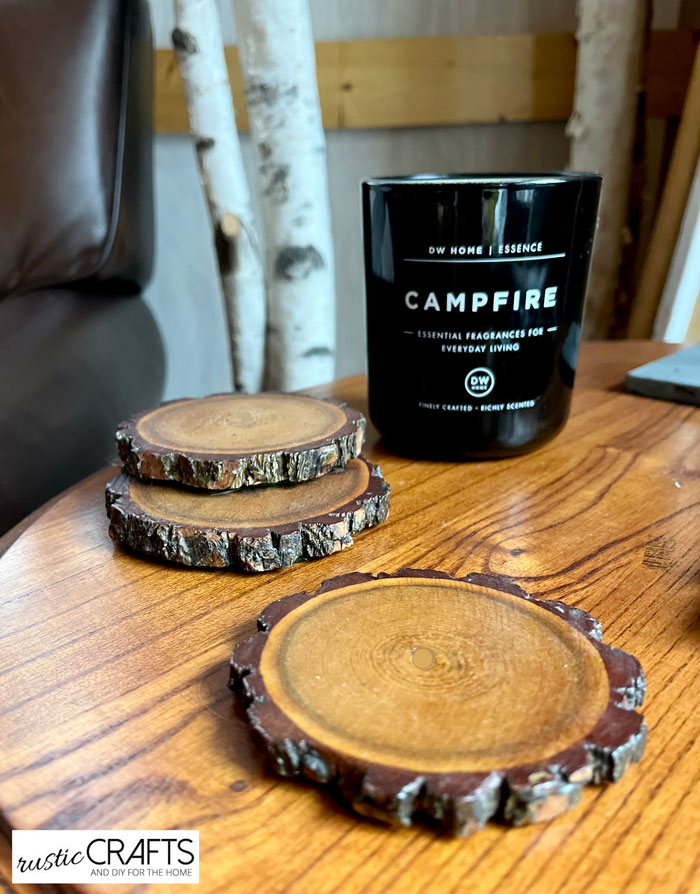
I’ve had a lot of different types of coasters over the years. Between tile coasters, stone, leather and wood, I think I’ve exhausted all of my favorite materials. The ones I keep going back to though are my wood slice coasters. I made these years ago and they hold up so well. Wood slices are also the perfect look for our cabin.
They are so easy to make too. When I made mine, I sliced a pine log into slices that are between 1/4 inch to a 1/2 inch thick. However, now you can easily find round wood slices like these at any craft store. So, if you don’t want to go through the hassle of cutting your own for free, you can purchase them instead.
I haven’t had to replace or add to my wood slice coasters since I made them. So, now if I want to make more it is to give out sets as gifts.
I’ve thought about adding stamped images or a wood burn design to a set of wood coasters since I’ve seen quite a bit of that around. It’s a fun style option but ultimately, for me, I prefer the simple rustic look. It would be easy to add stamps or wood burning to the wood if you wanted to. You would just have to do it before finishing the wood with varnish.
One nice thing about slicing the wood yourself is that you can choose from a large variety of logs and different bark styles. And, since they are so inexpensive to make, you can make a limitless supply to either give as gifts or to sell at craft sales.
I’ll go over the instructions for making the wood slices from your own cut log. If you want to purchase wood slices instead, just follow the steps for finishing and you’ll be able to whip them up in no time.
DIY Wood Slice Coasters
This post contains recommended product links. If you make a purchase through one of the links, I will earn a small commission at no cost to you.
Although these DIY coasters are easy to make, they do require a special tool. A miter or chop saw is necessary for getting your log slices. If you don’t already have a miter saw, they are definitely handy for a large variety of rustic crafts. I have even used mine for making small branch slices to use for rustic thumbtacks.
Skill Level: Easy
Materials Needed:
- pine log (about 3 1/2 inch diameter) or craft wood slices
- gloss brush on spar urethane
- felt circles
- miter saw
- leather string or raffia
- circle template – if you need to cut felt circles instead of using precut circles
- scissors
- glue
- sandpaper – medium and fine grit
DIY Coaster Instructions:
Once you find a good log from a pine or any other desired type of tree, you will need to cut it into slices with a miter saw. Cut each slice the same width, somewhere between 1/4 inch and 1/2 inch thick, depending on what you prefer.
After cutting, you will want to sand the top side smooth first with medium-grit sandpaper and then finish with a fine-grit sandpaper. If you are using a pine log, you may find that it is oozing a little sap. If this is the case, you will need to first clean the wood with a mixture of half water and half bleach to stop the oozing.
Once dry, you can then sand. After sanding, wipe off all the sawdust. You are now ready to varnish.
*Note: At this point, you have the option to decorate the wood with either rubber stamps or a wood-burning tool.
To get a nice thick coat of urethane varnish, I would use a brush-on glossy finish. Brush on two to three coats, drying completely between each coat. Varnish both the top and bottom and sides to completely seal the coasters. They will now be waterproof.
The back needs to be finished with felt to prevent the coasters from scratching furniture. You can either use pre-cut felt circles that can be trimmed down if necessary. Or, using a circle template, trace a circle onto a section of felt the size of your coasters. Cut the circle out and glue it to the back of the coaster. Do this for each one.

Your final step is to simply stack the finished coasters and tie them with a string of leather or raffia to make them a perfect gift set for someone on your list!

For another unique DIY coaster idea, check out the wine cork coasters at 10 Creative Wine Cork Crafts.
awesome. I started woodcrafting last year as a retirement hobby and I am always looking for new things to work on. I like the coasters. Thanks.
You’re welcome Ron! Woodcrafting is a great hobby – I hope your are enjoying your retirement 🙂
These are so cool! Great for a cabin. I made some coasters last week out of ceramic tiles and scrapbook paper. I’m giving away a set on my blog so head over and leave a comment to enter! =]
Cheers,
Natalie
Hey Natalie! That’s great – I will head over and check those out!