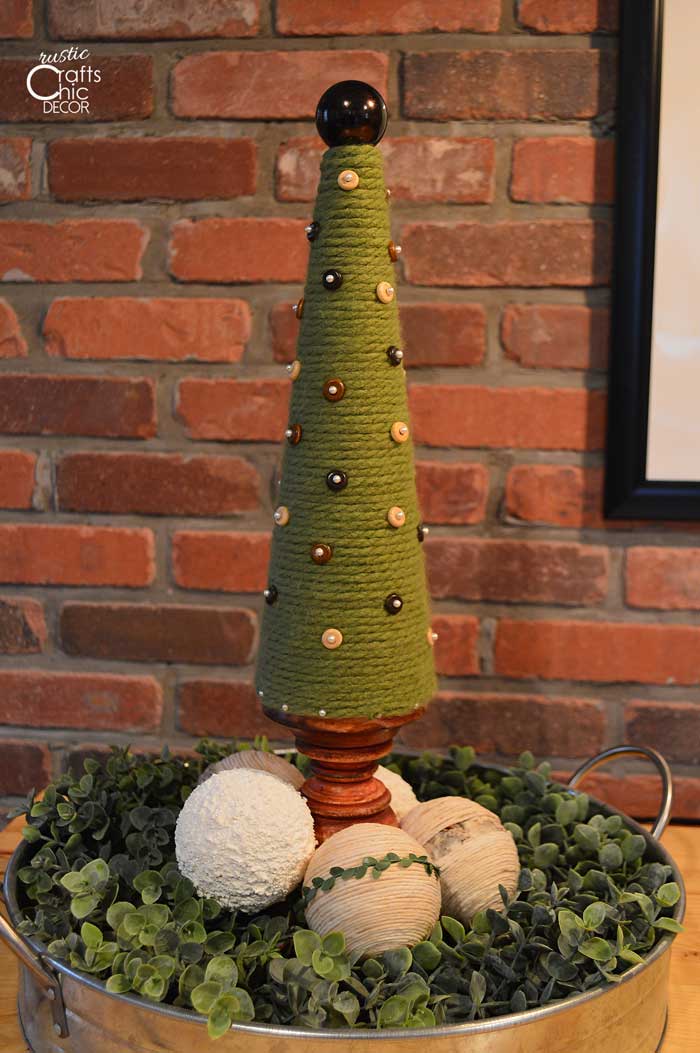
Besides a full size Christmas tree, I love to have miniature trees setting around to add even more Christmas cheer. A mantel, shelf, or small table are all good places to display small or topiary trees. I’m going to show you how to make a cone Christmas tree using a styrofoam cone and yarn. A cone Christmas tree is so easy to make that you can easily make several, in different heights, for a fun grouping.
DIY Cone Christmas Tree
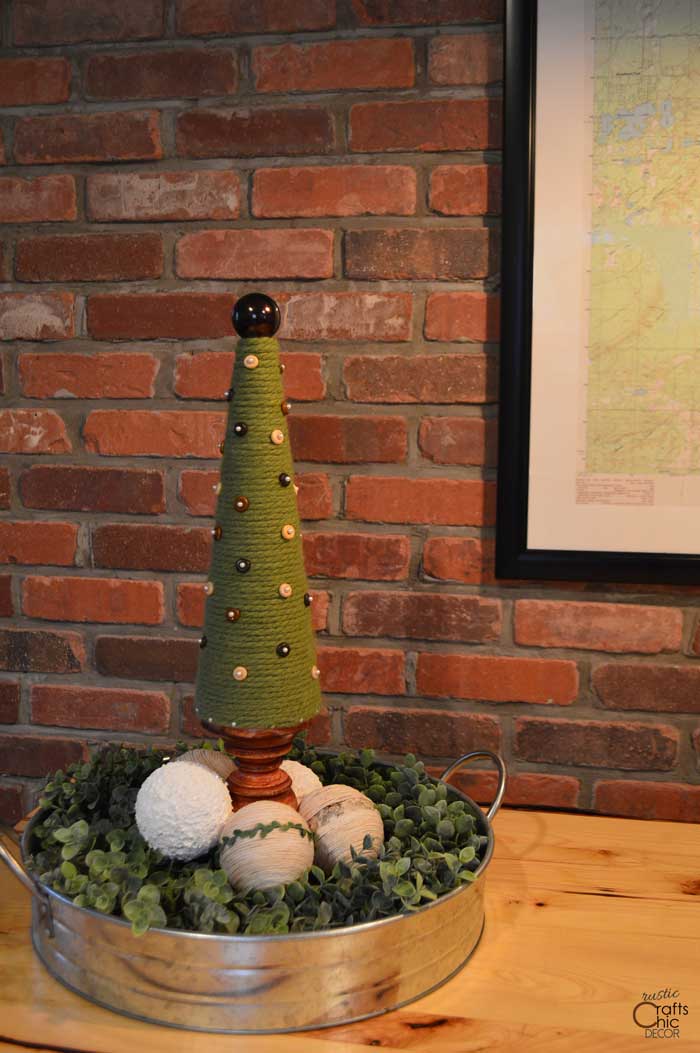
This cone Christmas tree is really such an easy project. I literally whipped it up in minutes! Because the base is styrofoam, it’s really easy to decorate with pins. Besides the yarn, everything just pokes into the foam. The hardest part about this project was deciding on what I was going to wrap the tree with. My options were white yarn, this sage green yarn, or twine. Ultimately, I wanted some green like a real tree. After that decision, I had to figure out what I wanted to embellish the tree with. I wanted it to be rustic, yet whimisical. Since, I had some flat wooden beads, I used those for my ornaments.
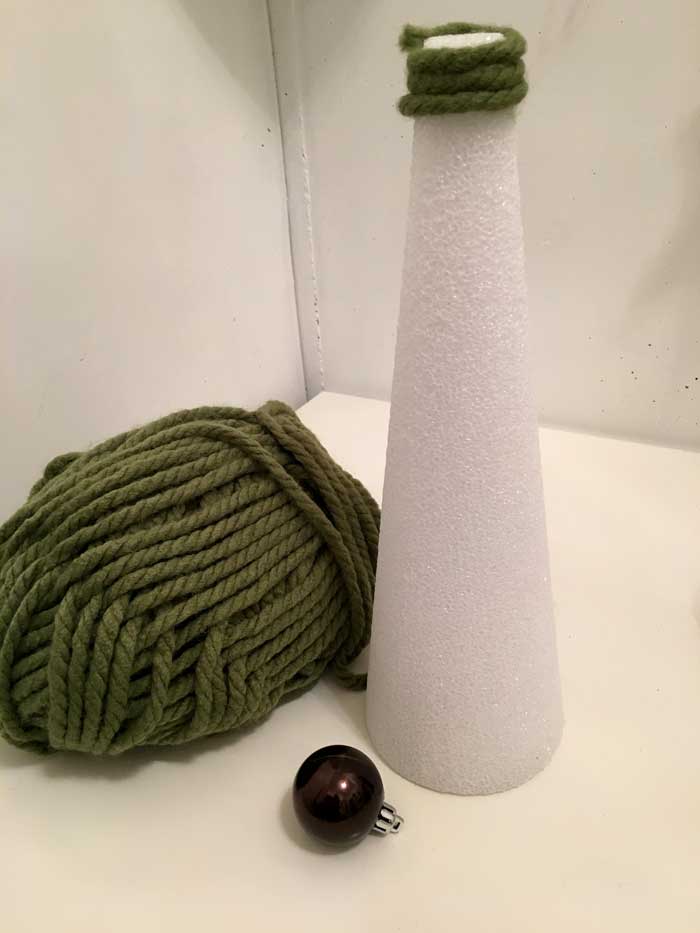
Materials Needed
- styrofoam cone
- yarn
- tacky glue
- flat wooden beads
- pearl end straight pins
- small ball ornament
- wooden candle stand – SHOP WOODEN CANDLE STANDS
Instructions
The basic tree
- Starting at the top of the cone, add a drop of tacky glue and secure the end of your yarn.
- Begin winding the yarn around the cone. I did not put glue over the entire cone but instead added a drop of glue after every few winds to hold the yarn in place. This made the process super fast and with no mess at all.
- When you get to the bottom of the cone, secure the yarn in place with pearl head straight pins. I placed a pin about every inch around the base.
Now for the decorating
- Place some tacky glue at the top of the cone and then push the top end of the ornament ball into the cone. Since it doesn’t punch into the cone very deep, the glue helps to hold it in place securely.
- Using more of the pearl straight pins, secure the wooden beads to the tree. You just push the pin through the hole in the center of the bead. There is no need for glue since the pins are long enough to secure the beads tightly.
- Place the finished cone on a wooden candle stand and that is it!
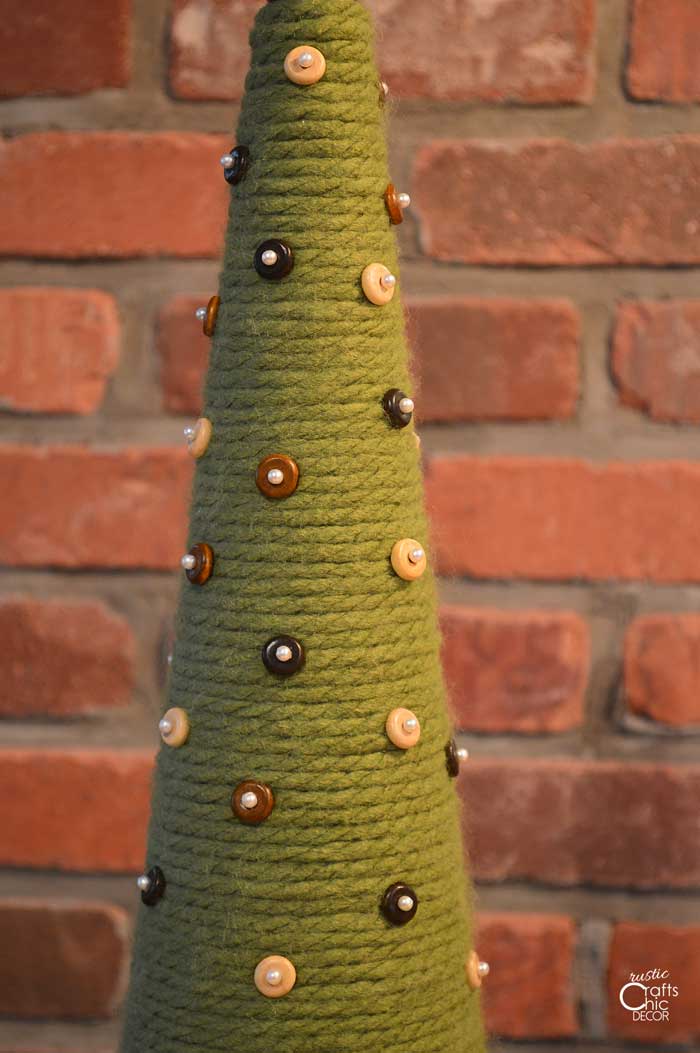
You could add ribbon garland if you want to. I had decided on a more simple look. I was happy that I ended up choosing the wooden beads to use as ornaments because I am also a big polka dot fan. They just make me happy which makes the tree topiary more cheerful to me.
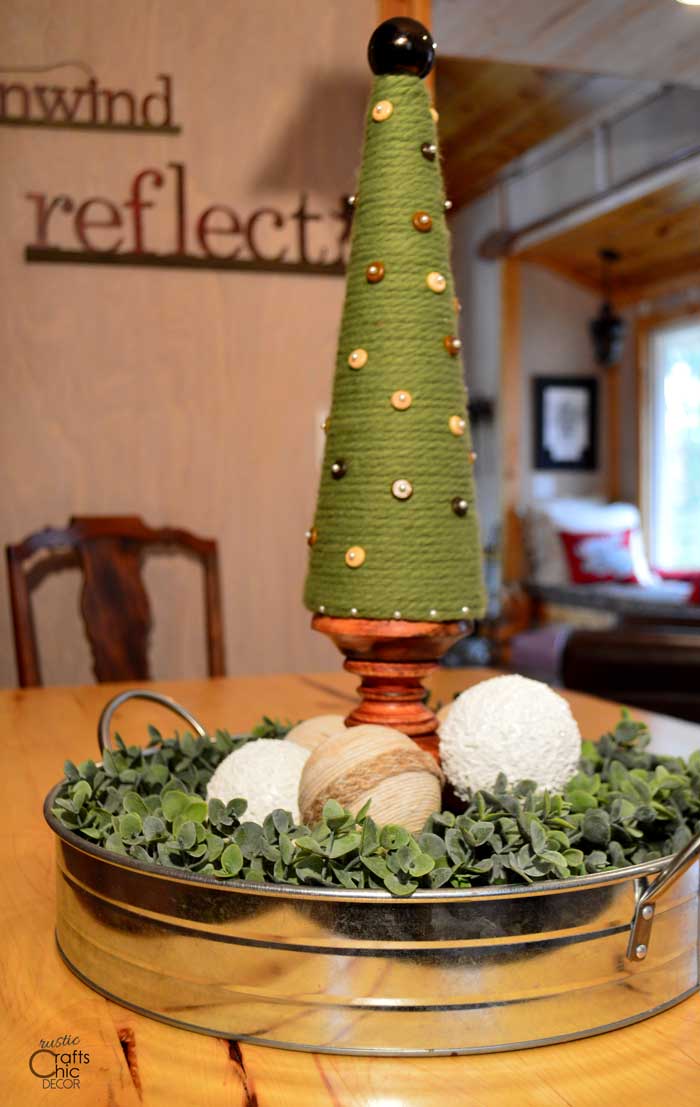
I think the topiary tree is just the right amount of rustic for our cabin setting. The display was complete when I surrounded the cone Christmas tree with some of my homemade snowballs and twine covered vase fillers.
There are so many variations to this craft that can really change up the look. For a more chic style, decorate the tree all in white. Use an off white yarn or twine for wrapping and add some lace ribbon and shiny cream beads.