I have seen craft flowers made from burlap, fabric, paper, leather, and pine cones. For something a little different, I’m going to show you how to make a metal flower. Depending on the metal used, metal can be quite easy to work. It also affords you the ability to easily bend the petals to give them shape.
For this craft, there are various metals that you can use for your petals. I found that a thin rusty tin sheet works best for this project. You can pick these sheets up from pretty much any craft store. Another budget friendly option is to use an empty can from your pantry. Just cut the top and bottom from the can. Then, make a cut through the length of one side and press the can flat on a hard surface. Whatever you decide to use, it is best to use a thin metal. My first intention was to use an old license plate. However, by the time I finished cutting three petals, I was tired out. It was just a little too thick for easy cutting.
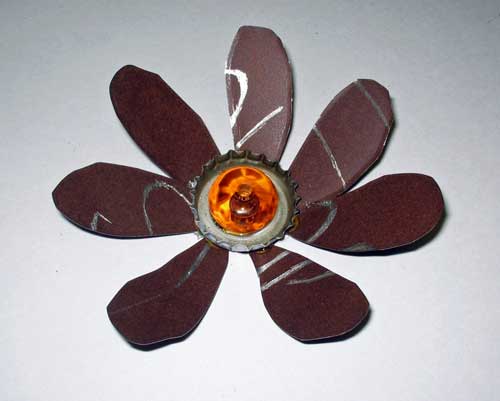
Before cutting the metal, there is another thing to think about. Do you want to add any designs to the metal before hand? Notice how my petals have silver squiggly lines through them? I first used a Dremel tool to make random lines in the tin. Then, when I did cut out the petals, there were random lines and curves that were different on each petal. Of course, you could also decorate your petals after cutting. However, smaller pieces might be a little harder to work with. Besides scratching out a design, you could also paint the petals or decoupage patterned paper to the metal.
Metal Flower Tutorial
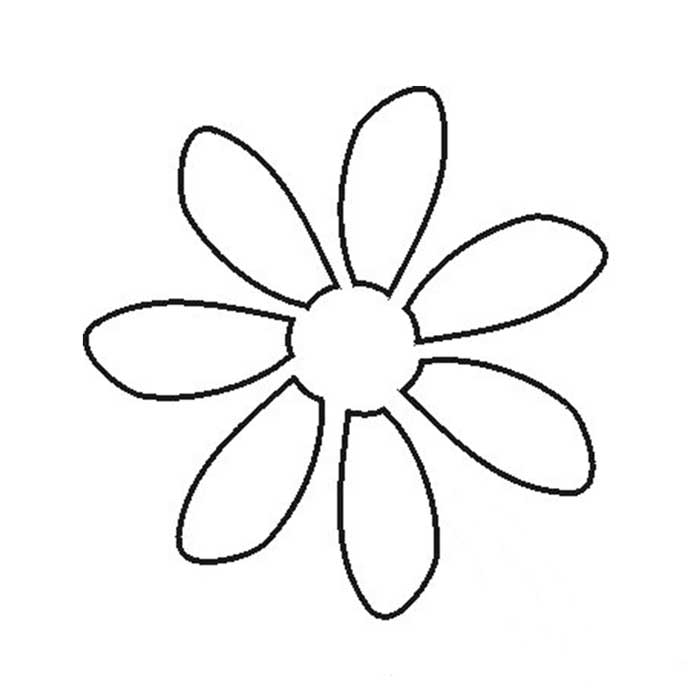
For this craft, I have provided a printable daisy template that you can use. Just download the image. You can adjust the size to your needs before printing.
Printable Daisy Template
Supplies Needed
- one small sheet of rusty tin
- Dremel tool
- daisy stencil
- tin snips
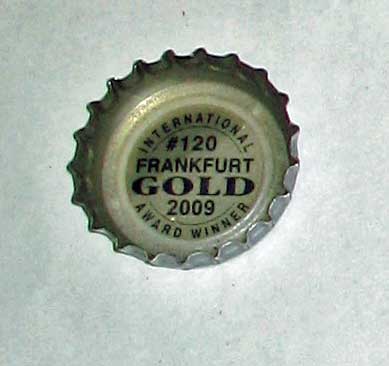
- one bottle cap
- one large bead
- about 12 inches of copper florist wire for stem
- hot glue
- tacky glue
Instructions
Time needed: 30 minutes
How To Make A Metal Flower
- Make A Pattern On Your Tin (optional)
Using a Dremel tool, create squiggly lines on your square of tin, Or, you can use other items for decorating your tin.

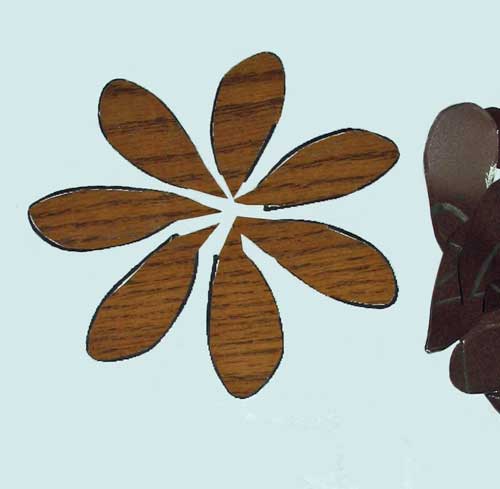
- Cut Out Your Daisy Template And Trace Design On Metal
After downloading and printing the daisy template, cut out the petals and trace the design onto your metal.
- Cut Out The Petals
Follow the lines on your metal and cut out each individual petal. Use a tin snips or heavy duty scissors. Don’t worry if you go out of the lines a little bit. In nature, petals aren’t perfectly shaped.
- Glue Petals To Bottle Cap
Using your bottle cap as the center of your flower, hot glue the right side bottom of petals to the back of the bottle cap. The bottle cap should be set so the inside is facing up.
- Add A Bead To The Center Of The Bottle Cap
Although you could keep the flower more industrial looking by only using the bottle cap at the center, a bead makes it more decorative.
- Glue On The Copper Wire Stem
Cut a section of copper florist wire to the length that you want the stem to be. I cut mine about 12 inches. Glue the top of the wire to the back of the flower center with hot glue.

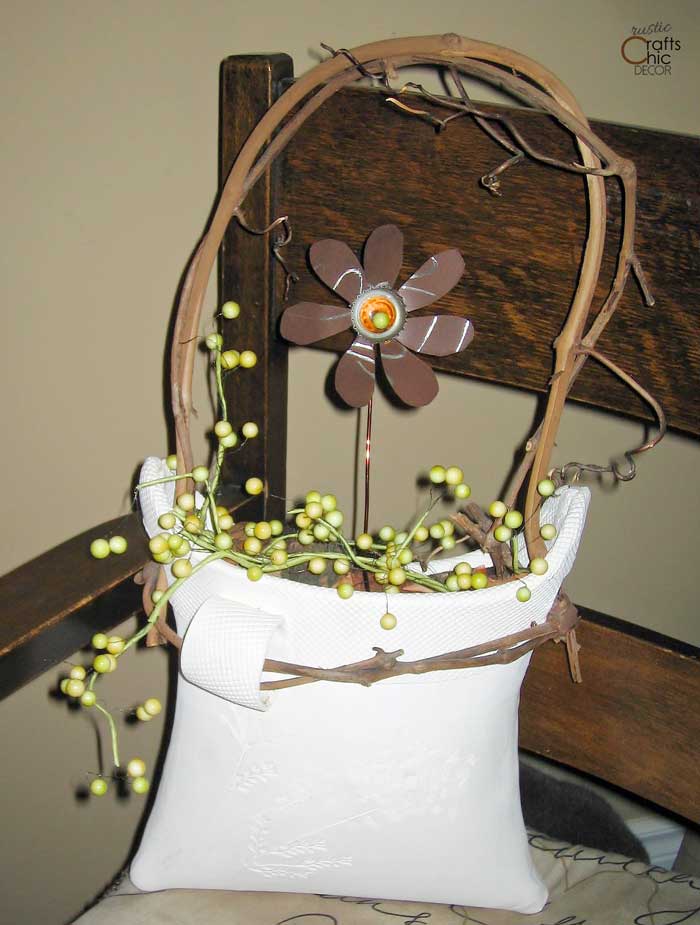
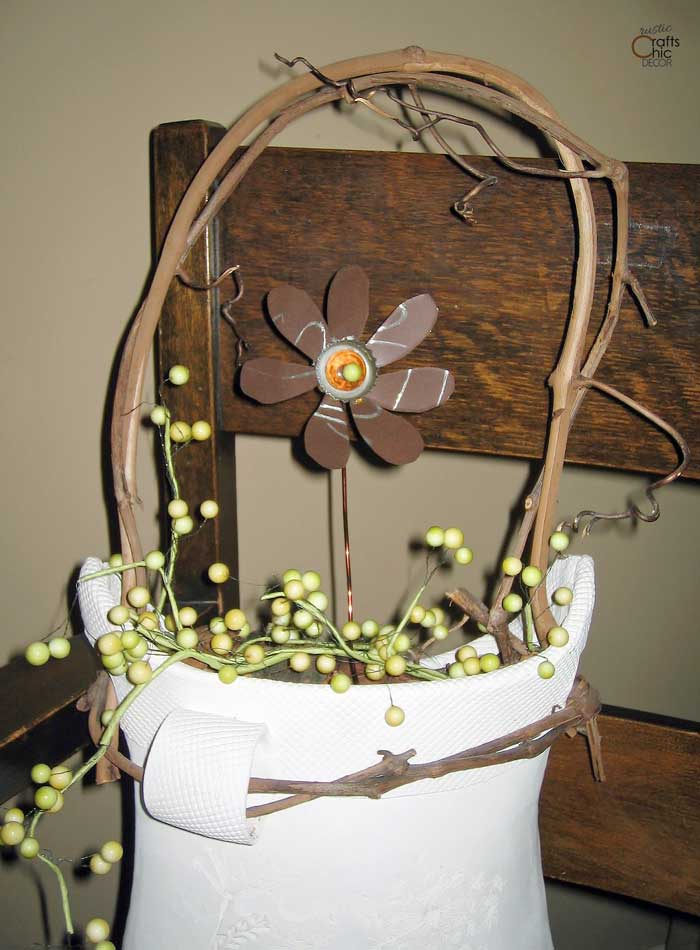
That’s it! Now all you have to do is stick the flower in your favorite pot or basket. For more industrial decor ideas, see these ideas for industrial farmhouse decor.
I wonder how you finish the edges so they are not sharp?
Thank you,
Vicki