This DIY lamp project uses a variety of birch log sizes to make birch floor lamps, table lamps and wall sconces. See how to prepare the birch and construct your own lamp.
Our DIY Lamp And The Start Of A Craft Business
It all started with a forest of birch trees and an idea for lamps. Why not bring some of that beautiful nature indoors? When my husband and I started our craft business, diy lamps were our primary art/craft item. Each lamp would have its own unique look because no two trees look exactly the same. We would build birch floor lamps, table lamps and wall sconces and sell these at local craft shows and a few area rustic stores. Since the lamps were so unique, we couldn’t just put a plain shade on them so we also crafted shades to coordinate. Our favorite shades were simply made by weaving birch twigs through the top and bottom of a plain shade that we bought wholesale.
Where To Find Birch Logs
You can purchase birch logs, bark and twigs from people who grow and harvest birch just for this type of use. One place that I have found birch for sale is at Spirit Of The Woods. If you have access to a woods, check for fallen trees that you can use. Freshly fallen trees are the best for most lamp projects since they wouldn’t have had a chance to rot yet. The last suggestion for finding material for lamps is simply to cut the suckers that grow straight up from a large birch tree’s base. This is what we typically would use. These root suckers make great lamp material and they don’t harm the tree when you cut them off. The suckers can actually get out of control so it is a good idea to cut these anyway.
Preparing The Birch For Use In A Lamp
Before using any of the cut or found birch in a diy lamp project, it is important to prepare it for use. Purchased birch should already be cleaned and dried. Birch for table and floor lamps is too big to dry in an oven so it is best to stack loosely in a dry area after cleaning. I use a solution of two parts bleach to one part water to disinfect and help dry out the wood. Don’t worry about rubbing off that first layer of dirty bark. It flakes off real easy and the next layer will be just as nice! You will be left with a smooth, non-flaky surface of birch to work with. The final step of the lamp building will be to spray the birch with polyurethane which will seal and protect the birch.
Deciding What Type Of Lamp To Build
Once you get your birch, you can decide what type of lamp you would like to build. Birch floor lamps are probably the most time consuming to do because of their size. The long and thin suckers are great to use for floor lamps. We almost always grouped several suckers together for a floor lamp and sometimes the birch pieces would even wrap around each other for a very artistic look. Wider birch trunks are great for table lamps. However, the thinner trunks or suckers also can be grouped together for a nice creative table lamp. Any scrap pieces are great for making into a wall sconce! The DIY lamp making procedure is basically the same for all of them.
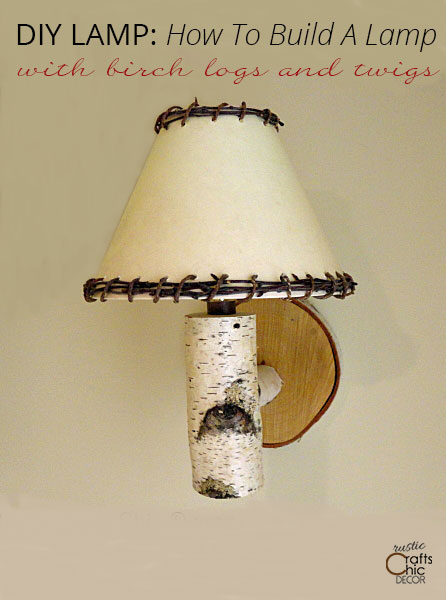
These wall sconces are fairly quick and easy to make. We have them all over are cabin! They are great for a little accent lighting or reading light.
DIY Lamp Supplies
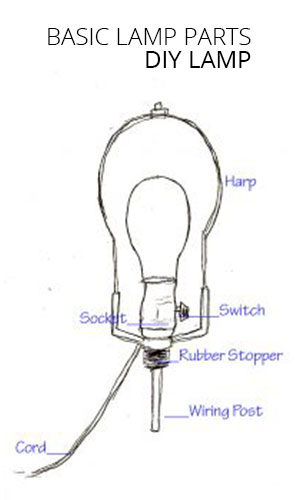
You basically just need to purchase a lamp wiring kit and fit the parts into your wood by drilling holes where appropriate. We also used oak bases for our floor lamps. You can make a base from any type of wood that you want and finish it with paint or stain. Just use wood large enough to make the lamp stable! Here is a diagram of the basic lamp parts in a kit:
DIY Lamp Instructions:
1. Drill a hole through the birch where you want to run the wire and rod or threaded post through. Use wood glue to secure the posts in place. We used posts at the top and bottom of the floor lamps to also aid in securing the main log to the wood base.
2. Attach the rubber stopper into the top rod or post end.
3. Add the optional harp, depending on the type of shade.
4. Screw on the socket cap.
5. Strip the wires and wrap around the coordinating screws.
6. Place the socket shell over the bulb socket.
More Details
We used clip on shades for the sconces so we didn’t need the harp. Also instead of having a cord hanging down the wall for our wall sconces, my husband hard wired these right into the wall switch. This is something I would recommend doing only if you are familiar with working with electricity. If not, consult an electrician!
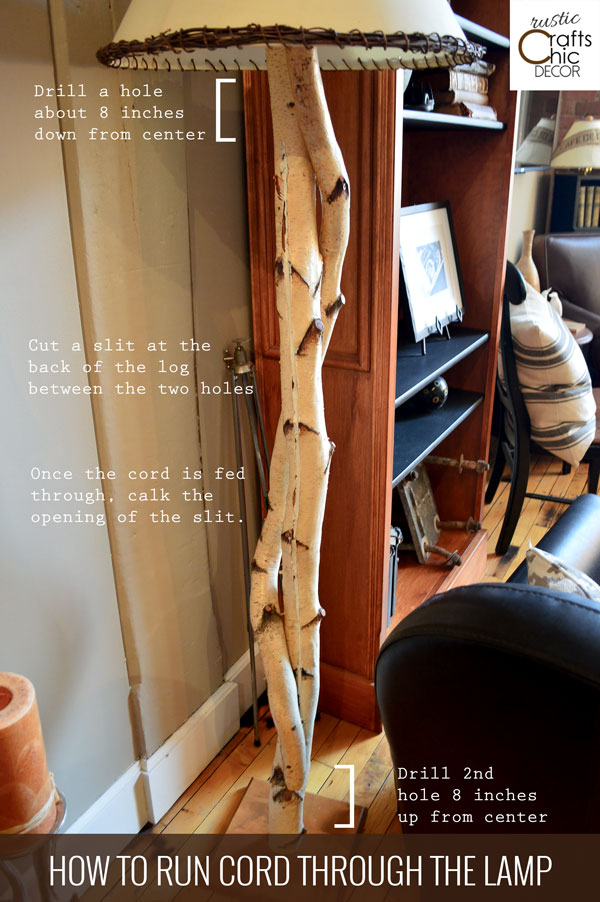
A floor lamp is a little more tricky but uses the same exact procedure. You just need about an 8 inch drill bit to drill a hole from the top of the log down the center of the log. Drill another 8 inch hole starting from the bottom going up the center. We then just cut a slit in the middle of the tree log to join the two holes in an area at the back of the lamp. It’s easiest to use an electric saw. The cord then gets tucked in and fed through the holes at the top and bottom.
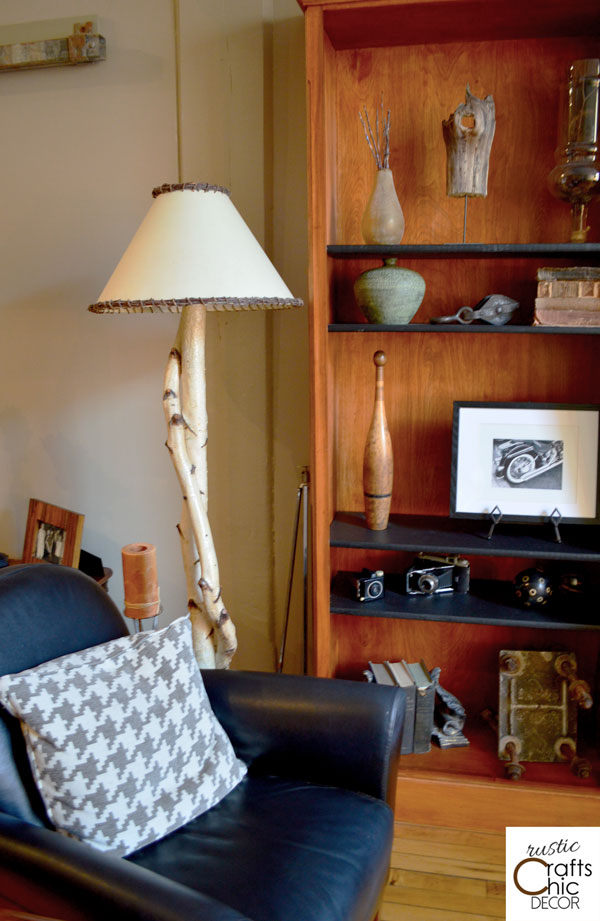
This floor lamp is my favorite and is one of the lamps that we kept for ourselves. You can see how the birch suckers wrap around each other for an artistic look.
Other Designs
Another great look for a lamp is to use pine and peel the bark off. If the wood underneath is still sappy, a good way to clean it is with a mixture of bleach and water. It cleans it up perfectly and it stays sap free. Any tree can work for this art, either with bark on or bark off.
The designs can be so versatile, especially with how you coordinate the lampshade, that the lamp can fit in with almost any kind of decor. Your decor doesn’t have to be just rustic. I have put birch lamps with peaberry lampshades in with a traditional decor and they looked whimsically natural and made a fun accent piece. Another area I tried was in our study which again was a warm traditional style with brown leather arm chairs. The lamps looked perfectly natural and warm behind the chairs and in front of the fireplace.
I wanted a rustic chic table lamp for my home office so I added a little bling to the branches on the shade. For a little bit of whimsy, I also wood burned a heart into the birch trunk with my husband and my initials – very girly and fun!
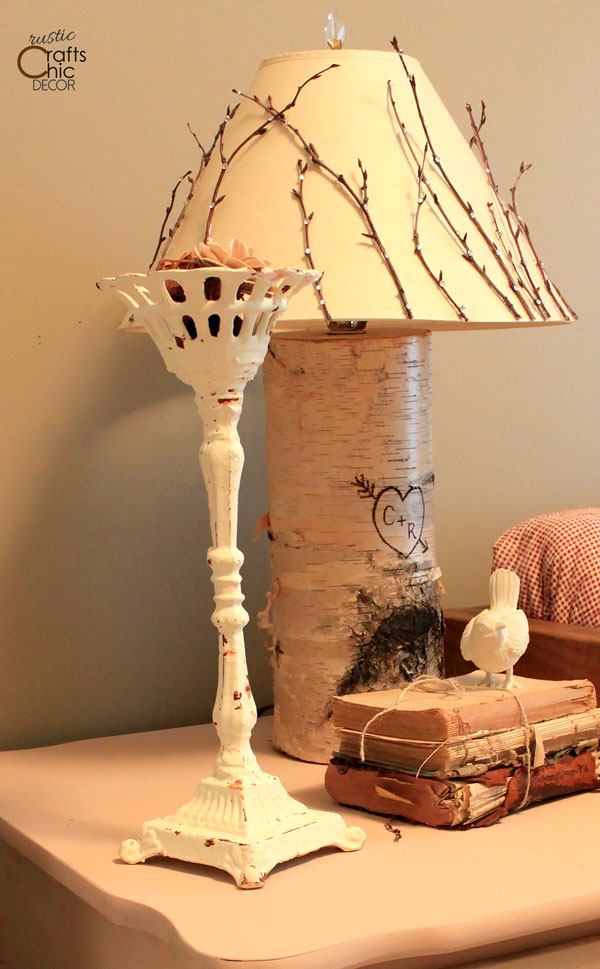
For complete instructions on making your own rustic lampshade see my post on DIY lamp shades.

Thank you Renee. I will have to see if I can find the correct type of bit that is long enough. I have a bunch of birch that I can use. Love Love your Blog!
For the table lamp do you drill a hole all the way down thru the base??? Id love to make one. I have a cabin theme decor and birch is my favorite.
Yes the hole is through the base. Sounds like the perfect lamp to make!
Question…how and do you treat the birch branches first? before bringing them into the home? just concerned about (pests coming in with them…don’t want that). And what would you suggest?
thank you
After cleaning with a mixture of bleach and water and then drying, we spray them with a light coating of matte polyurethane. We have not had a problem with any bugs.
I just found your blog and I love it!!!
Awesome Jennifer! I’m so glad you did!