I have been collecting bottle caps for quite some time and have used them in various crafts. Since I am trying to come up with some unique ways to decorate a Thanksgiving table, I thought I would try to incorporate bottle caps into this year’s table. Bottle cap wine glass charms seemed to be the logical choice. Bottle caps are a good size to mark a wine glass and when they are dressed up a bit with some glitz and Fall decor, they are perfect for a Thanksgiving glass of wine.
I made a set of six with bottle caps that had a base of black and silver. I figured this was a good starting point to add the rest of my decor. The colors that you will have on your table will help you to determine which color bottle caps that you want to use for this craft.
To embellish my bottle caps and give them a flavor of Fall, I used the wings off of a pine cone and some colored wooden leaf decals.
Bottle Cap Wine Glass Charm Instructions
Materials Needed:
- bottle caps
- acrylic paint
- paint brush
- leaf decals
- pine cone
- E6000 craft glue
- beading eye pins
- thin beading wire
- drill with small drill bit
- crop a dile tin punch (or a hammer and small nail)
- Jim Holtz alcohol ink (optional)
- q-tip
- wire snips
Step By Step Instructions
Prep Work
 1. If you have a Crop A Dile Tin Punch, use that to punch an indent hole in the edge of the bottle cap. This makes it easier to drill a hole all the way through with your drill. If you don’t have the tool, use a hammer and small nail to make an indent. I tried just drilling a hole right from the start and wasn’t able to get a hole through with a normal bit. It might work though if you have a bit for drilling through metal.
 2. Use your drill to drill through the indented hole. Because the hole for the wire is small, you need just a small drill bit.
 3. To hide the straight end of the eye pin, snip your beading eye pin with a wire snips so that it is small enough to fit inside your bottle cap when bent.
 4. Insert your pin through the hole in the bottle cap and secure it with E6000 glue to the inside of the cap.
Finishing Touches
 5. Paint the top of your bottle cap with at least three coats of your acrylic paint to completely cover the logo. I used a metallic silver paint. When the paint is dry, you can apply some alcohol ink over the top, in spots, if you like using a q-tip. I used Jim Holtz’s ginger alcohol ink to give it a touch of a warm rust.
6. Take your pine cone and clip off some of the wings or petals. I applied some cream colored acrylic paint over these. Since I was going to glue my wooden leaf decals to the pine cone wings, I wanted a light color to highlight the leaves.
7. Glue the decals to the wings and the wings to the bottle caps using E6000 craft glue for extra durability. You should have a different decal for each wine glass charm for marking glasses.
8. Snip a two inch section of beading wire with your wire snips and insert it through the eye of your pin. Form a circle to go around the stem of a wine glass and trim any access wire. You can bend the two ends with a pliers for clipping the ends together.
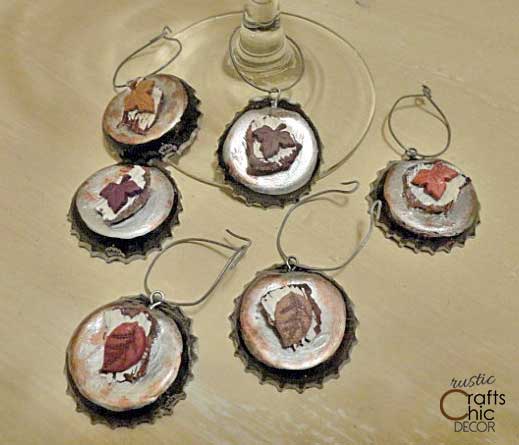
Finished Bottle Cap Wine Glass Charms
Now you are all set for a dinner party or our Thanksgiving table with a festive set of wine glass charms! Because each bottle cap charm has a little different look, it is easy to keep track of wine glasses.