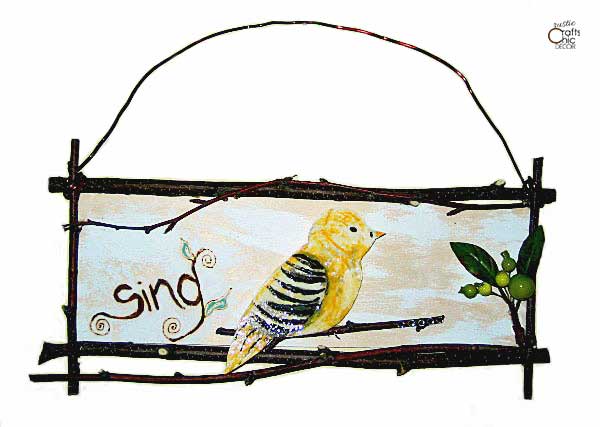
You can pretty much make anything, attach a hanger to it, and call it wall art. Whenever I get a creative streak, my first go to is to make something for the wall. There are no rules and you can just have fun. That is how my DIY bird wall art came to be. I started with an empty canvas of unfinished birch wood. Then, I just started filling it with some of my favorite things. Before long, I was making a dimensional bird out of paper and my wall art began to take meaning.
The unfinished piece of thin birch wood, that I used, was about three inches by eight inches. This was a nice size for a small hanging. Since I love branch crafts, I knew they would be a part of my design. I also wanted to work with paint, paper, and a little wood burning. And, this is what I came up with for my design.
Rustic Inspirational Bird Art
If you have been following the blog for awhile, you will know that I love bird designs. In fact, recently I came up with a bird design that I made as a free printable. Between birds and their houses, I have created a lot of different versions. This one is one of my favorites for the wall.

How I Made My Bird Wall Art
Although I love wood burning and working with branches, I really enjoyed making the bird figure for this wall art. The dimensional design is hard and sturdy making it durable for working with. I did a similar bird on a journal cover that I made over.
Instructions
- Prep And Layout
The first thing that I did was to draw out a rough sketch of how I wanted the end result to look. Using paper the same size as my wood, I laid out where I wanted things to go. I wasn’t super specific in how I wanted my branches to go. However, I knew I wanted to frame the wood with birch branches.
- Woodburning
I basically started my design from left to right so I went to work on my word first. With pencil, I drew out the whimsical lettering. Then, I went over the pencil with my wood burning tool. Since I also included a couple of leaves coming off the letter g, I painted those in with a light green paint.
- Whitewash Wood
Before going any further, I lightly painted over the wood with a white acrylic paint. I brushed it on very lightly to give more of a whitewashed look. I probably could have done this before I did the wood burning but it wasn’t hard to work around the wood burned letters.
- Create The Bird
To create the bird, I first drew out a bird outline on a thick piece of textured paper. I just drew the outline freehand but a stencil would work good for this too. After drawing, I cut out the bird and then painted it with acrylic paints. I just swirled some yellow paint onto the body and painted stripes for the wings. To make the bird a hard object, I then covered it with Mod Podge dimensional magic. It gave the bird a nice hard and glossy surface. To make the bird stand out from the wood a little, I glued a button to the back of the bird and then the button to the wood. I wanted it to stick out a little so that it could perch on a branch.
- Make The Wire Leg And Foot
Next, I constructed a small leg and foot using thin florist wire. Then, I glued the leg to the bottom and back of the bird. This is how I was going to perch the bird onto a branch.
- Add A Perch
I then added a small branch to the wood at the bottom of the bird where the foot rested. To add some interest to the other side of the wood, I applied a small floral pick.
- Sprinkle On A Little Glitter
To give the impression that the sun was shining on the bird, I added a little shimmering glitter to the bottom of the wing and the end of the branch perch.
- Frame The Wood With Branches
The last step was to frame the whole piece of wood with branches. I added a couple extra small twigs to give additional style. Once I was happy with the framing, I attached wire to the top branch for hanging.
When I was done with the DIY bird wall art, I decided that two hanging together would be more fun than one. So, I got to work on another one. This one is with the word “dream”.

To see some more fun bird art, check out my painted canvas craft.
