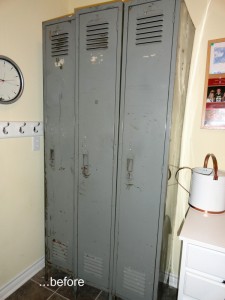
Have you ever had a looming project that you have had just a terrible time in getting started? I have had a set of old lockers sitting in my mud room for over six months. They were in desperate need of a locker makeover. Luckily, I did find the time to start and finish this project. I’m excited to show you my DIY locker makeover.
My intention was to get those babies fixed up right away so we could start using and enjoying them. I even wrote a post on decorating with old lockers as an inspiration for myself. There were all kinds of neat ideas that I had found and shared in that post but for some reason I still couldn’t make a final decision on my own lockers.
In the meantime, I had worked on several other projects and those old nasty lockers had just become a fixture. Well not anymore! I finally got a fire under me and went to town on the locker makeover for my first set of lockers. Yes, I do have another set to do at our cabin.
What I Did For The Locker Makeover
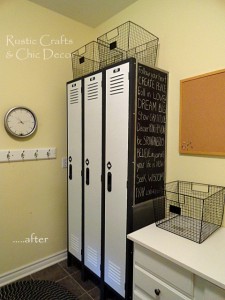
A couple coats of paint, some added vintage inspired hardware and a new chalkboard side and those lockers were taking on a whole new look. Like any project that takes a long time getting off the ground, my thoughts were “why the heck did I wait so long!!!!” It only took me two days and that was just because I had to wait for paint to dry/cure.
Prepping The Lockers
Before I could do anything, I had to clean the lockers and get them level. The cleaning took a bit of time because the lockers were so greasy. They came from a mechanics shop so they were in pretty rough condition. First I used a degreasing cleaner and then just a mild soap to get them sparkling clean.
I did not attempt to get the lockers aligned and level! This I left to my husband who did a great job of securely screwing the lockers together. Once the cleaning and leveling was finished, I was ready for the fun locker makeover work.
Paint And Embellishments
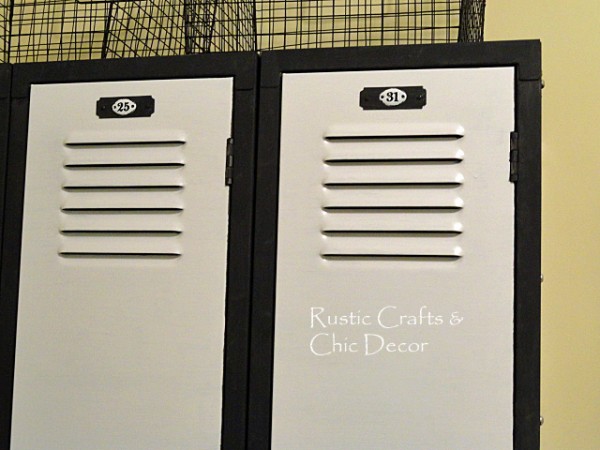
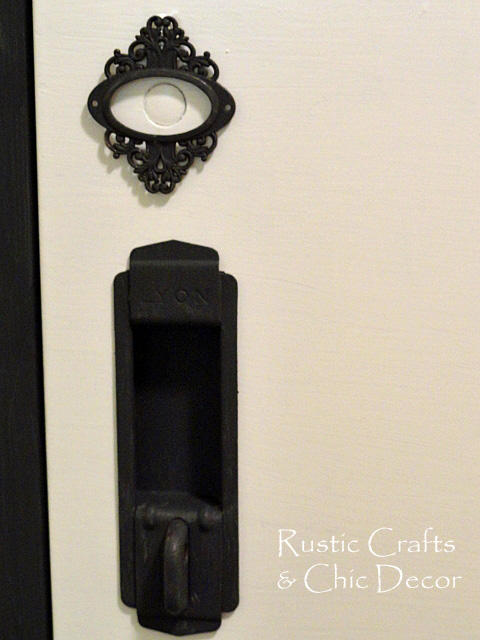
I used a satin white Rustoleum paint on the doors. For the trim and legs, I just did a light coat of acrylic paint in Graphite. I also used this for the handles and the number plates. To give the number plates a more vintage look, I glued a Jim Holtz metal number plaquette to the original plate. The metal numbers were found at Joann near their scrapbooking supplies.
Since I love embellishments, I also picked up a package of ornate plates by Jim Holtz that I thought would look perfect above each of the handles. To match the locker frame, I painted these in Graphite as well.
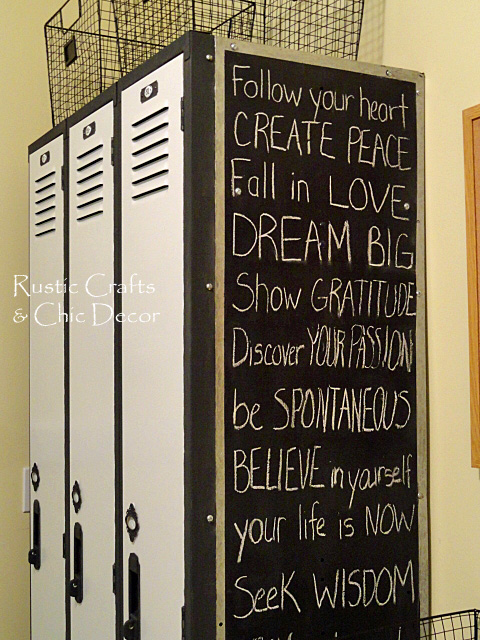
I decided to make the right side of lockers into a chalkboard by rolling on chalkboard paint and framing it with an edge of sterling silver acrylic paint. After seeing some subway art that I liked in a chalkboard style, I just copied that idea onto my chalkboard.
I picked up the industrial looking wire baskets from Marshalls for just $10 a piece on clearance! They added some nice height to the top of the lockers.
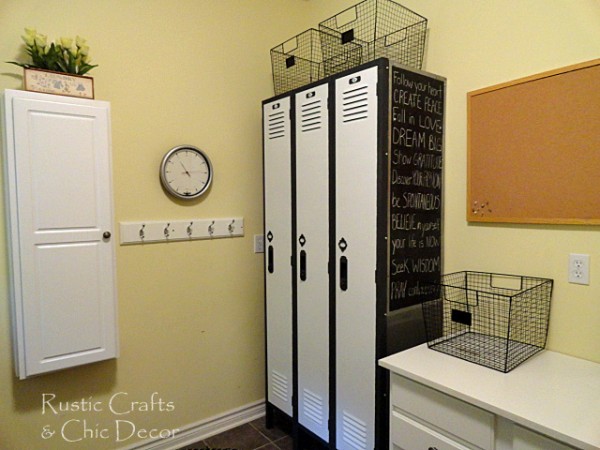
Here is a bigger picture of the laundry/mud room.
And, just for fun, another before and after.
Right now the inside of the lockers have the original three hooks and one shelf. However, I am thinking about making some changes there as well. I may have more need for less hooks and more shelving in at least one of the lockers……we shall see!

Do you have a list of the materials you used?
Akkk! You got some lockers!
I found 2 sets at a local Antique Mall. I wanted them but they were beyond my means. Them dumb “meanies”, lol.