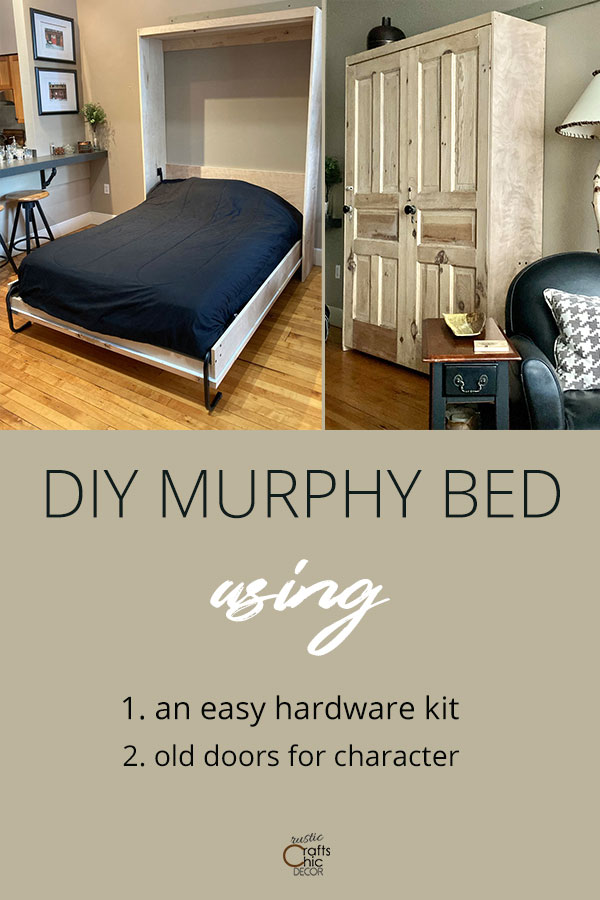
Small spaces call for some unique furniture choices! If you are in need of a guest bedroom but have no space for an extra bed let alone a spare bedroom, there is still hope. You can put a murphy bed in areas you would never put an actual bed. In case you aren’t familiar with a murphy bed, it is a bed that can fold up against a wall to look like a cabinet. Although they can be pretty expensive to buy, you can easily build one yourself for just a fraction of the cost. My DIY murphy bed has a unique look in that we used a couple of old doors for the face of it. The doors give the bed cabinet some rustic character that you wouldn’t find with brand new.
Although we spend most of our time living at our cabin, we do make fairly frequent trips to our one bedroom condo in the city. It works out great for my husband and I but if we have an overnight guest, there is no room for sleeping other than an air mattress. This isn’t terrible for an occasional night however for extended use it is not ideal. The solution for us was to build a murphy bed. We could put it on a wall in our dining space without it looking out of place. To put an actual bed there would just be awkward.
This post contains an affiliate link. If you make a purchase through the link, I will earn a small commission at no extra cost to you.
Murphy Bed Hardware Kit
The only problem we had was that we had never built a murphy bed before and it would have to function safely and smoothly. Luckily, I found a quality hardware kit at Easy DIY Murphy Beds that proved to be exactly the right choice. Not only did the hardware allow for smooth functioning, but the kit also came with a cutting guide for the plywood and an easy to follow step by step tutorial with pictures.
Since we were going to deviate slightly from the murphy bed plan, I was a little nervous. However, all that we changed was the front of the cabinet. Instead of using plywood, we instead used two antique doors. My husband put in a call to Easy DIY Murphy Beds to confirm changes to hardware placement to adjust for the spacing of the door thickness. They were super quick to respond and also sent follow up emails to check on how the process was going. This made us feel confident about what we were doing.
Because the tutorial and cutting guide are included with the murphy bed hardware, I’ll just go over a few helpful tips and what we had to do to the doors which take the place of the front plywood which is also the base of the bed where the mattress sits.
This section of the murphy bed construction was the most detailed and yet was pretty straight forward on putting the pieces together. Once the basic frame is complete, you just attach plywood to the inside and, in our case, old doors to the outside. This is what the mattress will set on and is the part that folds up and down into the cabinet. Again, the complete DIY tutorial comes with the hardware kit.
Helpful Tips
- Have Home Depot or Lowes cut the plywood pieces for you. Both Home Depot and Lowes will make cuts for free or have a very minimal cost like 25 cents per cut. There are a lot of cuts to make to the sheets of plywood. It saves a lot of time to take advantage of this service. We had all of our cuts made for free at Home Depot.
- Label your pieces. Because a lot of the pieces are similar in size, it really helps to put labels on them for which piece they are for. When we had our cuts made the attendant also wrote lightly on the side of the wood the dimension. All we had to do is match the dimension with the appropriate piece code. This made the pieces a little easier to find when following the tutorial.
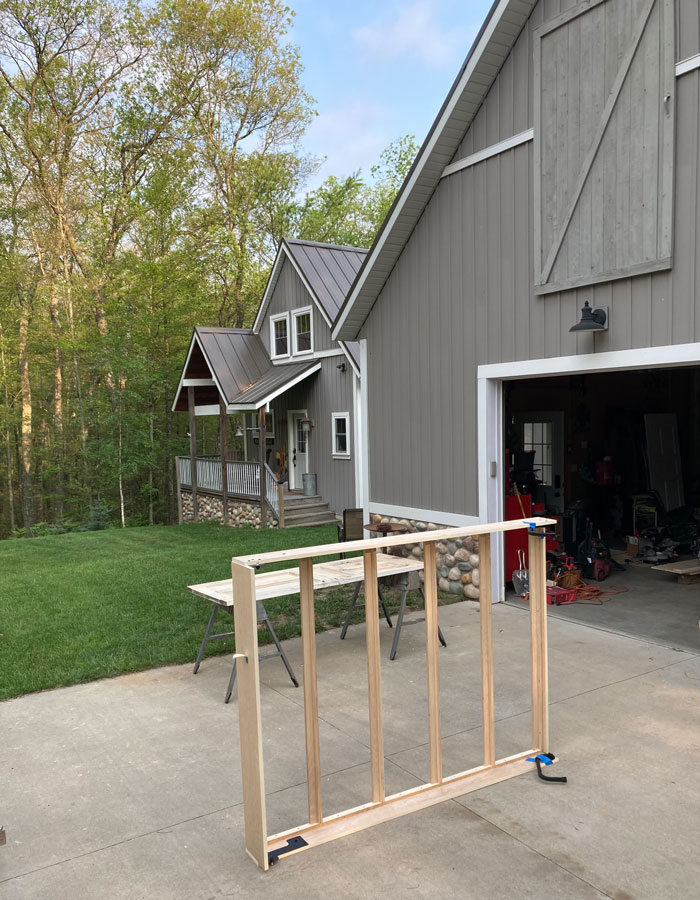
- Build your bed on site. If possible, build your murphy bed where you will be using it or as close as you can. We built the entire bed at our cabin and then transported it to our condo. The loading it into the trailer and transporting it went without a problem. However, getting it off the trailer and into our second floor condo was challenging. We assumed it would fit in the large freight elevator but not so much. My husband and son ended up having to carry the murphy bed up the stairs. Did I mention that it was heavy?
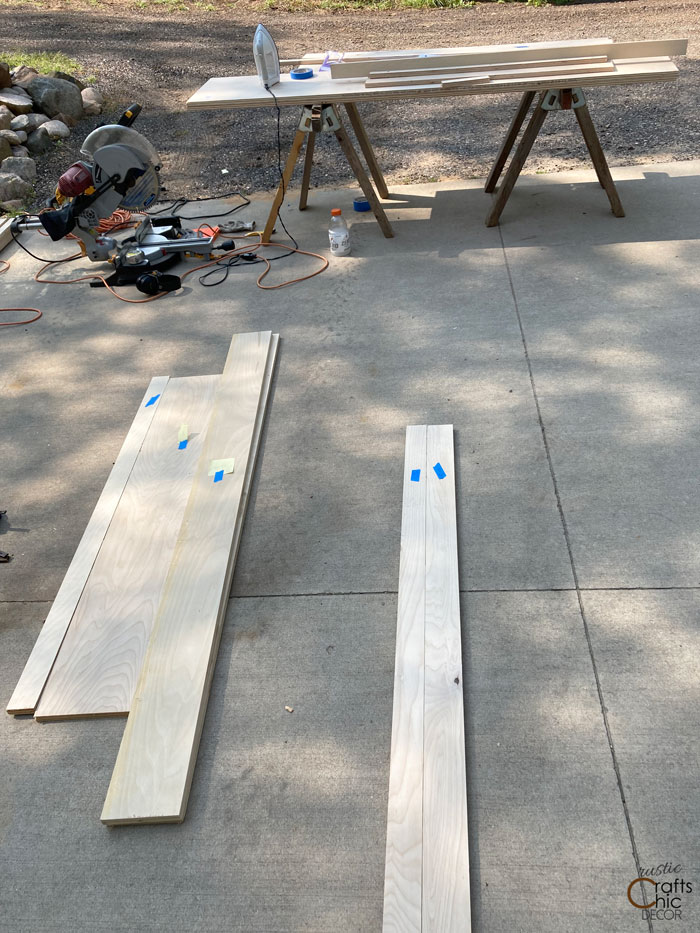
I should also mention that all of the cuts that were made for us were the sliced widths. We then cut the slices to length with a chop saw ourselves.
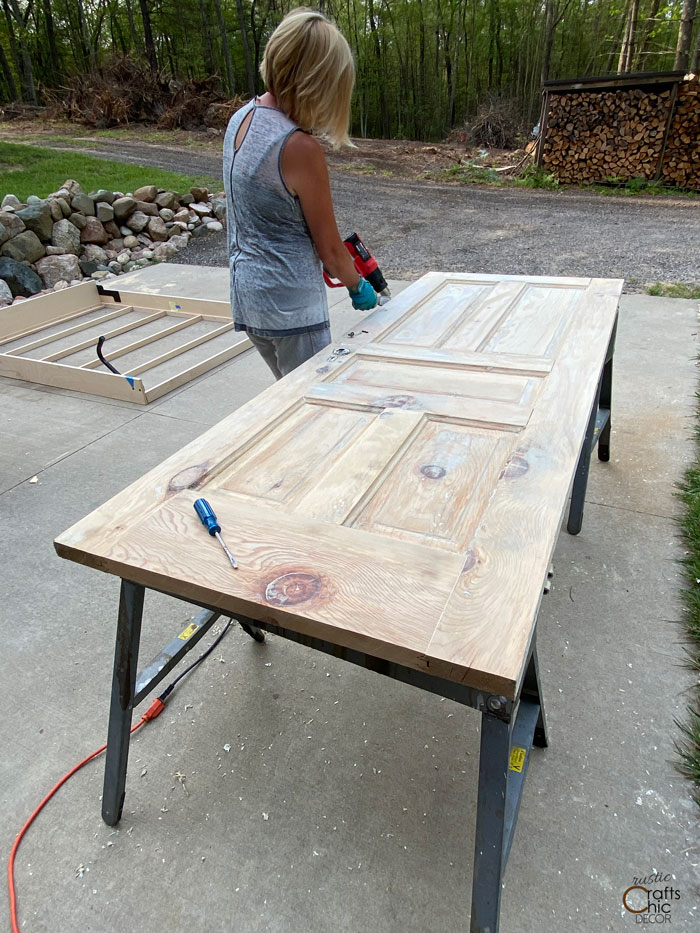
Old Doors For The Murphy Bed Front
We built a full size murphy bed and wanted to replace the plywood front with old doors. This meant we had to find two doors that would total aproximately the same width and height required for the plywood pieces. Luckily, that turned out to be pretty easy with 30 inch wide doors. However, we still had to trim both the width and height of the doors just slightly with a table saw.
Before using the doors at all, they needed to be stripped of paint. I really wanted the ability to stain the wood instead of painting it which meant all those layers of paint had to come off! In the past, I have used a citrus paint stripper for a job like this. However, I really don’t like the goopy mess that you get with a chemical stripper. It’s so hard, at least for me, to clean all of the residue. So, for this project, I purchased a heat gun which made the job quite a bit easier.

I found out I had muscles in my arms that I hadn’t used much! And, the heat wasn’t just coming from the gun in my hand, the sun was also bearing down on me. It was still a process that was way too long to call fun by any stretch. I was definitely glad when the end was in sight. But oh wait, there was still the second door. . .
A Slight Problem
Before starting the stripping on the doors, we had both doors laid out on saw horses with the right sides up that we wanted to use. Then, when I was done stripping the one door, we brought the doors inside the garage for the night. The next day, my husband brought out the doors again and laid them out on the saw horses. Without thinking about the placement, I went to work on the other door. When I was all finished, we realized that second door was right side down. Our intent was to have the door knobs meet in the middle like French doors. Now they were setting with each knob on the left side.
My husband suggested that we just flip the one over and strip that side as well. At this point, I might have laughed crazily. I just didn’t have it in me to strip another whole side. So I said what anyone would say, “they look fine, really, it might even look better this way…” The funny thing is that the placement did start to grow on me and I ended up liking the look. I kind of want to put numbers 1 and 2 on each door to further emphasize the idea of two separate doors.
Finished Murphy Bed
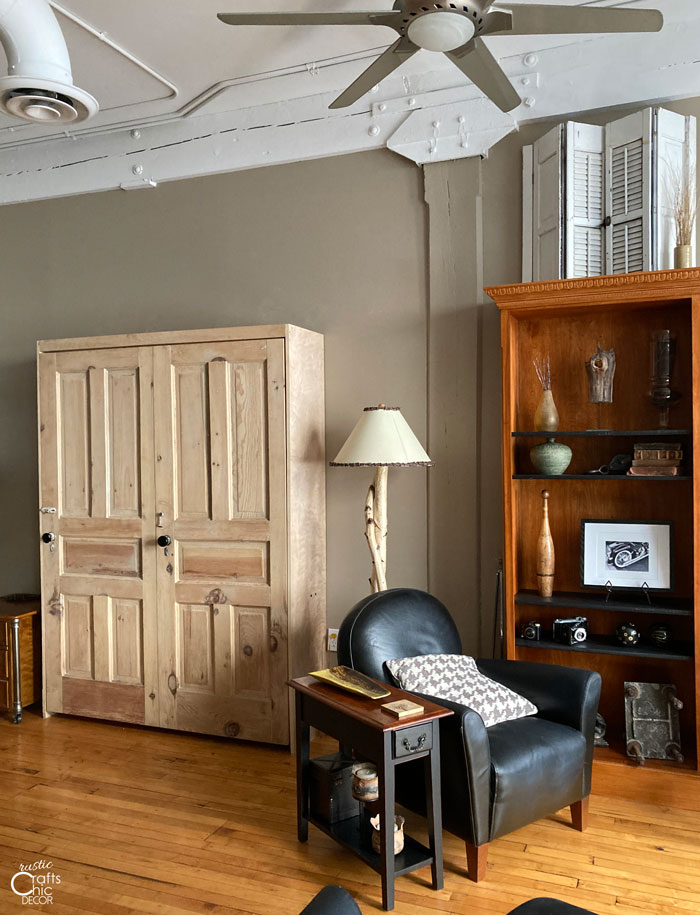
The construction of the murphy bed didn’t take long and I’m happy to have it installed to the wall. Our studs are steel so we used a combination of heavy duty sheet metal screws to go into the studs and drywall toggle inserts for between the studs. All together we have the bed attached to the wall in eight spots. It might be a little overkill but we didn’t want to have any issues. It’s been folded up and down several times and works like a charm.
Now I have to decide how I want to stain the cabinet. For now, I am just enjoying all of the natural goodness. After all the time to it took to strip off the paint, I want to be sure of what I want before applying any finishes.