I am a sucker for picking up old chairs and small tables. Whether I see them at a thrift store or a flea market, they seem to shout my name as I go by. Most of the time I have to look past the current styling and overall dirt. Instead, I think of all the possibilities for a brand new look. Case in point, I recently picked up a couple of old end tables from a thrift store. The tables had seen their better day but the price was right. I can always use an end table or nightstand somewhere so I made plans for a table makeover or two that would fit my style.
I’ll show you how I distressed painted one of them, in a shabby chic style, to use in a small sitting area. The other table I made more rustic for use as a nightstand in my son’s bedroom. You can see the details of that table makeover at my makeover post using a freezer paper image transfer.
End Table Before Makeover
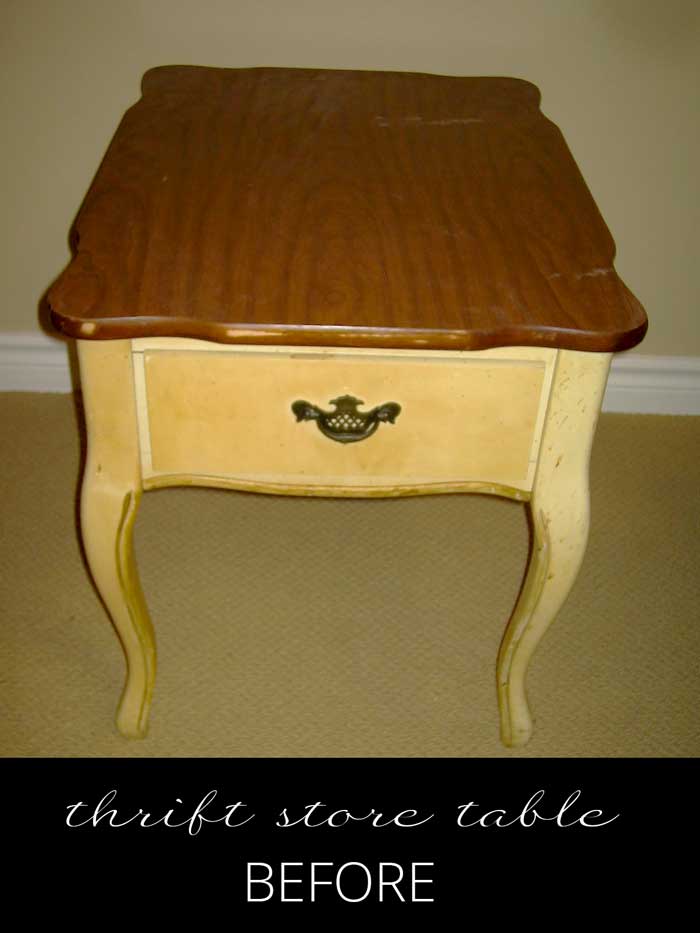
The only thing I like about this table is the shape. It has a laminate top which makes it much harder to paint. The grime is disgusting and I also don’t care for the drawer pull. It was going to take a little creativity to make this table usable and shabby chic.
Before I could begin the makeover, I had to prep the table. First, I removed the drawer pull and cleaned off the surface grime. Next, I sanded the old paint off the table base and cleaned it again with a damp rag. Finally, I brushed on a couple of coats of Zinsser paint primer on the table top. It does a great job of preparing a laminate top for the actual paint.
Steps To Distress Painting Table
Normally, I like to use chalk paint to paint furniture. However, for this table, I just used some leftover wall paint that I had used for my daughter’s bedroom. It was Benjamin Moore Mochachino, a very subtle pink.
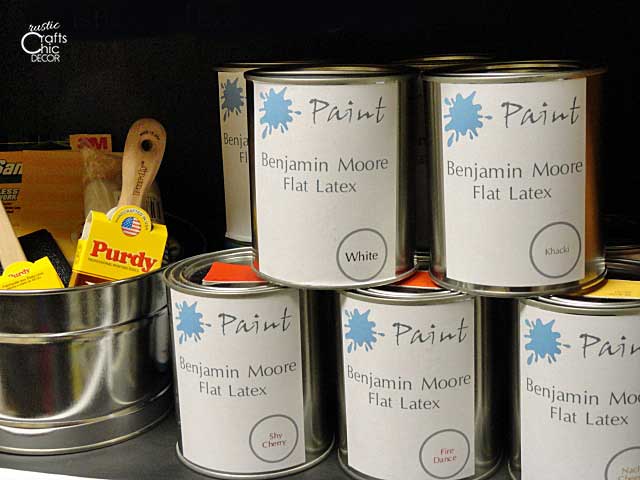
I keep all of my leftover wall paint in new smaller paint cans just for purposes like this. Because I had enough of the Mochachino left over, I decided to use that plus a little bit of cream paint. Plus, the color would fit in nicely with my shabby chic office/sitting area.
- First I brushed on a couple of coats of the mochachino and let it dry.
- To brighten up the table a little, I then brushed on some cream color paint very lightly so you could still see some of the pink.
- Because I wanted even more of the pink to show in some areas, I sanded over the white paint in some areas to see more pink.
- And here is the crazy part! It’s crazy because I hated the yellowish grime on the table before the makeover. However, I wanted to add a little more age to the table. So, I rubbed on a little brown shoe polish in creases and other key areas. It gave some subtle aging in a clean kind of a way.
Adding A Chic Drawer Pull
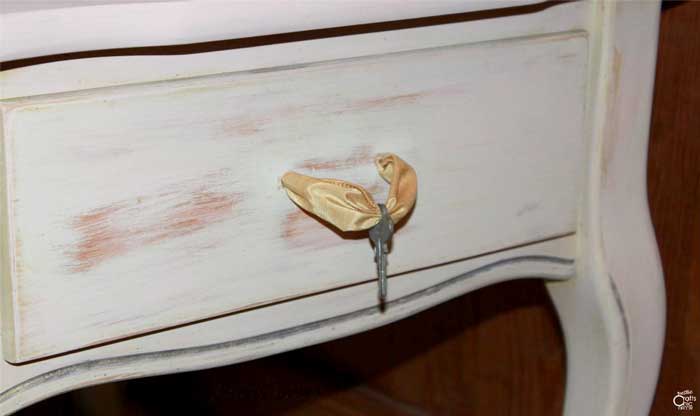
You can have a lot of fun with creative drawer pulls. In fact, I dedicated a whole post just to drawer and cabinet pulls that you can make on a budget. My idea for this table was super simple. I had some chic gold wired ribbon that would make a nice accent. To give it some more charm, I strung a vintage key on the ribbon. Then I inserted each end of the ribbon into the two holes where the previous pull was screwed. To hold the ribbon in place, I just tied the two ends together, at the inside of the drawer, and then dabbed on some E6000 craft glue.
Updated Shabby Chic Table
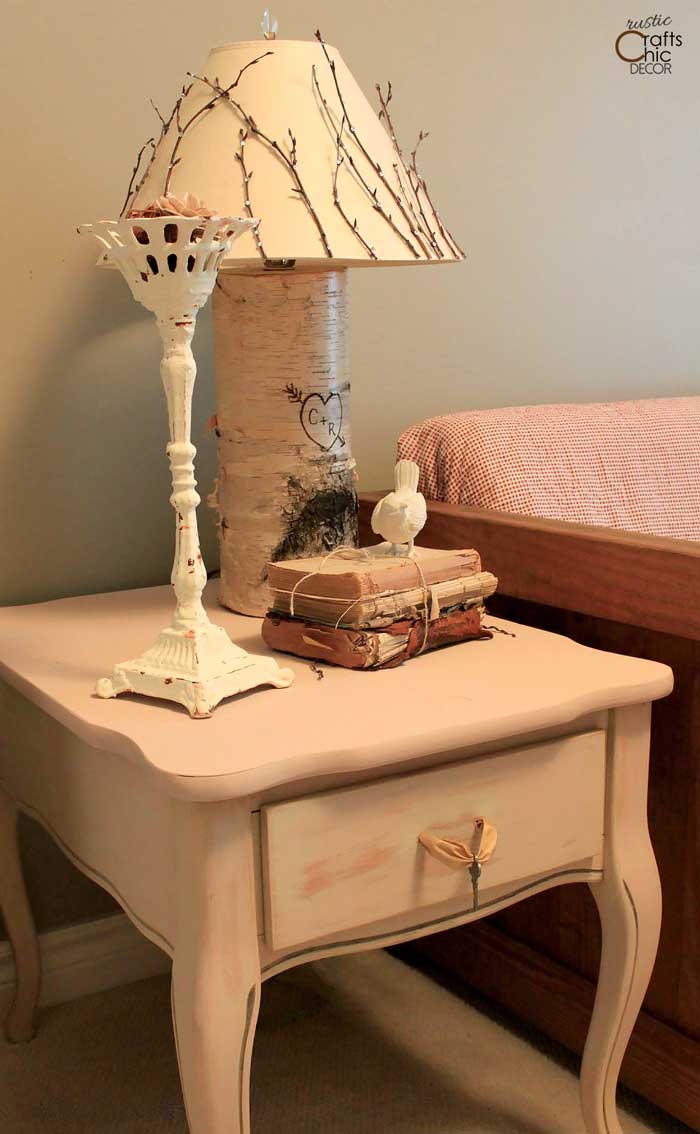
Now the table makes the right setting for my stack of old shabby books and my shabby chic table lamp. See how to make a DIY birch lamp as well as how to decorate the shade in a shabby chic style.