I was thinking back to making paper snowflakes as a kid and remembering how much fun it was. The different designs that you can make just from changing the cuts is addicting. This thought made me wonder how I could make a rustic version of a snowflake. And then, the answer came shouting back at me. I could use twigs instead of paper! I’ll show you how to make a snowflake, in just a matter of minutes, using simple twigs.
It’s so much fun watching the snow come down in the Winter. So much so, that I enjoy bringing some of that prettiness inside. One of my favorite crafts is to make indoor snowballs. They always stay white and never melt! These twig snowflakes are a similar idea but just a little more rustic.
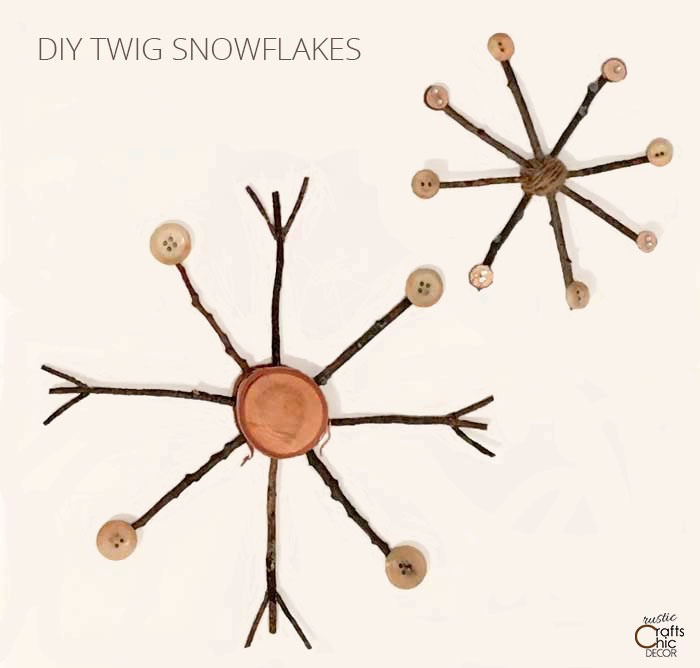
This snowflake craft is so easy that you will find yourself wanting to make several for various uses. The smaller DIY snowflakes are perfect for hanging on the Christmas tree. In fact, my original intention was to make snowflake ornaments.
After making one ornament, I decided to experiment with making a larger twig snowflake. I can still hang it on the tree but also thought of also using these for gift package decorations.
You could definitely make these snowflakes entirely from twigs for practically free. The only cost would be for the glue. However, you can also embellish them with things like buttons or sequins for a fun look. I had some small wood slices leftover from my thumbtack craft that I used on my smaller snowflake ornament.
So go ahead and collect your twig and any other embellishments and I will show you how to make a snowflake!
How To Make A Snowflake
This post contains recommended product links. If you make a purchase through one of the links, I will earn a small commission at no cost to you.
Supplies Needed
- at least four small twigs – if you don’t have access to twigs you can also purchase bundles of twigs
- *optional wood slices for larger snowflake
- buttons
- hot glue gun and glue sticks
- twine
Instructions
Time needed: 5 minutes
How To Make A Snowflake
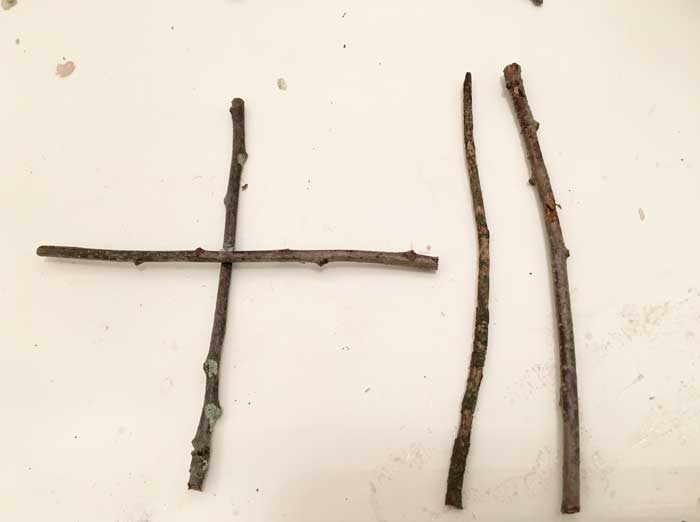
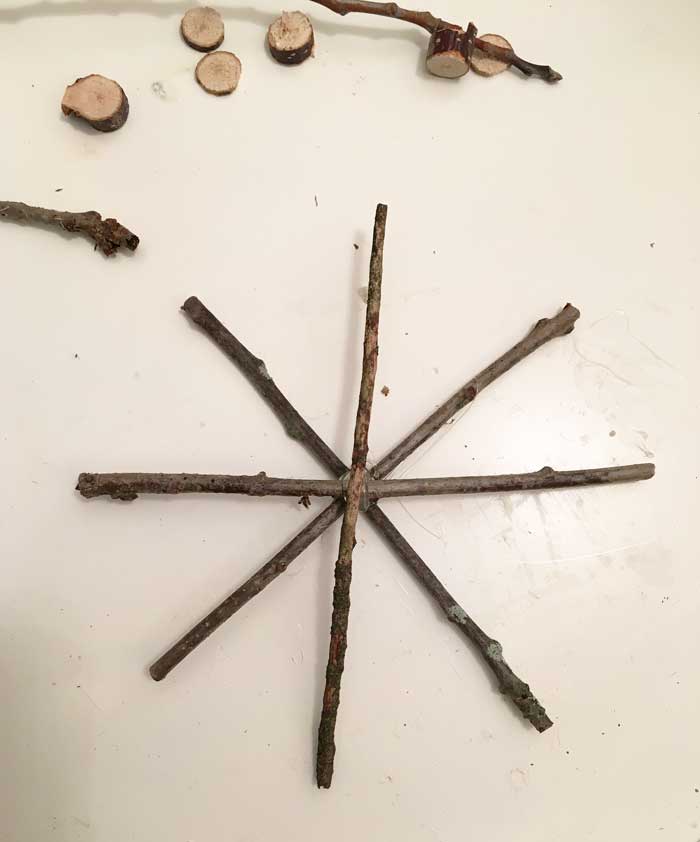
- Cut Twigs To Size
Using a scissors, cut your twigs to the size that you want your snowflake to be. You will need four twig sections for each snowflake.

- Glue Twigs Together
Place your first two twigs on the table with one crossing over the other to form a plus sign. Add a dab of hot glue between the area where the two twigs cross. Next add a diagonal twig across the top and glue in place. End with the last piece going diagonal the other way.
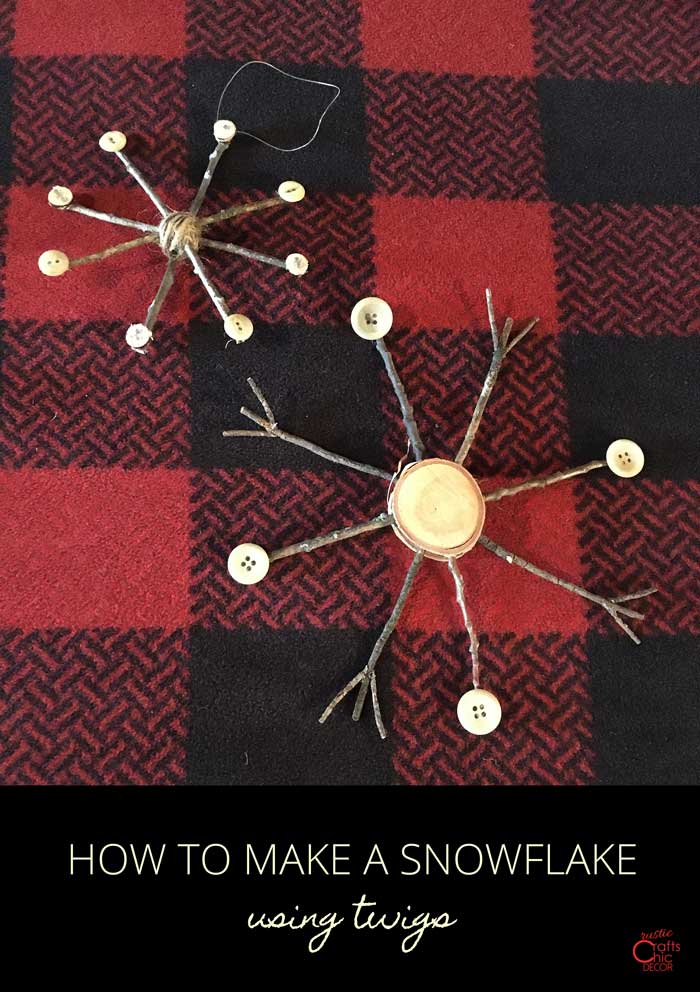
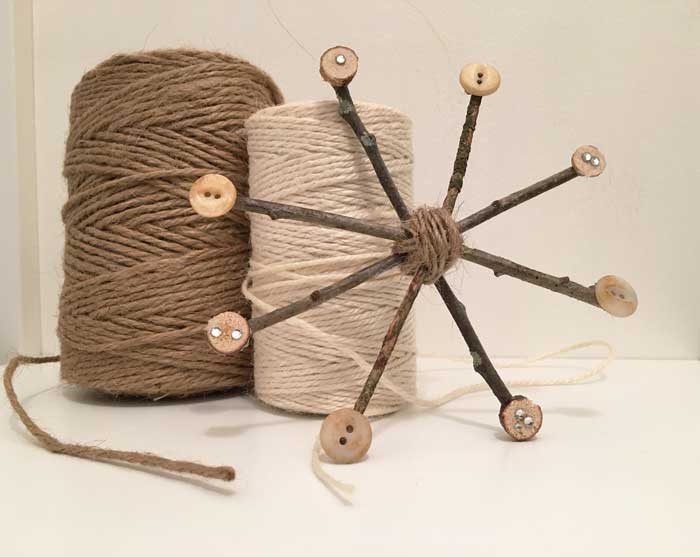
- Wrap Twine Around Glued Middle
To hide any of the glue, wrap twine around the middle. You will weave the twine through each of the cross sections. Start by hot gluing the end of the twine at the back, Finish by gluing the opposite end also to the back.
- Add Embellishments
Add embellishments to the outer ends of your twigs. Things like small branch slices, buttons, or sequins work great for this.
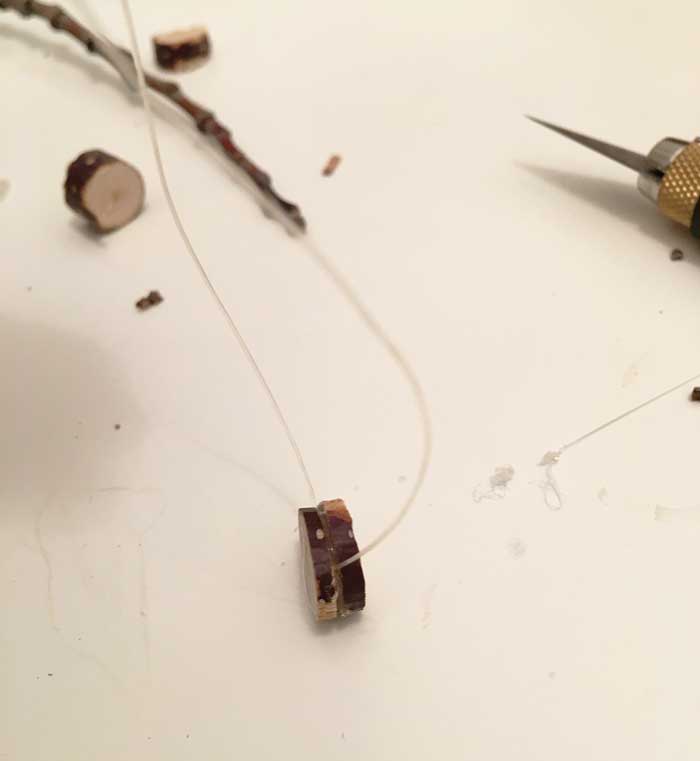
- Secure A Hanging Thread
If you will be making a snowflake ornament to hang on the tree, attach a loop of string to one of the twigs at the top. I used elastic thread that I tied into a knot. Then, I glued the knotted end to the middle of a small branch slice. I used another branch slice to cover the thread and first branch slice so that the elastic was sandwiched in between the two branch slices.
Snowflake Craft Complete
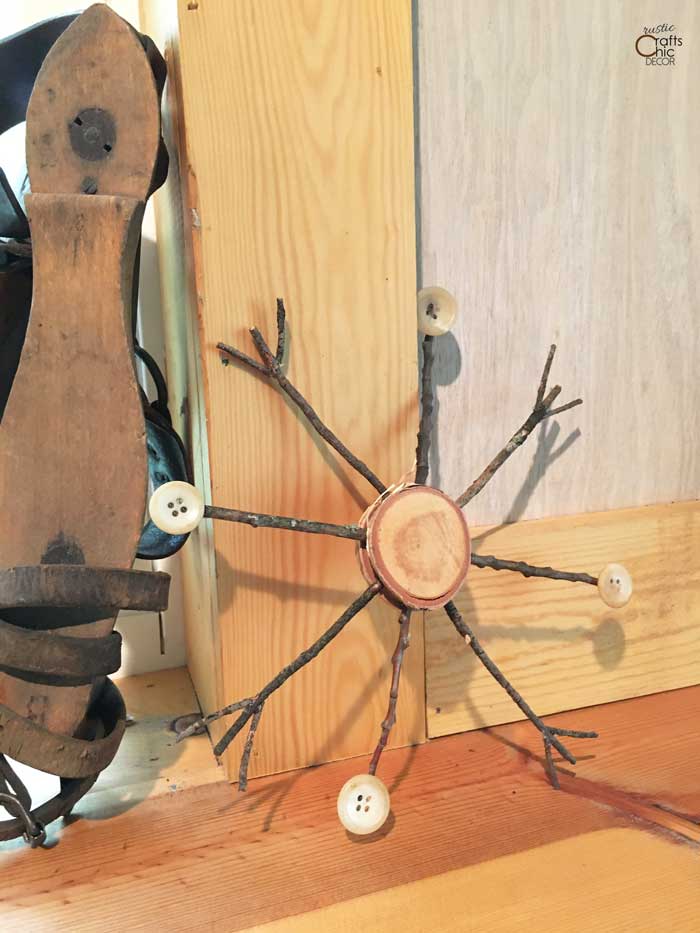
This ornament was very simple with the ends of the twigs simply embellished with small branch slices and buttons. The larger snowflake craft was made in a little different way but just as easy.
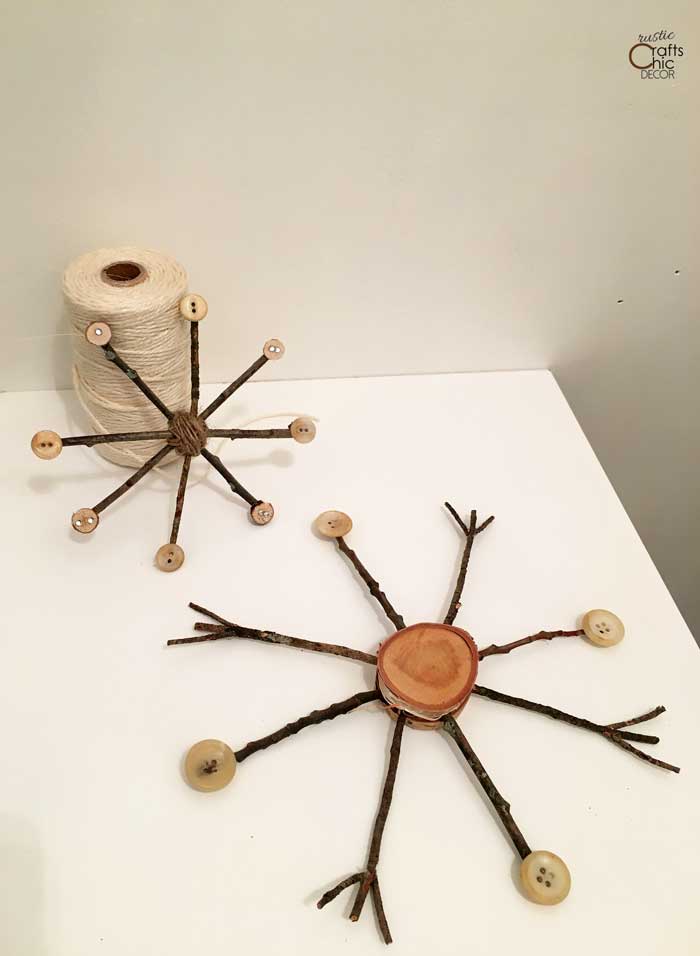
Instead of using four twigs that criss-crossed each other, I used eight twigs that all met in the middle of a larger wood slice.
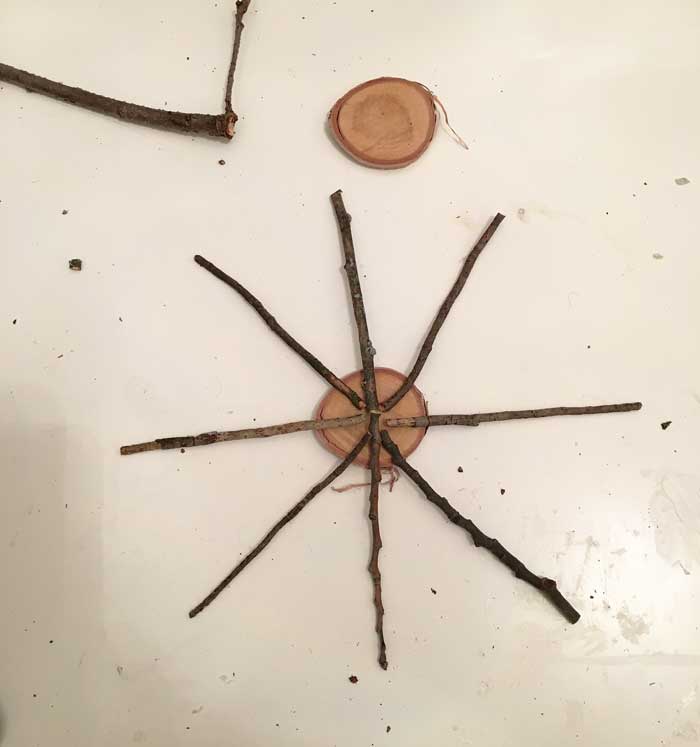
Once the twigs were all in place, I glued them down to secure them to the bottom wood slice. Then, I added some more glue to the top of the twigs and set the second wood slice on top. This sandwiched all the twigs in the middle of the two wood slices.

Once the twigs were secured, I added a couple of one inch twigs to the sides of four of the main snowflake twigs. With the remaining four twigs, I added buttons.