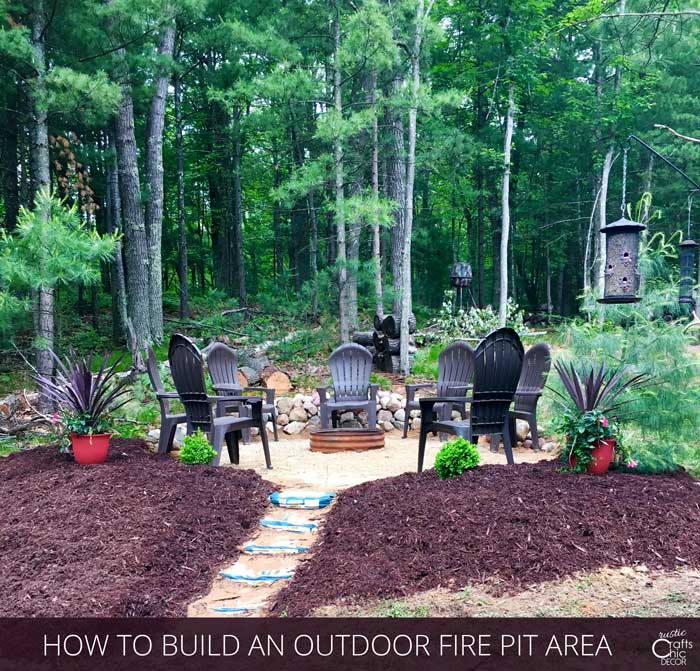
Because we wanted an outdoor gathering place for our family and friends, we made a more formal fire pit area. Previously, we had a fire ring in an open area but it wasn’t real welcoming. Plus, if you sat in the wrong chair you were likely to topple backwards! I guess it’s important to start with level ground! See how to make a outdoor fire pit area that is safe and welcoming.
Steps To Building A Backyard Fire Pit
Find An Open Area
The first step is to find the best area that is far enough from any buildings or trees. Our cabin is in the middle of the woods which makes the sand and rock wall, surrounding the pit, extra important.
Draw Out A Design
Before starting any project, it’s good to have a plan. If you can visualize the final landscape, it helps with the whole process. My husband drew out a rough sketch of what he wanted the area to look like. Since we had to level the fire pit area, create a rock retaining wall and merge the leveled ground with the rest, a drawing was super helpful. When we were finished, it was fun to see how close we came to the actual plan.
Work The Plan
Prepare The Ground
The hardest work for us was in leveling the ground for the fire pit and seating area. Instead of renting an excavator for this, like normal people, we used shovels. Digging into the ground with lots of tree roots is hard work! We felt muscles that we didn’t even know we had. However, since we are gluttons for punishment, we carried on.
To check for level, we used a long two by four and a level. We placed the two by four on the ground and put the level on top of it. Then, we kept rotating the wood around the fire pit area to make sure all angles were level. Finally, we did a chair test. We placed all of the chairs around the circle and determined that no one was going to flip backwards.
Prepare an area that is large enough for people to sit around comfortably without having to be too close to the fire. The fire pit dimension plus the number of chairs will help to determine this. It’s good to allow about three feet between the fire pit and chairs.
Build A Rock Retaining Wall
Because we had to dig into the ground on one side, it was necessary to have a retaining wall to keep the higher ground from eroding into the fire pit area. We already had some river rock leftover from another retaining wall so we used that and also found more muscles. Loading rock into a wheel barrel and pushing it to the fire pit to stack against the dirt wall was another work out! However, that wasn’t the worst part.
When we were gathering the rocks, out popped some baby snakes! I HATE SNAKES!! My husband hates them too. Even though they were just babies, they were just as slithering and scary as any. Plus, I couldn’t help but wonder where the mama snake was. Luckily, we were almost at the end of rock gathering because I was done at that point. It was back to more stacking.
Before stacking the rocks, we laid out landscaping fabric to prevent weeds growing through. We then stacked the rocks at an angle going up, pounding them into the dirt as we went. This dry stack works well and none of the rocks are moving.
The Actual Fire Pit
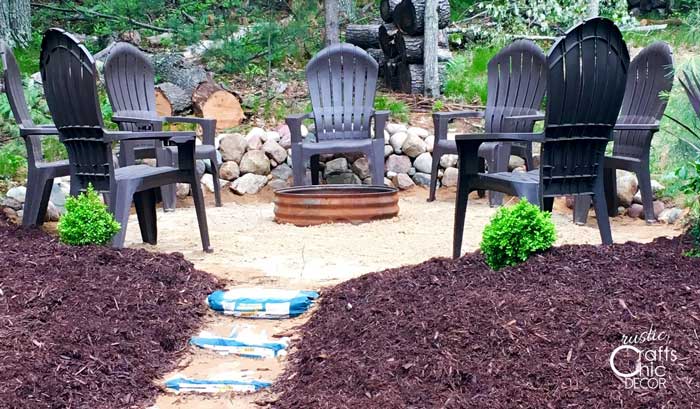
The fire pit can be made with stone, brick or a simple metal ring. We used our rusty metal ring for a more rustic look. Once our ground was level, we then dug out about a three inch deep circle for the fire ring. We then placed sand around the fire pit to fill the whole seating area. This also gives us a more beachy rustic feel. Since sand is also fire retardant, it helps to put out any flying sparks.
Final Landscaping
Since the fire pit area is at a higher area than the rest of the ground, we made steps up to it. These are the easiest stone steps that you could ever make. All we do is put bags of concrete mix into the dirt where we want the steps. We then spray them with water and just leave them in place to harden with time and more water or rain. Eventually, we will peel off the paper and we’ll be left with a concrete step.
We added bark to our newly created dirt mounds and added a few plants. And then….
RACCOONS!
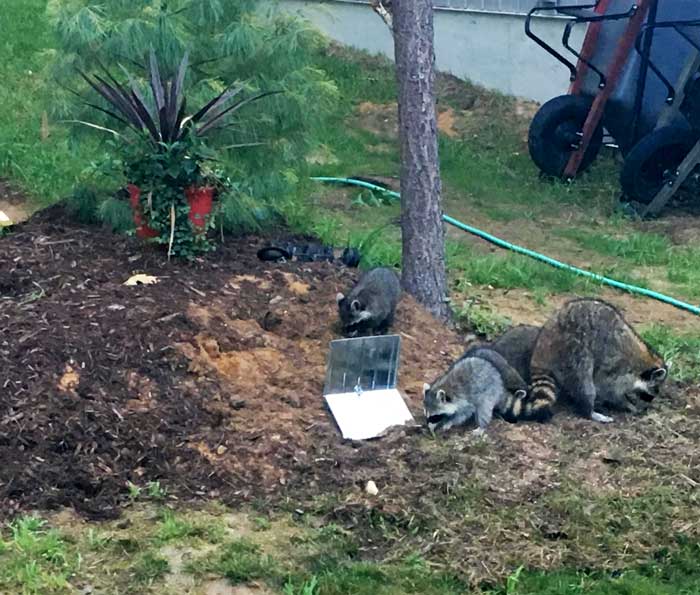
These crazy raccoons made quick work of knocking down a bird feeder and digging up the bark!
I absolutely loved your detailed guide on creating an outdoor fire pit area! Your step-by-step instructions make it seem so easy and manageable. The finished result looks cozy and inviting, perfect for gathering with friends and family. After reading your post, I’m inspired to explore morenoutdoor fire pits ideas for my own backyard. Thanks for sharing such valuable insights and inspiring creativity in outdoor living spaces!