If you have a blog, in all likelihood you have images in your posts. After all images help to tell your story and are necessary for visually relaying your message. Plus, when you have images in your post, it makes it easier to share on Pinterest. However, did you know that using images can really slow down the load time of your site if not done correctly? I’ll show you how to optimize images for the web so that they don’t slow down your site.
When you take a photo, the original file size is very large. If you use the photo as is, it will mean that your page takes longer to load because of the size. You need to reduce this size so that your image takes up less file space. The lower the file size, the less time it takes your page to load. Luckily, there are a few ways to do this without compromising the quality of the photo.
How To Optimize Images With Photoshop
If you use photo editing software, like Photoshop, you simply need to save your photo for the web. Do not click on “save as” instead click on “save for web”.
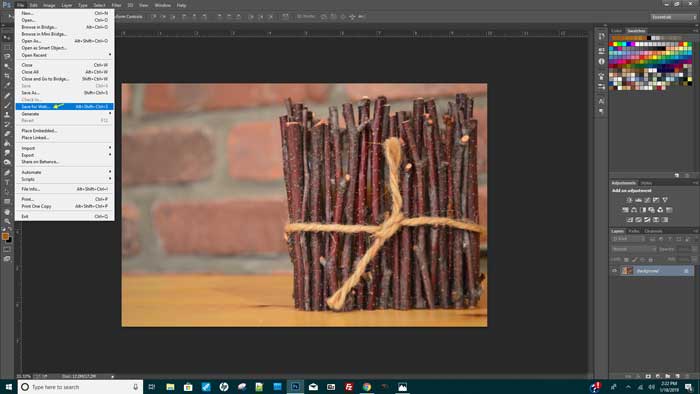
After clicking, you will get to the next screen where you can choose the file format and change the sizing.
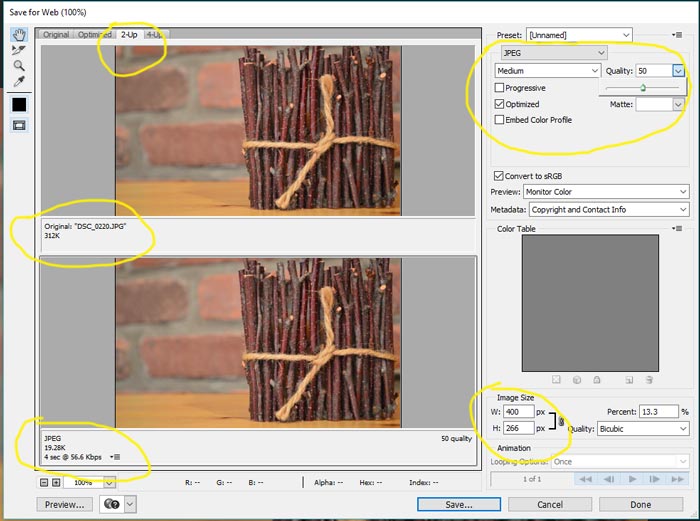
Choose the 2-up tab if you want to view a comparison of the original image versus the optimized version. Usually by picking a JPEG format at medium, the photo is not noticeably changed. Here, you can see that the top, original photo, has a file size of 312K. The lower, optimized image, is now down to 19K.
Most of the time JPEG is the best format to use for the web. You can experiment by testing the look using other formats. See what the file size reduction and quality of image are to make your decision. Use GIF’s for automated images. And PNG’s to handle transparencies.
Change the image size to any size that is not larger than the container size that you are putting it into. For example, if your screen width for your blog posts is 700px, then make the size 700px or smaller in width.
When you are ready to save your image, click the save button at the bottom of the screen. Then, make sure that you are saving the photo with a descriptive name instead of a coded number. This is better for image SEO.
How To Optimize Images For Web Using A Plugin
There are several WordPress plugins available for compressing images. Once you have a plugin installed, your images will be compressed automatically when they are uploaded. Although, this is one step in optimizing images, you will also want to make sure to use descriptive image titles and alt tags for boosting blog traffic.
Best Image Compressor Plugins
WP-Smush Image Compressor

I like to use wp-Smush for an image compressor. If you already have a lot of old images on your blog, this plugin will go back and compress those images in bulk. Also, whenever you upload a new image, the plugin automatically compresses the image. It reduces bulk without affecting the appearance. This free plugin is great to use on its own but I like to combine it with images that I already resized in Photoshop to best optimize images for web use.
I have only used the Smush image compressor but the following plugins are also known to be good.
- re-Smush.it
- EWWW Image Optimizer
- Compress Jpeg and PNG Images
- ShortPixel Image Optimizer
For other plugins that will help your blog, you may be interested in reading, Five Essential WordPress Plugins.