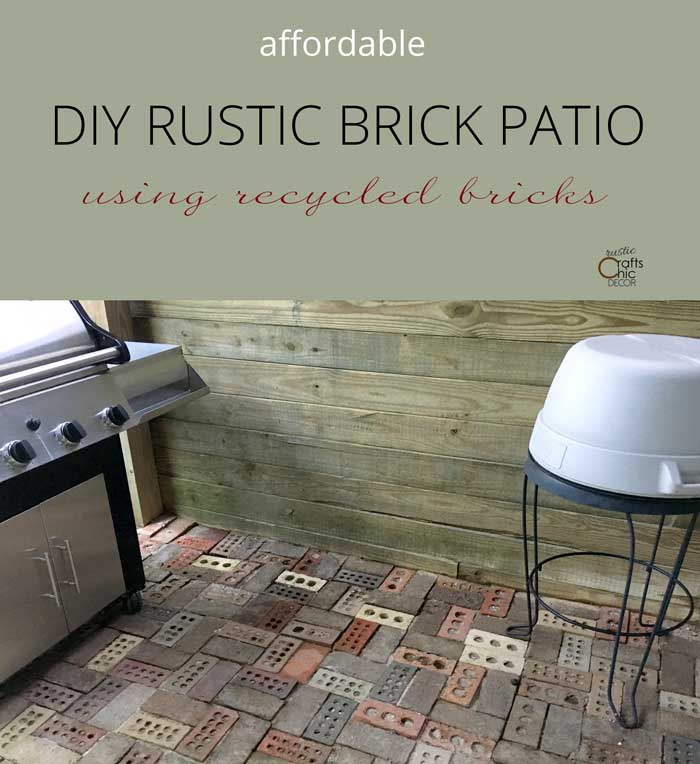
An affordable way to make your own brick patio is by using recycled bricks. You may not get uniform bricks to use but it’s a great way to create a rustic setting that is a bit more whimsical. The prep work and laying out of bricks is a little labor intensive but the cost savings and fun rustic look may just make it worthwhile. This DIY brick patio cost us under a hundred dollars.
For us, it all started when my husband bought a ton of brick. He literally bought about three tons. It was an odd assortment of leftovers, which he found from Craig’s List, that cost us $50. We used some of the brick to make a raised floor under our cabin’s wood stove. However, we had plenty leftover.
I remember looking skeptically at the massive pile hoping that we would in fact be able to use it up or at least put a large dent in it. Since our cabin is built with a walkout basement, we were going to need a patio under our main deck. To save a little money, we decided to use all of those bricks to make our own DIY brick patio.
How To Lay A Brick Patio
The job required a little bit of labor in preparation and laying out of the bricks but the end result is a decorative look for very little cost.
Preparing The Ground
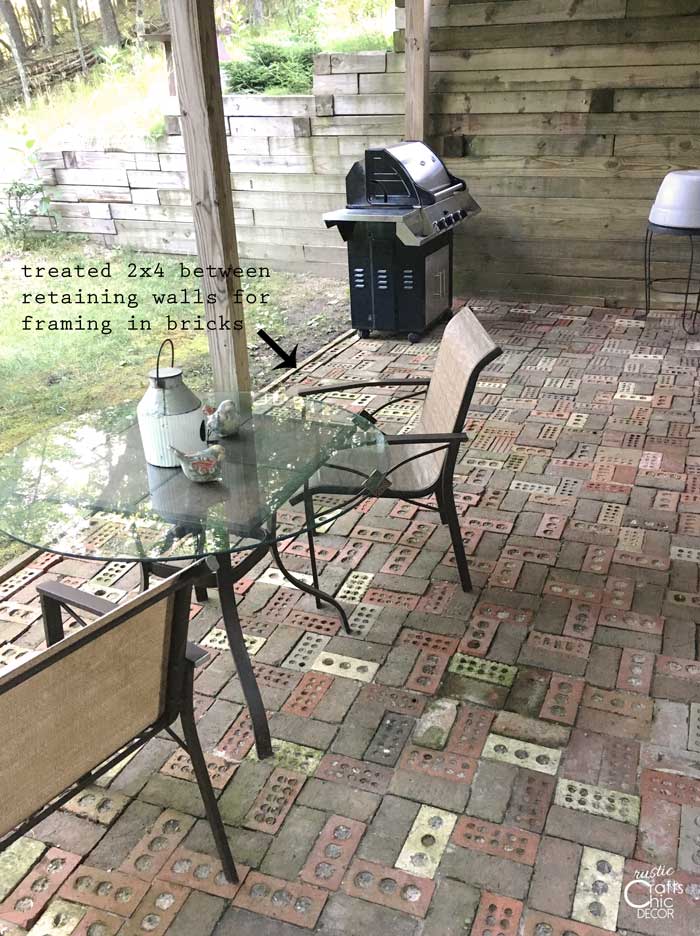
To prepare the ground, we had to dig down the topsoil to be at a level that was even with the door trim once the brick was laid. Once the topsoil was dug down, we had to frame the patio area. Since we already had retaining walls on each side of the patio, we only needed to border the front edge. We used a long treated 2×4 for this. You need to have a border for each side of the patio which you can either do with 2×4’s or bricks. If using bricks, just lay them out first at your borders. Next, the dirt had to be completely level. We had been soaking the ground for several weeks and it was fairly compact but we rented a vibrating compacter for $50 just to make sure it was completely compacted.
After leveling the area, we poured a layer of dry mortar mix over the dirt. We used about 15 bags at a cost of $3 per bag for an area of 160 square feet. A long 2×4 was dragged across the mortar mix to level it off before we began laying the bricks.
Laying A Brick Patio
Come Up With A Pattern
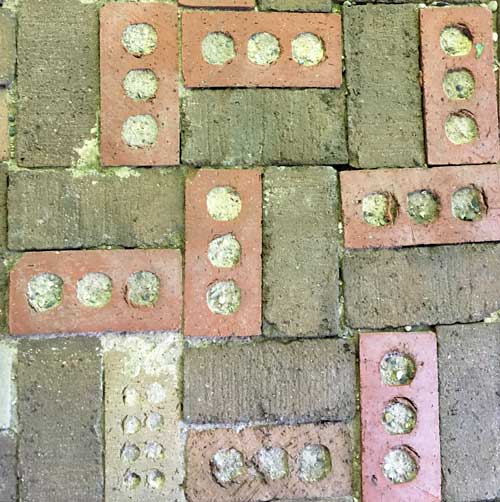
It’s best to have some sort of pattern in mind to give your patio a uniform design. This is easier to do if all of the bricks are the same general size. We had bricks of varying styles so some of them were laid with holes up. When determining our pattern, we tried to intermingle the two styles so they were evenly spread. We also alternated brick colors and used this basic pattern for our layout design.
Add Mortar Mix To Holes And Seams
Once all of the bricks were laid, we filled in the holes and gaps with more dry mortar mix. With a garden hose, we then wetted the entire patio which mixed with the mortar to make a hard bond between the bricks. When the patio was dry and cured we had a completely solid surface.
Since we have the upper deck for sitting, we currently use the patio area mainly for grilling. The patio reminds me of an old cobblestone or brick road. Besides Craig’s List, I would think that you could find leftover brick at your local brickyards. The beauty is that the brick doesn’t have to all match. You can make your own design with what you can come up with.
For more rustic patio ideas, see my post which includes eight creative rustic patio settings.