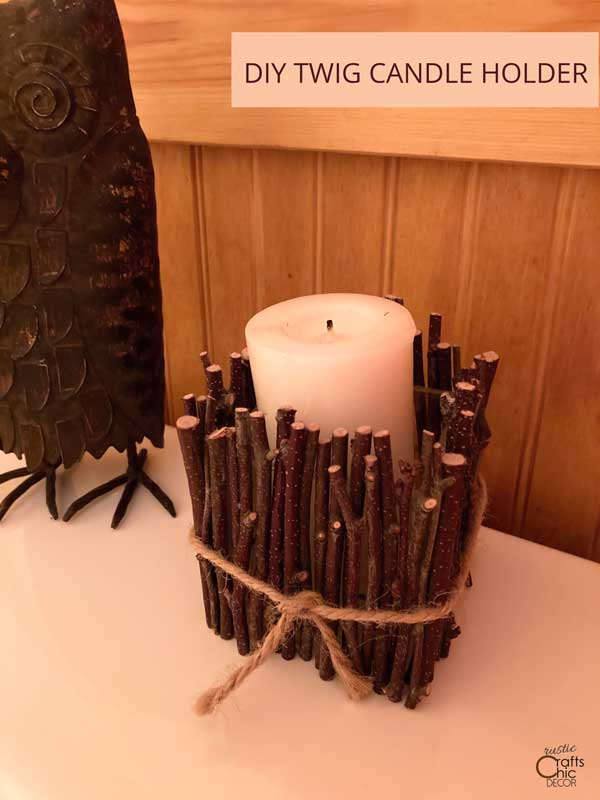
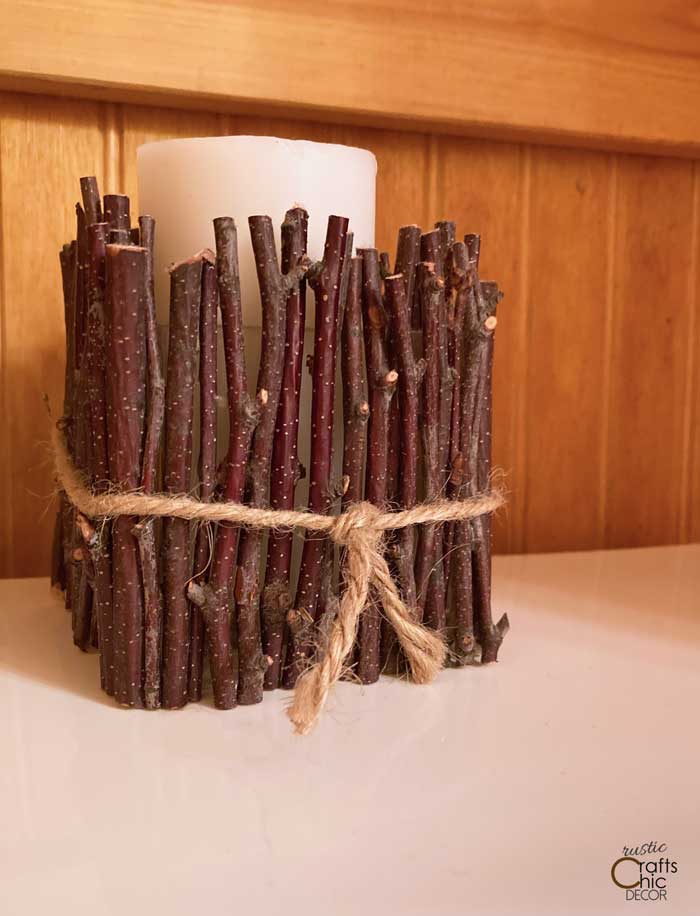
If you love candles, like I do, you probably have plenty of them setting around your house. I tend to buy a lot of small votives, in glass jars, that are easy to find spots for. However, I was thinking it would be nice to jazz one up a bit and give it some rustic styling. A super easy way to do this is to just add twigs around the glass container. Not only is it easy, but this DIY can also be done for practically free! You can even make your own soy candles to go along with this DIY twig candle holder.
You can collect twigs or small branches right from your own backyard. I particularly like birch branches for crafts because of their size and coloring. However, any twigs will work. Plus, if you don’t like the look of the natural branches, you can always paint them. In fact, if you want a mix of rustic and chic, try a gold metallic paint going half way up the branches.
This post contains recommended product links. If you make a purchase through one of the links, I will earn a small commission at no extra cost to you.
DIY Twig Candle Holder
Supplies Needed
- twigs – if you don’t collect your own, they are available to purchase
- glass candle holder
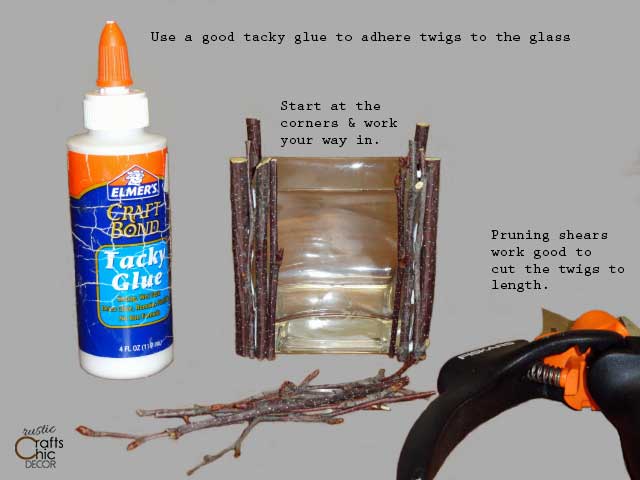
- tacky glue or hot glue
- twine
- pruning shears or scissors
Instructions
You really can make this candle holder as big or small as you would like, depending on the size candle you wish to use. I used a small square glass to fit a votive candle nicely. The shape doesn’t matter either, as long as it’s not an irregular shape like an hour glass.
Step One: Cut Twigs To Size
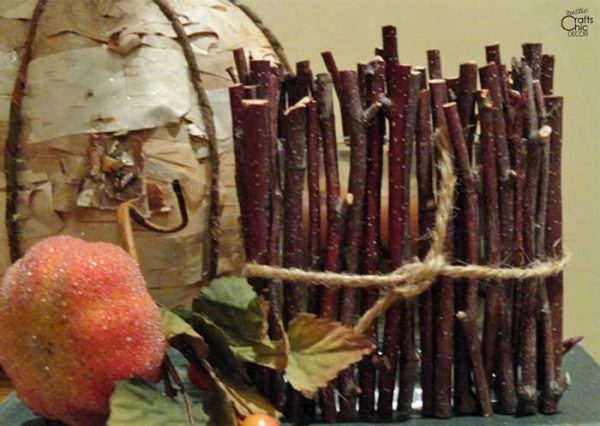
Measure the height of your glass candle holder. Then, cut the twigs a little higher than the container with pruning shears. You can vary the heights a little if you want. If you want some of the glass to show, just cut the branches that much shorter than the candle holder.
Step Two: Glue Branches To Glass
Starting at the corners and working your way in, se tacky glue to adhere your branches to the glass. You will want to use this type of glue because it dries clear and you will never see it through the glass. It tacks on fairly quick but you can move it around for several hours. I still had some wet glue in spots after having it set overnight. However, all of the branches were still held in place.
Step Three: Tie A Section Of Twine Around The Twigs
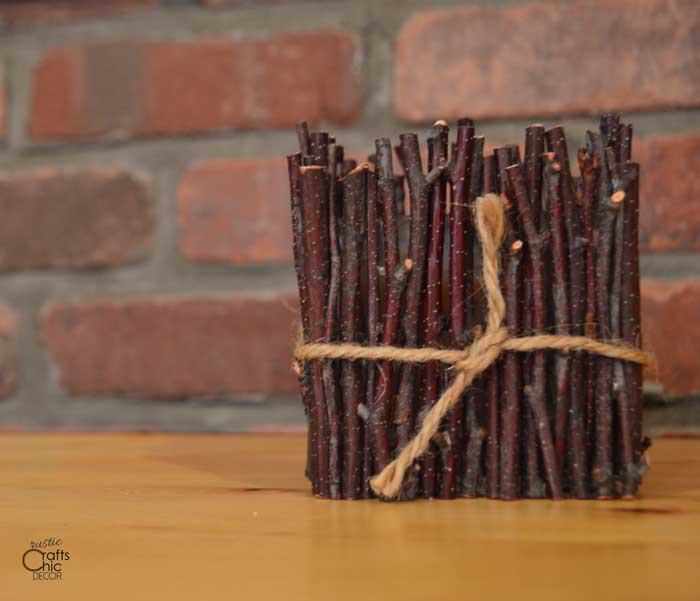
Once the glue is dry, you can tie a section of jute string around the branches, loosely, just to finish it off. Set your candle inside and you are finished. Just three easy steps!
If you want to deepen the color of the twigs, you can also apply polyurethane at this point. Use either a satin or gloss spray polyurethane or brush on a glossy varnish. I was happy with the color of my twigs so I just left them natural.
I love the rustic look of the twig candle holder especially when the candle is lit. If you like to see a little more of the candle itself, I like to also use small pillar candles.
If you like this twig candle holder and are interested in making more rustic style decor with twigs, branches, or logs, check out the following tutorials.
- DIY Rustic Candle Holders Using Logs
- A Rustic Sign With Twig Letters
- Pom Pom Embellished Twig Centerpiece DIY
- DIY Rustic Chalkboard With Branches
- DIY Thumbtacks With Branches
Hi there~ Just stopping back by to say thanks for linking up at Feathered Nest Friday!
Thank you Courtney! I will do that.
Love this!! So creative and cute! Would love if you would come share at Feathered Nest Friday sometime! 🙂