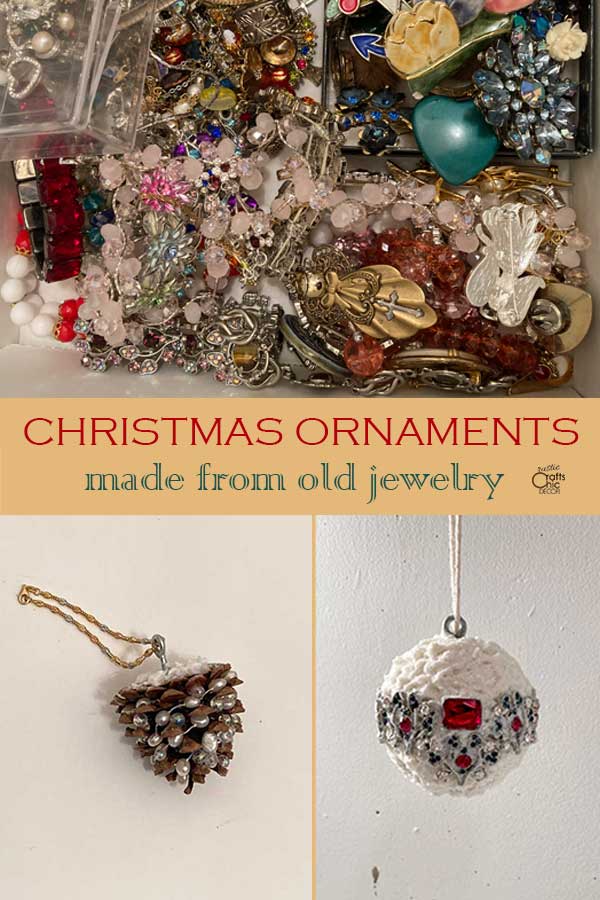
What do Christmas and old jewelry have in common? The answer may seem obvious when you look at all of the glitz and sparkle that come out during the holidays. Jewelry is full of shiny color, sparkle, pearly whites, and of course tons of silver and gold. If you’ve ever wondered what to do with your old jewelry, that no longer gets worn, just think Christmas ornaments. The jewelry can easily be repurposed into a variety of decorative Christmas ornaments for the tree. I’ll show you some of the Christmas ornaments that I made from old jewelry passed down to me.
Vintage jewelry is my favorite to repurpose because it is especially ornate. The colors and styles are so pretty to look at. But for me, the pieces are a little to flamboyant to actually wear. Instead of having these beautiful pieces go to waste, it’s fun to come up with unique ways to display them. If you don’t mind the idea of taking jewelry apart, the pieces are great to use in Christmas decorating. All that glitz and sparkle will give your tree a much admired high end look.
This post contains recommended product links. If you make a purchase through one of the links, I will earn a small commission at no extra cost to you.
How To Make Christmas Ornaments From Old Jewelry
There are a variety of easy ways to create expensive looking Christmas ornaments from old jewelry. Whether you create a new ornament from scratch or decorate some plain balls, there are plenty of ways to dress up your tree. A lot of how you decorate a Christmas ornament will depend on the type of jewelry that you have. Here are a few ideas to consider.
- Glue a pretty brooch to a plain colored ball ornament.
- Wrap a necklace around a ball.
- Fill a clear acrylic ball ornament with a variety of jewels.
- Hang a pendant in the middle of a Christmas cookie cutter to hang on the tree.
- Cover a styrofoam ball with jewelry for a new handmade ornament.
- Decorate a pinecone with a necklace or beads from any jewelry.
The following tutorials are what I did to create some unique ornaments for my tree this year.
Pinecone Ornament With Necklace
I like to decorate with pinecones during Christmas but when they are adorned with jewels they add the needed chic for a well dressed tree.

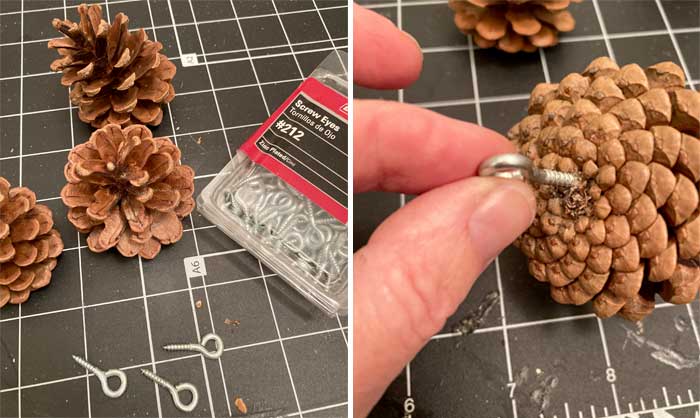
What You’ll Need
- pinecone
- eye screw
- strung necklace/bracelet or beads from necklace
- texture paste
- glamour dust
- hot glue
Instructions
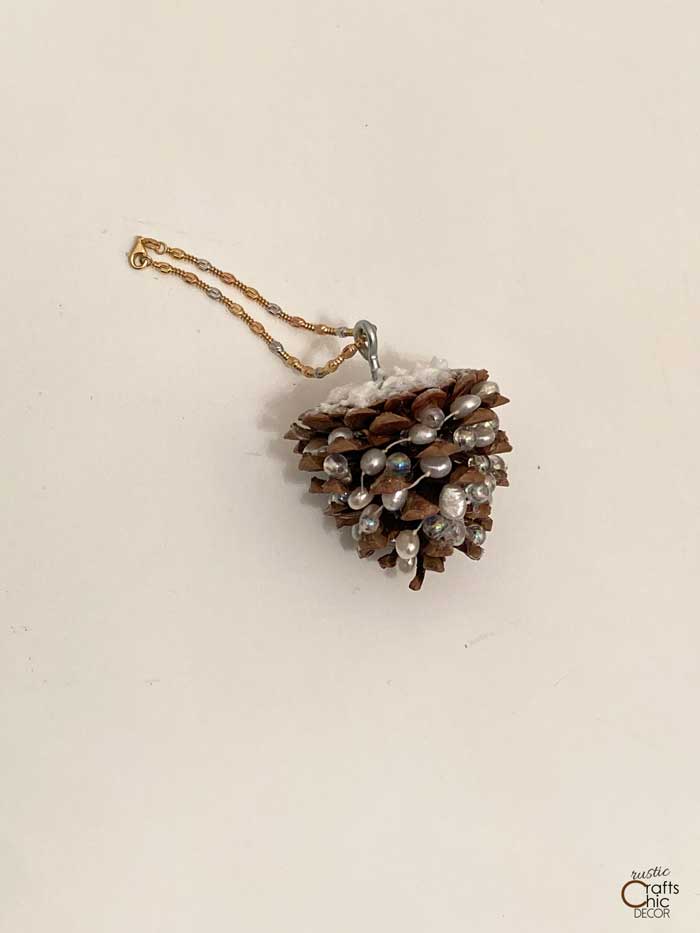
1. Twist An Eye Screw Into The Top Of Pinecone
Screw eyes work really nice for creating a loop that a bracelet or a strand of twine can thread through for hanging the ornament on the tree. Just twist the screw, by hand, into the top of the pinecone.
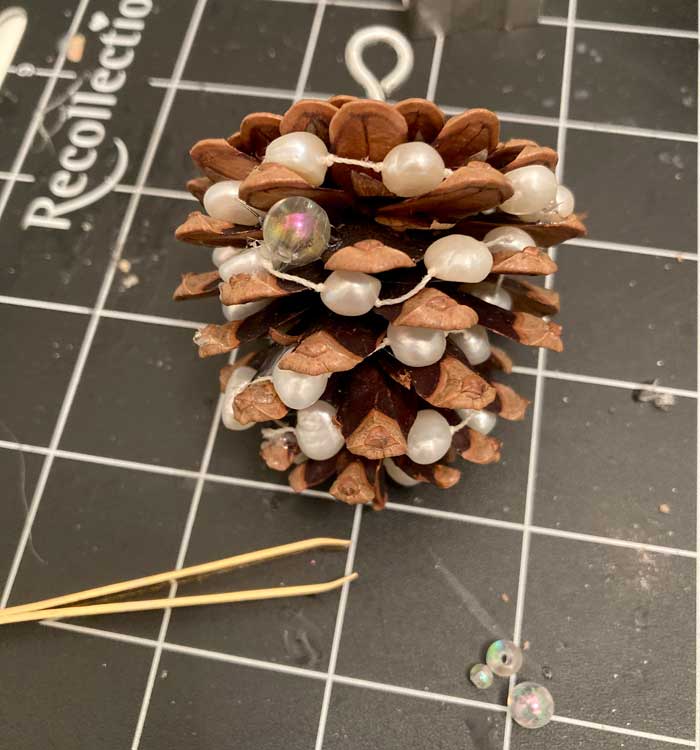
2. Wrap And Glue Necklace Around Pinecone
I cut the clasp off a necklace and then wrapped it around a pinecone – kind of like garland around a tree. I used a small dab of hot glue every inch or so to secure the necklace to the pinecone.
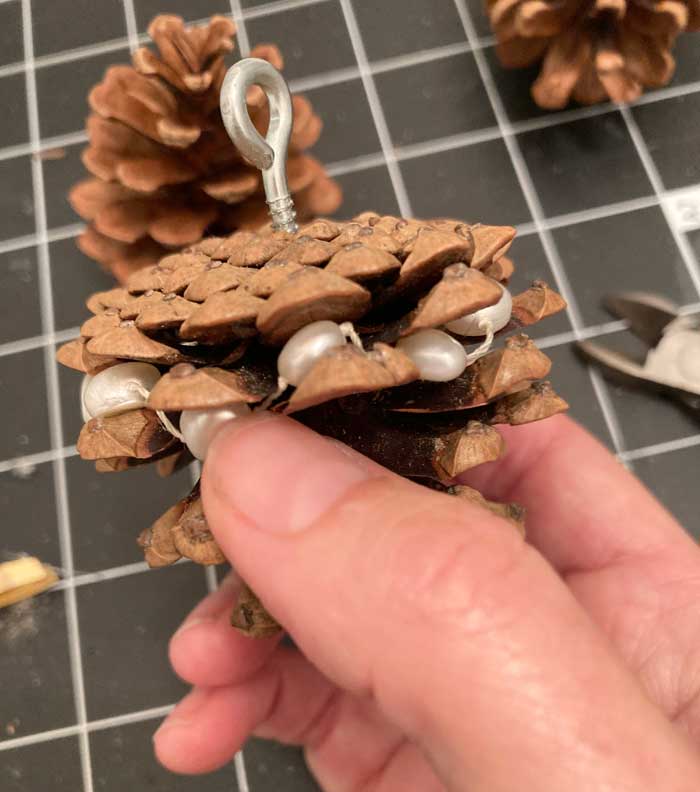
3. Add Beads To Fill In Gaps
Because I wanted to fill in the gaps and add a little more sparkle, I also attached beads from another necklace. These easily slipped off the strand when the end was cut.
4. Spread Texture Paste Onto The Top Of Pinecone
Since I still wanted to add more sparkle. I applied texture paste to the top to look like snow. This is a lot like how I make indoor snowballs using Snow Tex which is basically the same thing.
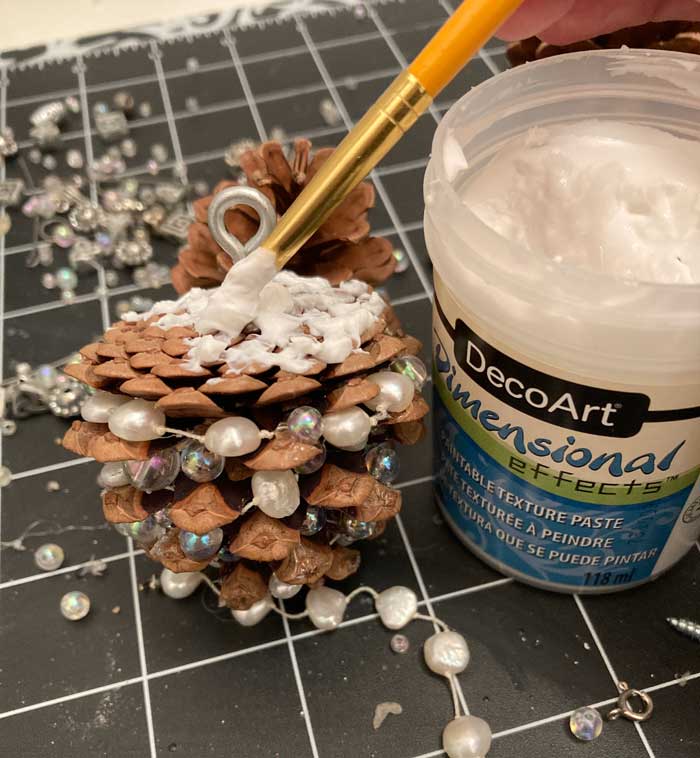
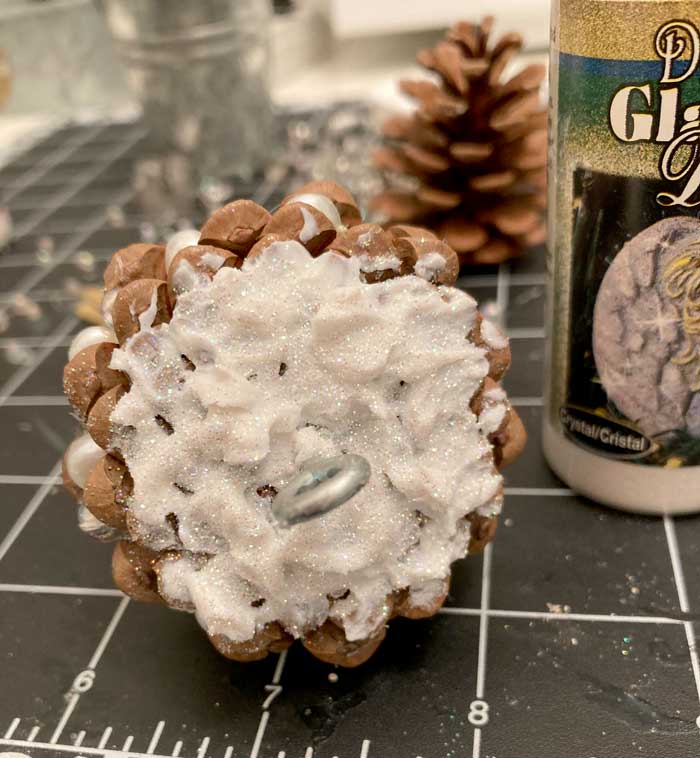
5. Sprinkle Glamour Dust Onto Texture Paste
To give the texture paste the look of snow, I finished it off by sprinkle the paste with Glamour Dust.
6. Thread A Bracelet Through Eye Screw For Hanging
Now all I had to do was attach something to the top for hanging the ornament on the tree. Since I wanted to use up some more old jewelry, I thread a silver and gold bracelet through the screw eye.
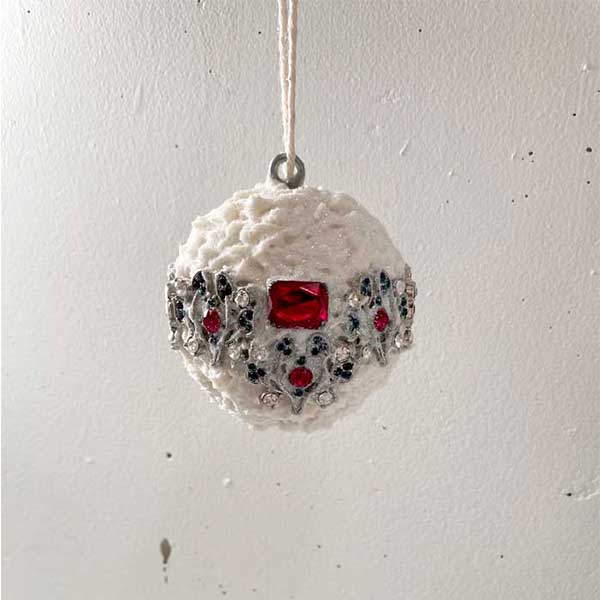
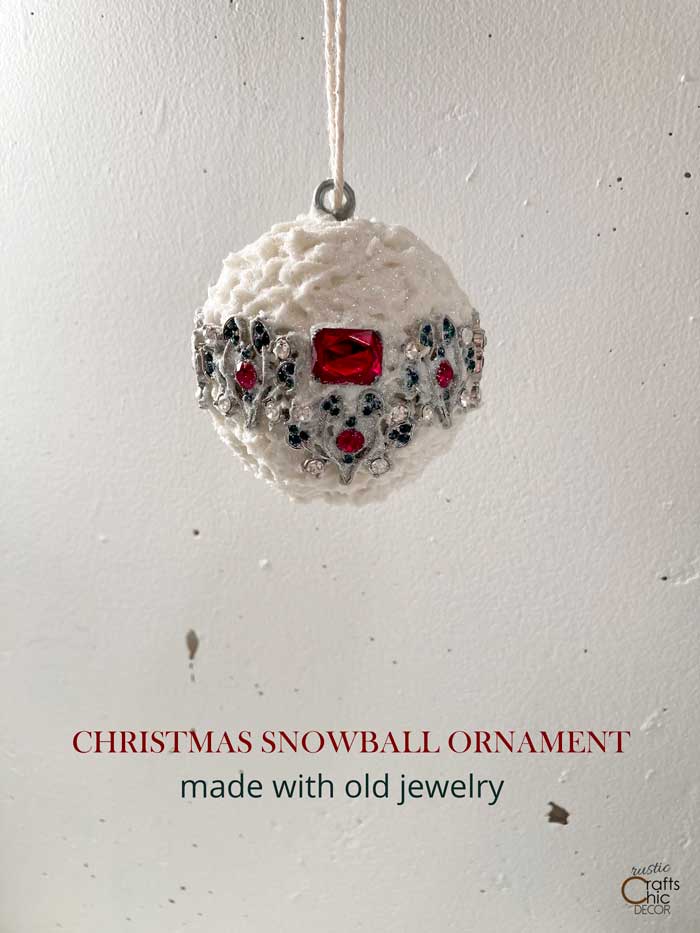
Styrofoam Ball Ornament With Vintage Bracelet
Decorating a Styrofoam ball is a lot of fun because there are so many different possibilities. You can fill the entire ball with jewelry or just a section. I added jewelry just around the middle of the ball and then filled in the rest with texture paste to look like snow.
What You’ll Need
- Styrofoam ball
- old jewelry
- Styrofoam glue or Gorilla clear glue
- screw eye
- texture paste
- glamour dust
Instructions
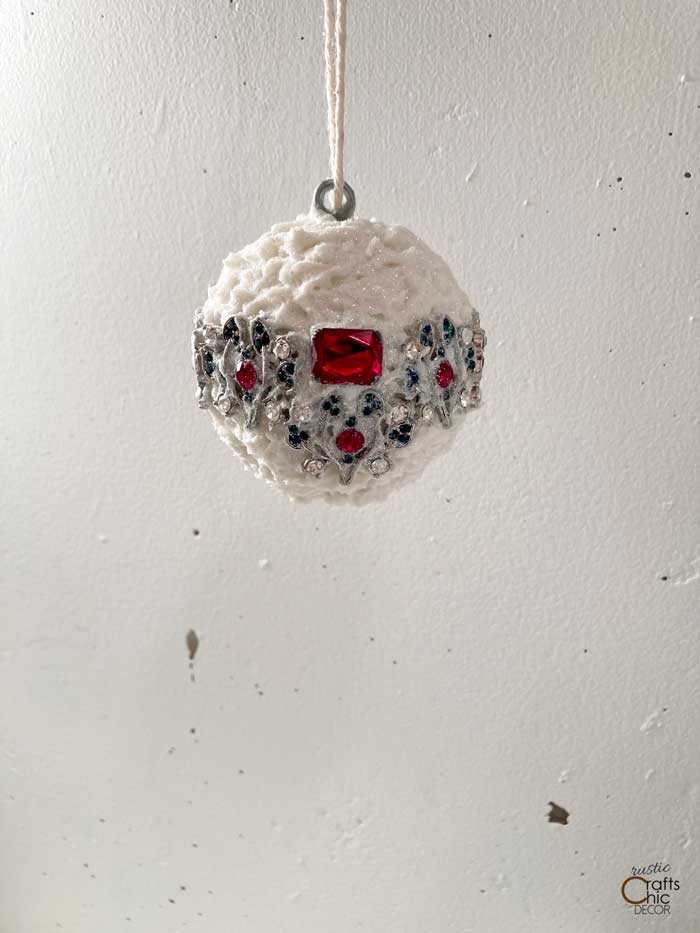
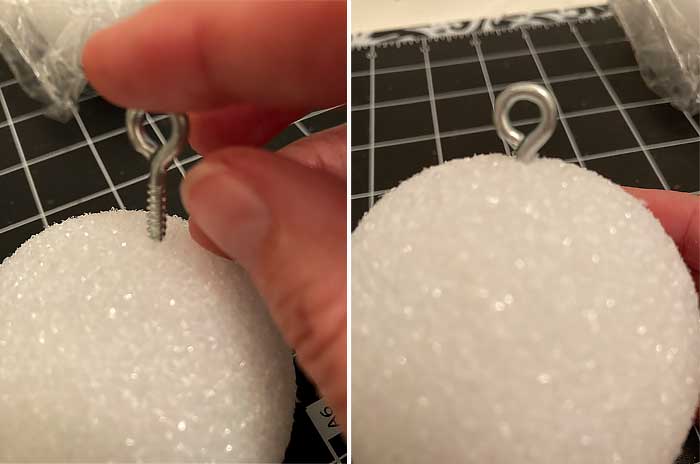
1. Insert A Screw Eye Into Top Of Styrofoam Ball
First, coat a screw eye with glue and then poke it into the top of the ball. Once dry, it will be nice and secure.
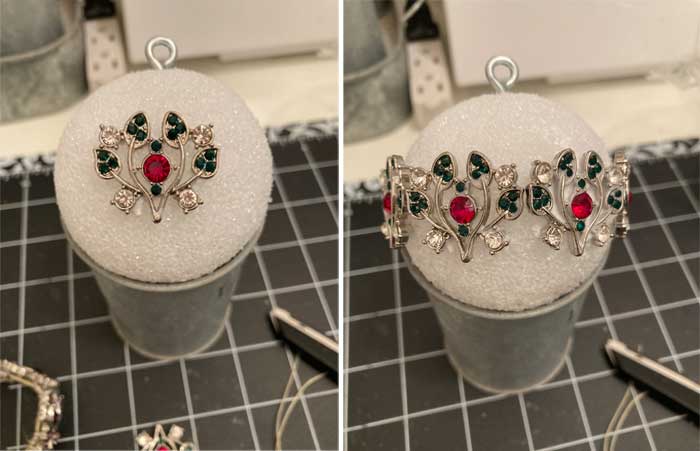
2. Glue Jewelry To Ball
Decide on a pattern with the jewelry that you have. Then, adhere the jewelry to the ball with Styrofoam glue or another tacky clear glue. I needed to cut the pieces off a bracelet to get it to fit around the size of my ball. Since the bracelet pieces had little protrusions on the back, I was also able to press those into the styrofoam for easier adhesion.
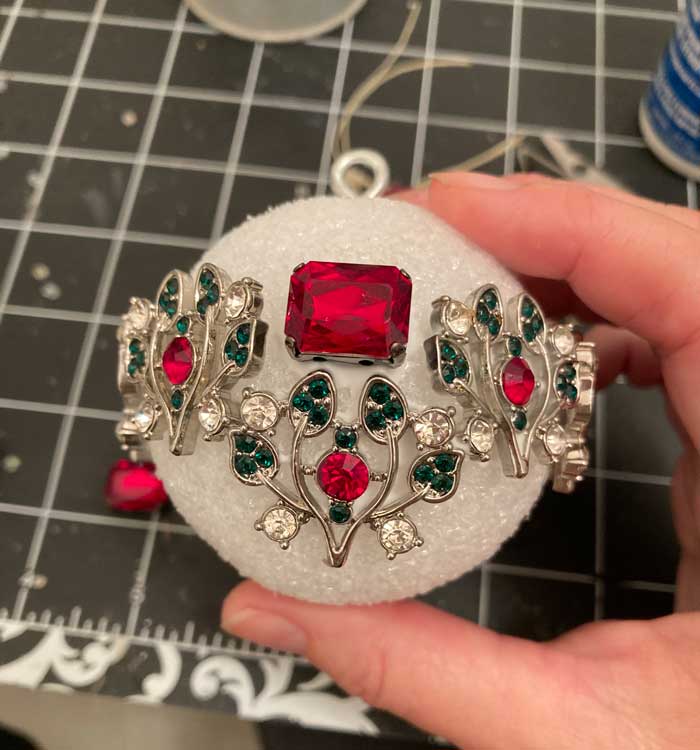
This step is best done in phases. I applied half of the jewelry and then let it set in a small bucket to dry. Once dry, I did the other side.
There wasn’t quite enough room for my last bracelet piece to fit in line. So, I just dropped it down a bit and added a red jewel to the middle. It’s fun to see what designs you can end up with using a variety of jewelry.
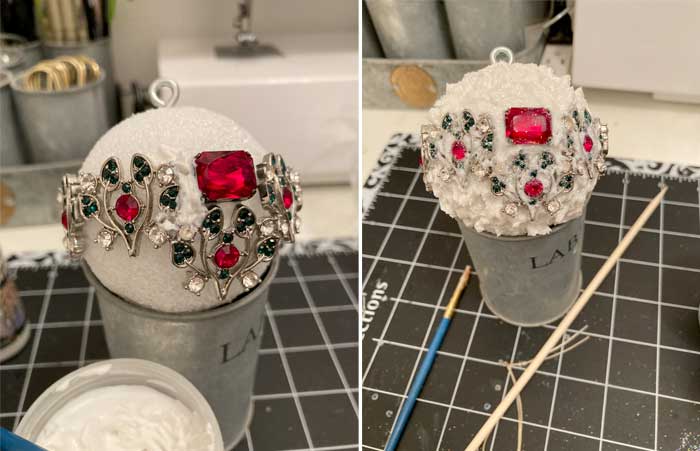
3. Brush On Texture Paste Around The Jewels
I didn’t want to fill the entire ball with jewels because I wanted to highlight my pattern. So to fill in the gaps, I applied texture paste instead. I used a very small paintbrush to fill in the areas inside the jeweled pieces. The texture is now like a snowball. With the jewelry showing through, it’s like finding treasure buried in the snow.
4. Sprinkle Glamour Dust Over Texture Paste
For the texture to look most like snow, it needed some sparkle. All I did was sprinkle Glamour Dust over the texture paste while it was still wet. Glamour Dust is super fine making it a good choice for the look of snow. Again, I had to work in sections for easier handling of the ornament while working. I could get the majority of the ornament finished. Once that was dry, I flipped it upside and finished the bottom.
After sprinkling the ball with Glamour Dust, I then polished off some of the jewels so they really shined and shone through the “snow”.
5. Attach A Hanger Through The Screw Eye
And that’s it! Now my tree gets to where some of the old jewelry instead of having it just sit in a box. I plan on turning the majority of the jewelry into Christmas ornaments and other decorations. It always feels good to upcycle old stuff!
If you like to make your own Christmas ornaments, you might also be interested in the following tutorials for homemade ornaments.