Decorating with pumpkins is a popular thing to do in the Fall. However, that doesn’t mean that you have to drastically change your home decor style. All you have to do is make the pumpkin fit in with the rest of the space. For those who love rustic decor, a rustic pumpkin is easy to make with a little birch bark. I’ll show you how I gave a plastic orange pumpkin a complete rustic makeover using birch bark.
A traditional orange pumpkin definitely has it’s place in Fall decorating. The problem is that it can be hard to incorporate that color in your home. Unless you already have orange accents, adding the color can stick out like a sore thumb. I like to find other ways to get the look of a pumpkin but in a way that fits my style. Previously, I have made a rustic pumpkin using book pages and a branch stem. I have also covered a plastic pumpkin in a neutral cream sweater. This time, I opted to go super rustic with a pumpkin craft using birch bark.
DIY Birch Bark Rustic Pumpkin
*This post contains affiliate links. If a purchase is made from clicking on a product link, I may earn a small commission.
Craft Materials Needed
- basic plastic pumpkin
- birch bark – can peel from a log or purchase
- bark covered wire
- two paint brushes
- Spanish moss
- cream color acrylic paint
- Mod Podge decoupage
- wire snips
- E6000 craft glue
- spray acrylic sealer
- glamour dust
- tacky glue
Craft Instructions
Rustic Pumpkin Craft
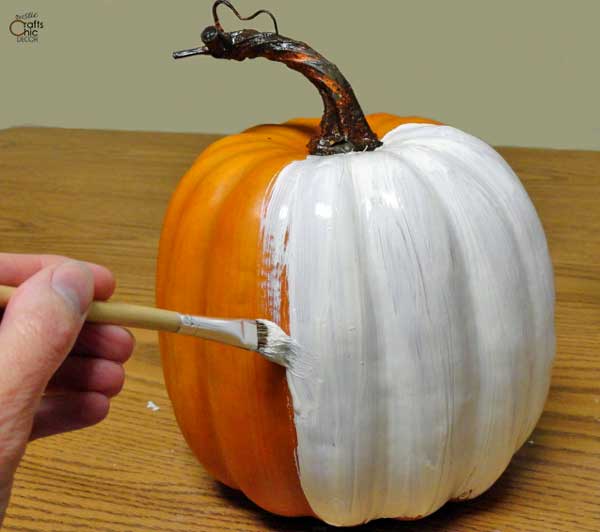
- Paint The Pumpkin
To start, paint the entire pumpkin with cream color acrylic paint. This provides a neutral background in case of any little gaps in the birch bark. If you have or purchase a plastic white pumpkin, you can skip this step.

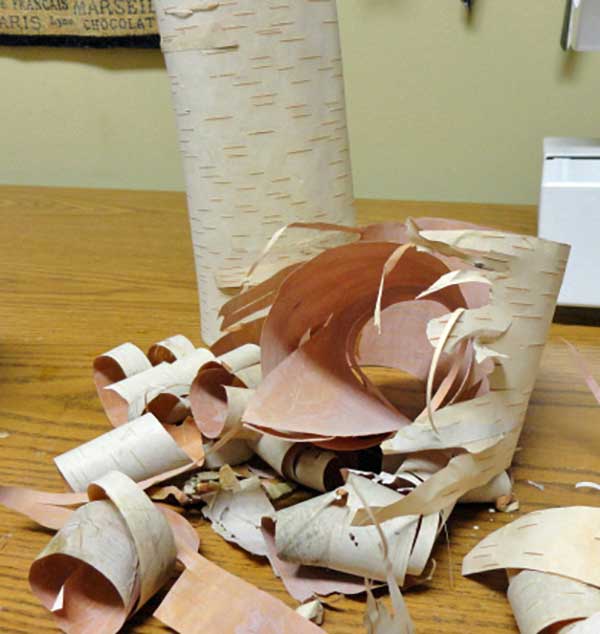
- Peel Birch Bark From Log
If you have purchased birch bark sheets, you can simply tear or cut the sheets into smaller pieces. I used a birch log to peel my bark from. Peel small pieces which are easier to work with when applying to pumpkin. Depending on the look that you want, you can just peel the top layer or peel a couple of layers for a multi color effect. You will need more logs if you are just using the top layer.
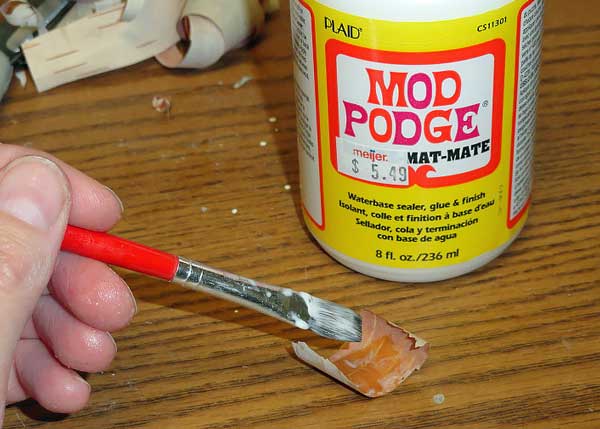
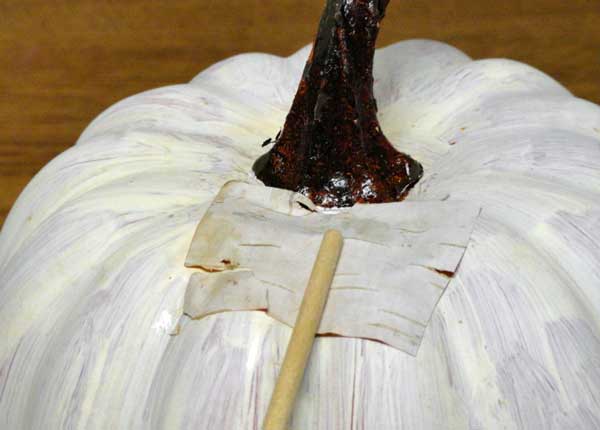
- Adhere Bark To Pumpkin With Mod Podge
Next, apply Mod Podge to the back of a piece of bark and then attach it to the pumpkin. Repeat with rest of birch pieces, overlapping slightly.
- Smooth Each Piece To Remove Air Bubbles
Use the handle of your paint brush to smooth each piece, as you go, onto the pumpkin. This helps to remove any air bubbles or creases.
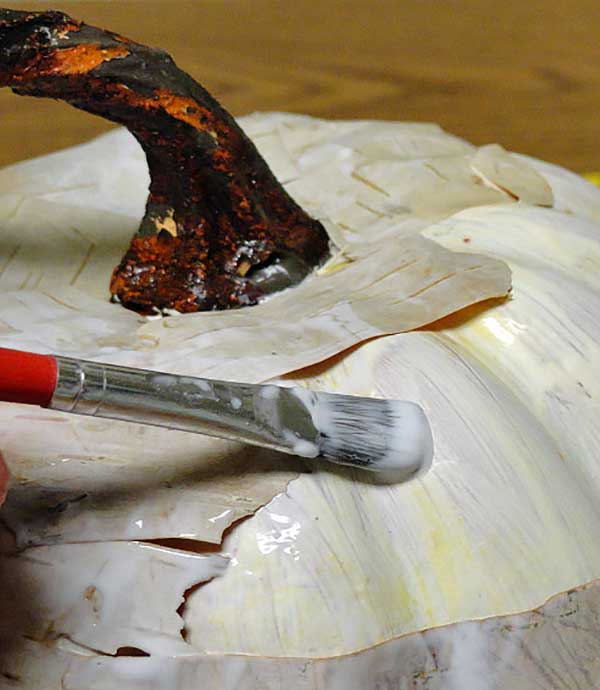
- Add Another Coat Of Mod Podge
You can apply another coat of Mod Podge either after applying each piece or when all of the pieces are in place. This top coat helps to bind all of the pieces together.
- Spray Pumpkin With Acrylic Sealer
Once all of the pieces are in place and the top coat of Mod Podge is dry, spray the pumpkin with acrylic sealer. The sealer will add another layer of protection. At this point, you can also optionally sprinkle on some glamour dust to add a little sparkle. Do this while the sealer is still wet.
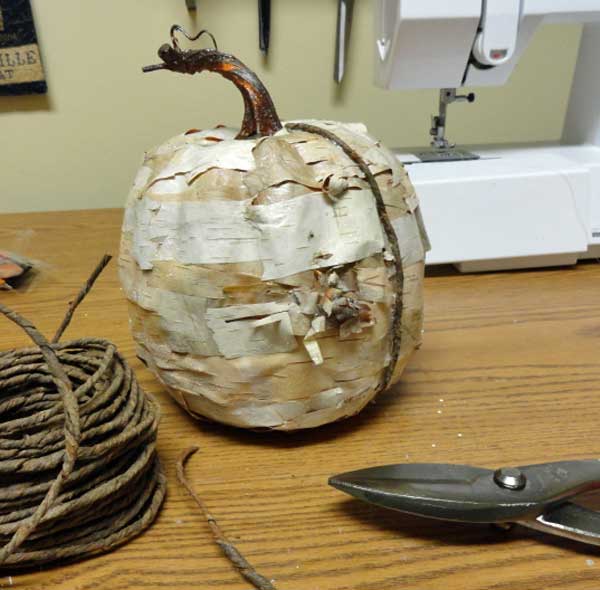
- Define The Pumpkin With Bark Covered Wire
Cut sections of bark covered wire, with tin snips, to place in the vertical grooves of the pumpkin. The length should go from the base of the stem down to the center bottom of the pumpkin. Use E6000 craft glue to attach the wire to the grooves.
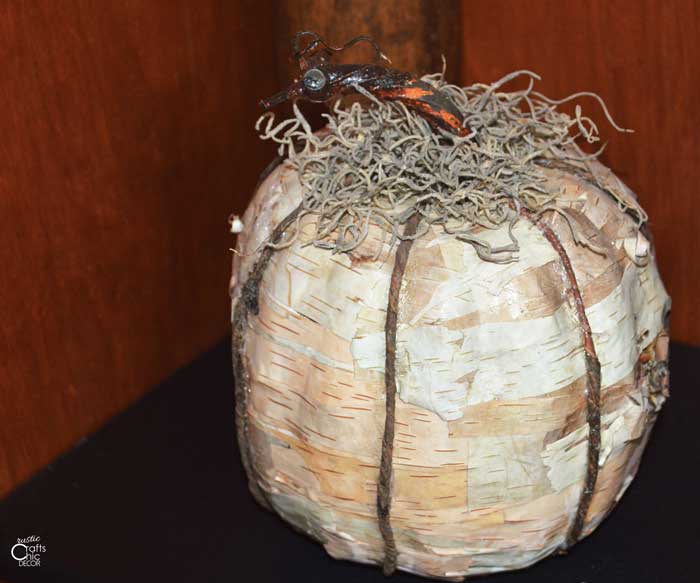
- Decorate The Top With Spanish Moss
When all of the wire is in place, apply tacky glue to a one inch diameter around the stem. Press some Spanish moss into the glue. This gives the top of the pumpkin a nice finished look.


Finished Rustic Pumpkin Craft
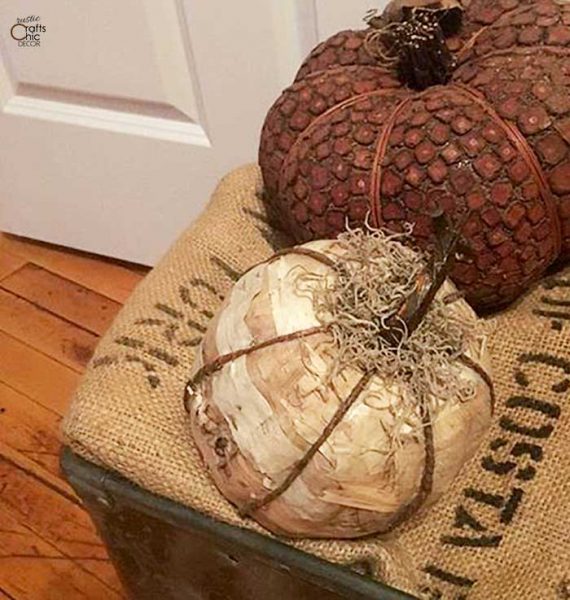
I combined my birch bark pumpkin with another rustic pumpkin that I had actually purchased. The look still says Fall but just in a more rustic way. Because the birch bark is coated with both a layer of Mod Podge and sealer, it is very durable.

Although I used real birch bark for this project, it could also be done with just paint. See an example of this with the vase I painted to look like birch bark. The result is pretty realistic.