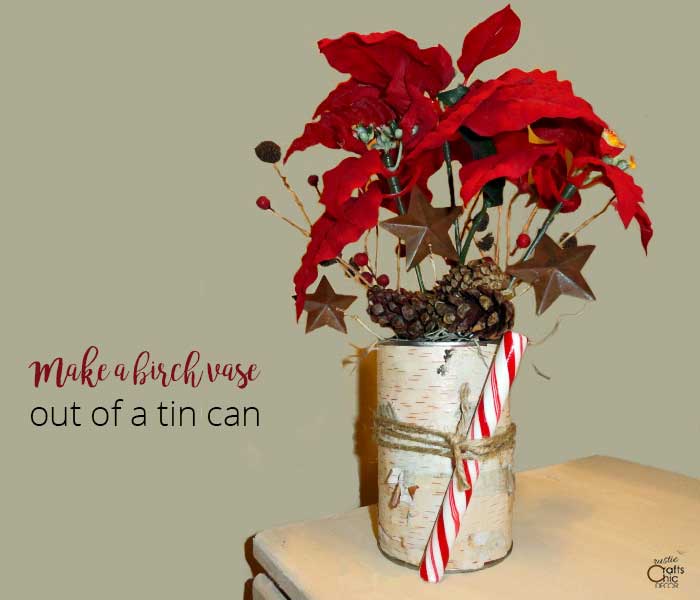
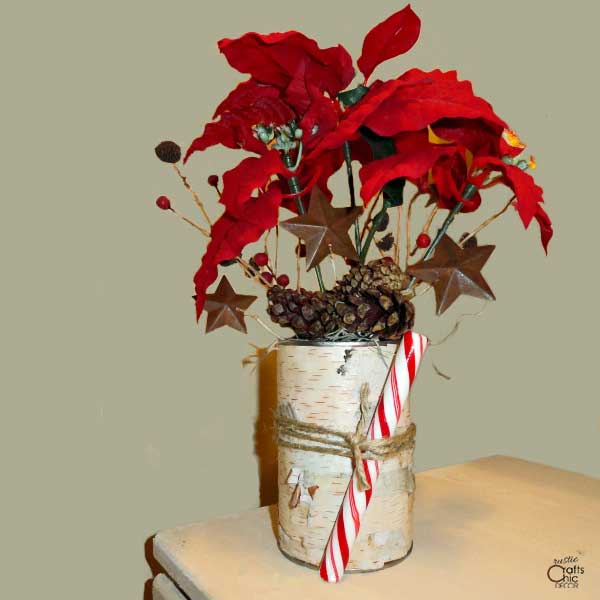
The best craft projects, I think, are made up of recycled items or things directly from nature. That is why I decided to make a birch vase using both. I used a tin coffee can, that was ready to be thrown away, and some birch bark that I had collected from outside. Together they make an easy and affordable vase for a Christmas centerpiece.
DIY Birch Vase
This is a craft project that anyone can do regardless if you have access to real birch bark or not. Birch bark can also be purchased at stores like Save On Crafts. Or, you could use patterned birch bark paper from a craft store but the look will be a little less authentic.
Materials Needed For Birch Vase
- small strips of birch bark
- a cylinder can in the size that you want your vase
- Mod Podge decoupage in matte finish
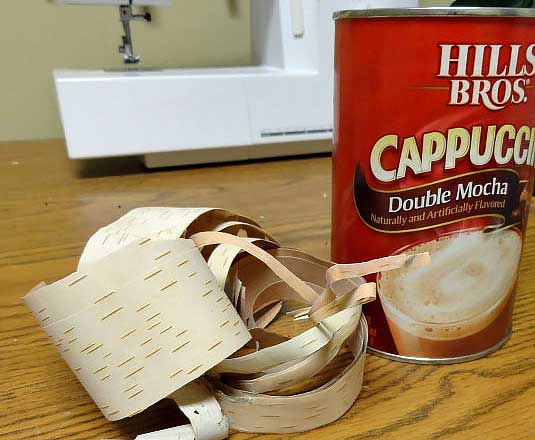
By the way the birch vase looks when it is completed, you would thing that one large section of birch was wrapped around the can. If you have ever worked with birch bark before, you will know that it’s not always easy to get or peel a large enough section. However, it’s easy to work with small strips of thin bark. You just have to be careful when laying out the final strips to make sure it ends up looking like an authentic log.
Instructions For The Entire Christmas Centerpiece
Apply The Birch To The Can
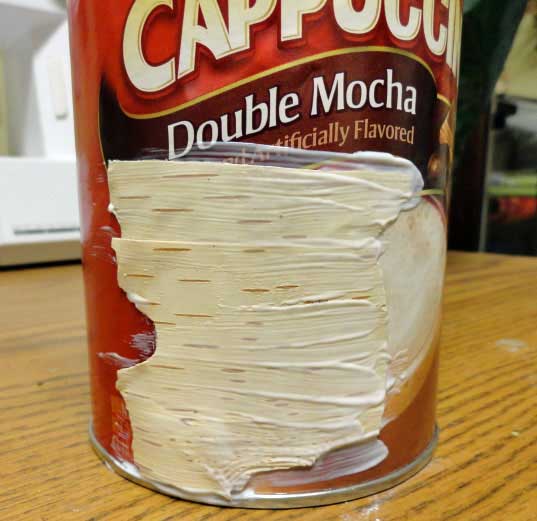
First, I started applying small sections of birch bark to my can using decoupage. I applied one coat to the back of the bark and then another coat to the top of the bark when it was adhered in place on the can. With the decoupage, I kept adding pieces, overlapping as I went, until the entire can was covered. At first, I used the plainest strips of bark for coverage. It doesn’t look real authentic at this point. However, I saved the curling pieces of bark and the ones with knots for the end. I strategically placed them so that the vase started looking like a real log.
If you purchase your birch bark, it comes in large sections. You will most likely be able to just roll it on the can and adhere with glue. The same is true with patterned paper. Just be aware of the seam. You may want to play around with some smaller pieces to cover it.
Once my can was completely covered with the birch bark, it started look much more like an actual birch log. This is exactly how I wanted my birch vase to look.
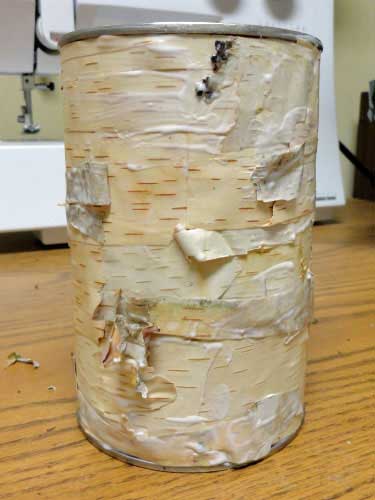
At this point the decoupage was still wet but once dry it looks like a log.
Fill And Decorate The Birch Vase
To make my Christmas centerpiece, I just used floral picks that I already had on hand. I had a faux poinsettia plant that I wasn’t using anymore and also an old weathered wreath that I stole red berry picks and rusty stars from. For a more planned out centerpiece, I could have purchased the exact florals that I wanted. But, since I don’t like things going to waster, I felt good about reusing what I had.
Before adding my floral picks, I inserted a round Styrofoam ball that was trimmed a little to fit inside the can. I used this to poke my poinsettia flowers and other picks into.
Once I had the right amount of florals added, I filled the can with Spanish moss to further secure the Styrofoam and glued some small pine cones at the top of the can.
Finally, I tied a peppermint stick to the front and wrapped some jute string around the can a few times.
Even the peppermint stick was somewhat recycled since it was unopened from last year. However, now that I took it from it’s wrapper, I will be throwing that out at the end of the season!