Don’t throw out your empty tin cans! Instead use them for storage. Okay, it will take a little crafting to get them to look nice. However, a tin can works great for storing pens, paint brushes, or other craft and office items. You can also use them in the kitchen for storing utensils. With all of the potential functional uses, it only makes sense to recycle your cans for crafting. This can craft shows how to decorate your cans to use for storage.
You can do almost anything with a can to give it a unique decorative look. From painting it to covering it with paper or fabric, you can create a style that fits your taste. It’s even easy to add a handle to a can for hanging or carrying. I’ll show you a variety of ways to decorate a can to give you a little inspiration.
Besides using tin cans for storage, see how I also recycled six pack containers and cereal boxes for handy storage containers.
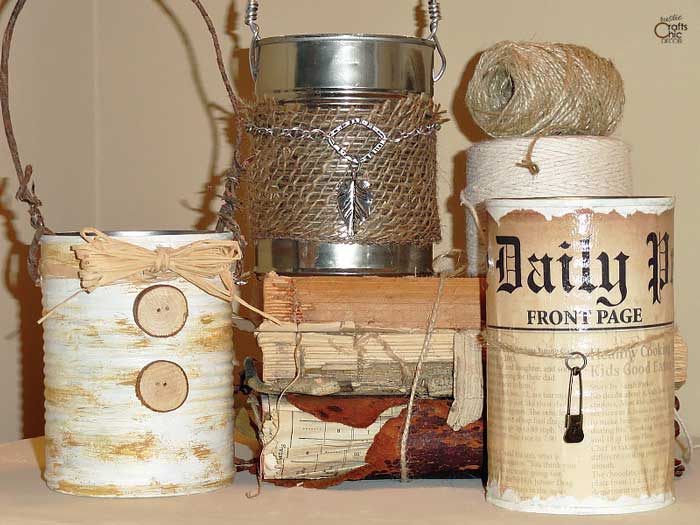
Three Options For Decorating Cans
Because all of my decorating options use different materials, I’ll go over each style individually. I’ll begin with a can covered in newspaper, then go over painting, and covering with burlap.
Newspaper Covered Can Craft
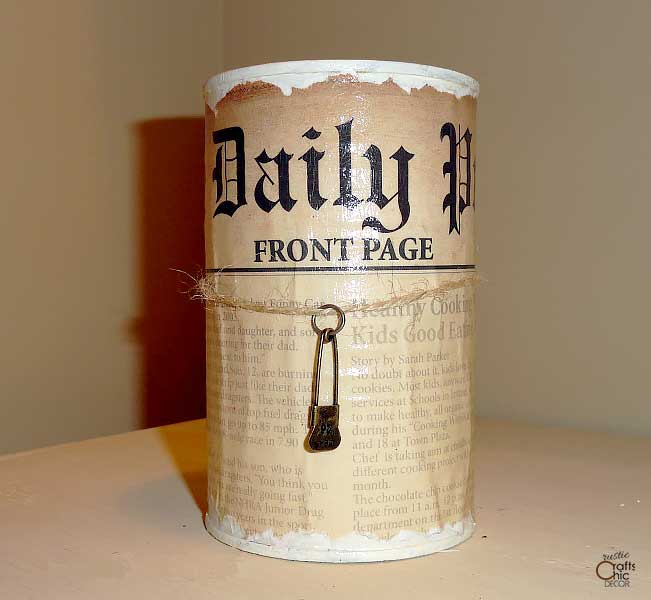
Although you could easily cover a can with real newspaper, I chose an aged newspaper craft paper to cover the can with.
Instructions Using Decorative Paper
How To Cover A Can With Decorative Paper
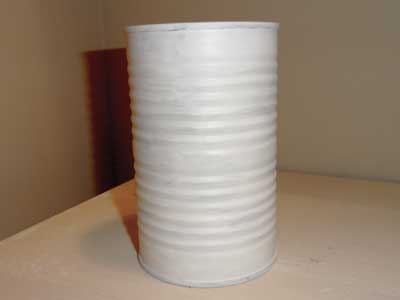
- Paint The Entire Outer Can
I started by painting the can with cream colored acrylic paint and let dry. Since I was planning on tearing the top and bottom edges of the paper, I wanted a light color paint to show.

- Measure And Cut Paper
Measure the circumference around the can and cut paper to that width. Then, measure the length of the can and pencil in lines for the top and bottom. You could cover the can fully with paper. However, for the torn edges, simply tear the paper at your two lines. This way some of the paint shows through.
- Brush Decoupage On Can And Apply Paper
Brush on Mod Podge decoupage over the painted can. Wrap the paper around the can on top of decoupage. Cover the paper with another coat of decoupage.
- Apply A Glossy Varnish
Once the decoupage was dry, I applied a glossy varnish to seal and protect the finish. Depending on the look you want, use whatever sheen of varnish that you want.
- Add Twine And A Charm
Simply string a charm on a section of twine and tie it around the middle of the can.
Tin Can With Handle
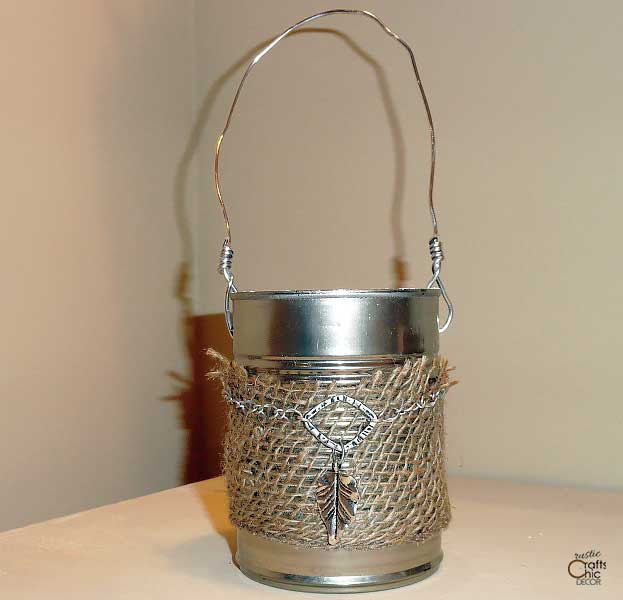
I kept one of the cans more natural and industrial. I did add a handle for a fun look and wrapped it with burlap and silver for a more monochromatic look.
Instructions For An Industrial Look
- Using a tin hole punch, punch a hole about a half inch down on each side of the can. If you don’t have a hole punch, just use a nail and hammer a hole through the tin. Loop a section of heavy gauge silver florist wire through the holes. Twist each end up and around the section of wire to secure.
- Cut a two inch wide section of burlap to fit around the can and glue in place with hot glue. Add silver embellishments like a chain and charm. Just cut a length of jewelry chain with a tin snips. Secure the two ends of the chain together, at the back, with a jump ring. Glue the chain at the back to keep in place.
Painted Can With Buttons
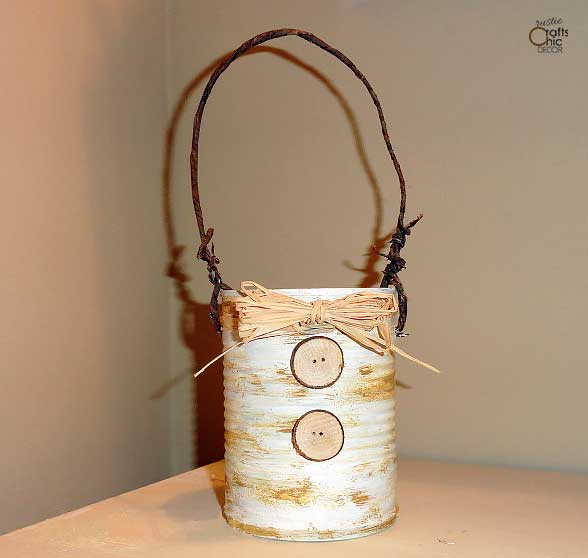
This last example is the most rustic. With distressed paint, wooden buttons, and bark covered wire, it is full of rustic goodness.
Instructions For Rustic Can
- Paint the entire can with cream color paint.
- Cover the painted layer with weathered wood crackle medium. You can find this in the acrylic paint aisle in most craft stores.
- Lightly brush on, in spots, a rusty metallic paint.
- Slice a large branch in 1/8 to 1/4 inch width.
- Drill two holes in each branch slice and adhere the buttons to the can.
- Make a handle just like the previous example accept use bark covered wire.
- Tie raffia around the top of the can and secure with tacky glue.
I’ve never heard of bark covered wire. Where do you get that? Sounds like something I need (-;
Linda, I bought my wire from Joann Fabrics. I think I may have seen it at Michaels too.
Thank you Renee, I will have to make a trip to Joann’s.
Your cans are wonderful. I will now look at can in a different light. Ive bought some burlap recently for a project but still have some left over, and I have mod podge but haven’t really used it much. But now the wheels in my head are turning. Thanks for the inspirations.
Your tin can crafts are amazing! Thank you so much for sharing with us how you made them. I hope it’s okay, I just couldn’t help but feature them on my tin can crafts round-up I just finished.
Thank you so much for sharing 🙂
Thanks Jamie! and thanks for the feature 🙂
Renee, we featured you this week! Awesome project!
We’d love you to submit another!
-Kim
Thanks Kim! I did link up again!