Have you ever looked at a cereal box and thought “hey that would be perfect for storing paper in my pretty office”….? Probably not! However, that is exactly what I did one day when I needed to organize my office. After finishing a box of cereal, the idea came to me about recycling it. It was a great size for storage but just needed to be made pretty. And, that was the beginning of this cereal box project.
My Cereal Box Project
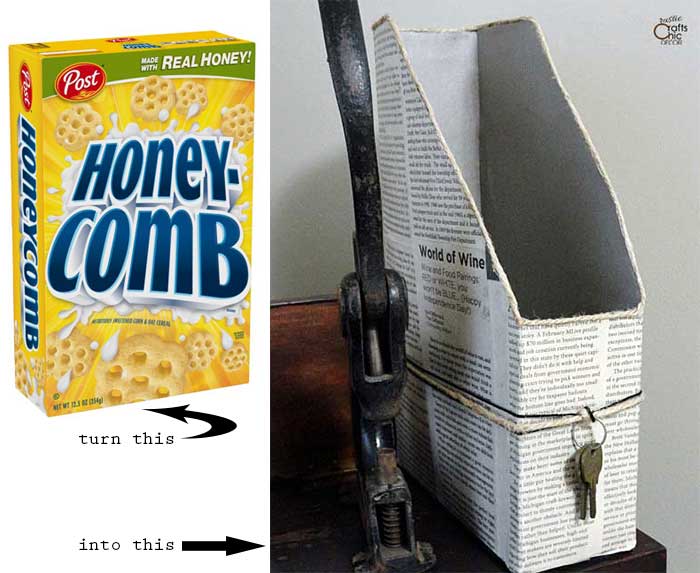
By just making a couple of cuts, covering the box with decorative paper, and adding some embellishments, I was able to turn a cereal box into a decorative paper holder. Follow the directions below to make your own paper or magazine holder. Although I used newspaper for my project but any decorative paper or paint can be used to create your own style.
Materials Needed For Cereal Box Project
- cereal box
- newspaper or other decorative paper
- old keys or other embellishments
- 2 pieces of plain 12×12 craft paper for lining
- Mod Podge matte finish decoupage
- paint brush
- 42 inch section of twine
- 20 inch section of black embroidery string
- tacky glue
- scissors
Cereal Box Project Instructions
Time needed: 30 minutes
Turn an empty cereal box into a stylish organizer for your home or office in just a few easy steps.
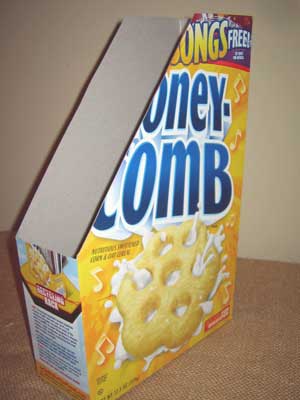
- Cut The Box To Shape
First, cut off the top flaps from the cereal box. At one of the narrow ends, measure six inches up and draw a straight line. At the other narrow end, measure out from the back toward the front about 3 1/4 inches on both sides. Now draw a diagonal line from that point to your six inch up point on the short end. Do this on both sides. Cut the box to form your paper holder as shown.

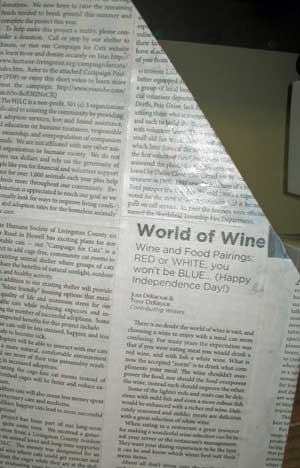
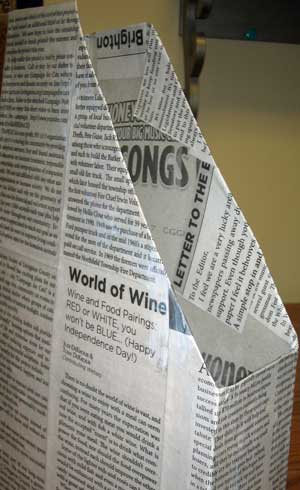
- Apply Paper To Outer Box
Now, start cutting out sections of newspaper and decoupage them to your box using Mod Podge matte finish decoupage. Using a medium size paint brush, brush some of the Mod Podge onto the box first. Next apply it to the back of the newspaper and set the paper in place. Now brush another layer of Mod Podge to the top of the newspaper. It will look shiny when it is wet. Continue doing this with all of your pieces, lining them up in a nice pattern with just a little overlap.
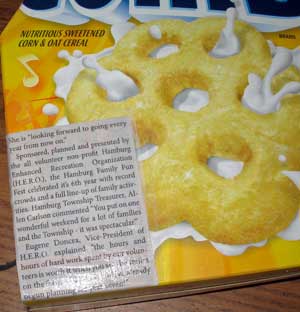
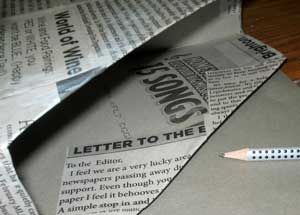
- As The Paper Dries, It Will Flatten Out
This picture shows how it looks when it is partially dry. The last piece put on was the one right above the World of Wine. You can see that it looks a little bubbly. It will flatten when it is totally dry, like the rest.
- Fold The Paper Inward Where It Meets At The Cut Edges
The inside edges will look like this when you are finished with the newspaper, which isn’t too pretty! You will now want to finish the inside with a layer of craft paper. I chose a shimmery silver craft paper to coordinate with the newspaper print.
- Line The Inside Of The Box With Plain Paper
Lay the box onto the craft paper, with the paper facing up, and draw an outline for your cutting edge. Cut out the paper and decoupage it into the inside of the box. Cut out sections for the other side as well as the two narrow sides and repeat the process of decoupaging.
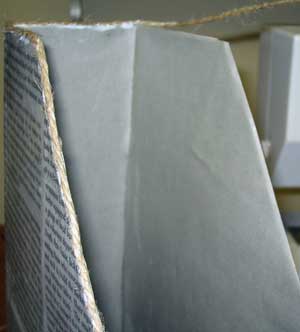
- Finish The Cut Edges With Twine
Put a bead of tacky glue around the edge and trim out the box with a section of twine or jute string. This glue dries nice and fast so it is easy to press the string in place and have it stay.
- Add Fun Embellishments
The last thing to do is to cut a section of jute string about 20 inches long and two section of black embossing string the same length. Tie your two keys, by a key ring, to the middle, and wrap the rest of the string around to the back. Secure the string in place with a knot and cut any access string. Secure the string in place with a bead of tacky glue at the front and back knots.
The Finished Cereal Box Project
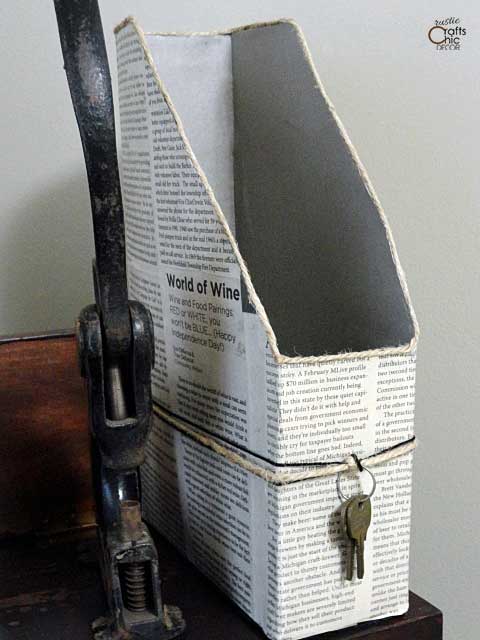

Because this cereal box project was made with all recycled materials, the paper holder was free to make.