An easy craft to make at Christmas time is your own stocking or two. There are so many materials to choose from to give yourself a custom look. I’m going to show you my DIY Christmas stocking that I made from a coffee sack. There are definitely pros and cons for using this material and I’ll explain what they are.
I had been saving some coffee sacks for awhile now to make Christmas decorations with. The pattern on my particular coffee sacks consist of a lot of red and green. Since I don’t typically decorate with those colors, I wanted to save them for Christmas. This leads me to my DIY Christmas stocking.
So, there are plenty of grain sacks, burlaps, and even coffee sacks that are much softer and finer than the material of mine. I would recommend using a material with a tighter and softer weave. The coffee sacks that I had were great for making placemats but not so nice for making a stocking. It was like trying to craft something out of a hay bale. My finger tips are never going to feel the same again!
However, I was determined to make a stocking anyway because I love the graphics on the coffee sack. That was one plus! Also, since I was planning on using the stocking for a decorative wall hanging, the sturdier texture worked well for that. No one would be sticking a hand down this stocking so no worry about injuries. Yes, the material is that rough and poky.
Most of the time, a stocking can be made easily with a sewing machine. With two layers of this heavy material, machine sewing was not an option.
DIY Christmas Stocking
If you can make a pillow, you’ll be able to make a stocking. The toughest part is just getting the shape right. However, there is an easy solution. If you have another stocking, that you like the shape of, you can just use that as your pattern. Otherwise, just draw out a stocking on paper until you get the look you want. Once you’re happy, cut it out and use that as your pattern,
cutting the pattern
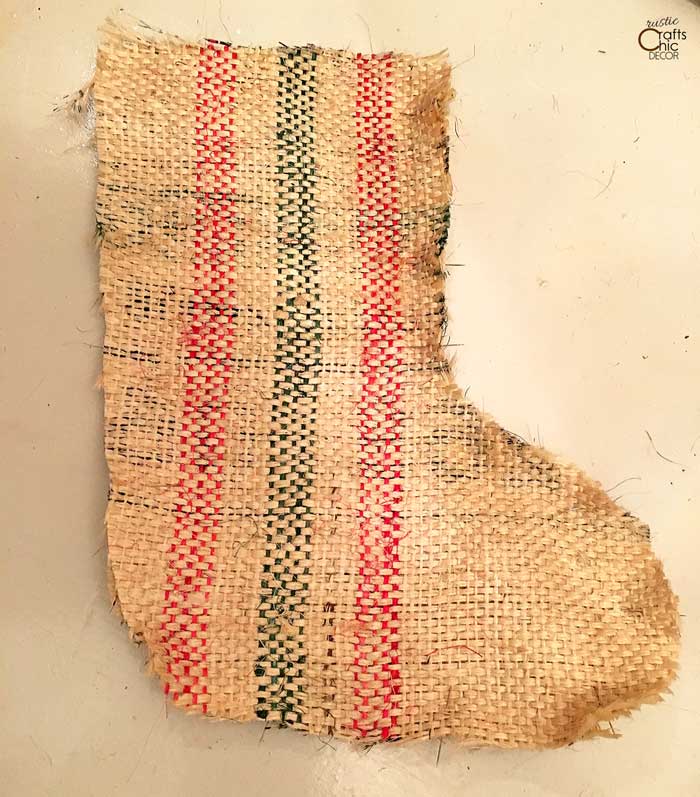
I had a stocking to use as a pattern. So, I just pinned that to my coffee sack and then cut around the stocking plus about 1/4 inch all the way around. You can see how thick the weave is on the coffee sack and how it was already starting to unravel! Again, it would be much easier and cleaner with a tighter weave.
Because I wanted to control the pattern on both sides of the stocking, I didn’t fold my fabric in half to do the cutting of two pieces. I’m not sure why I cared about that since you can only see one side when the stocking is hanging. But, if I want to switch directions of the stocking, it will have a nice pattern either way. Anyway, I did remember to flip the stocking around when I cut the second piece! If you fold your fabric with right sides together, you can cut both pieces with one cut.
Did I mention that because I had previously washed and dried my coffee sacks, that they were a bit wrinkled? I had pressed the coffee sacks that I used to make my placemats but it took forever. So for the stocking, I just got the fabric wet and it worked like a charm to flatten out my material.
sewing the pieces
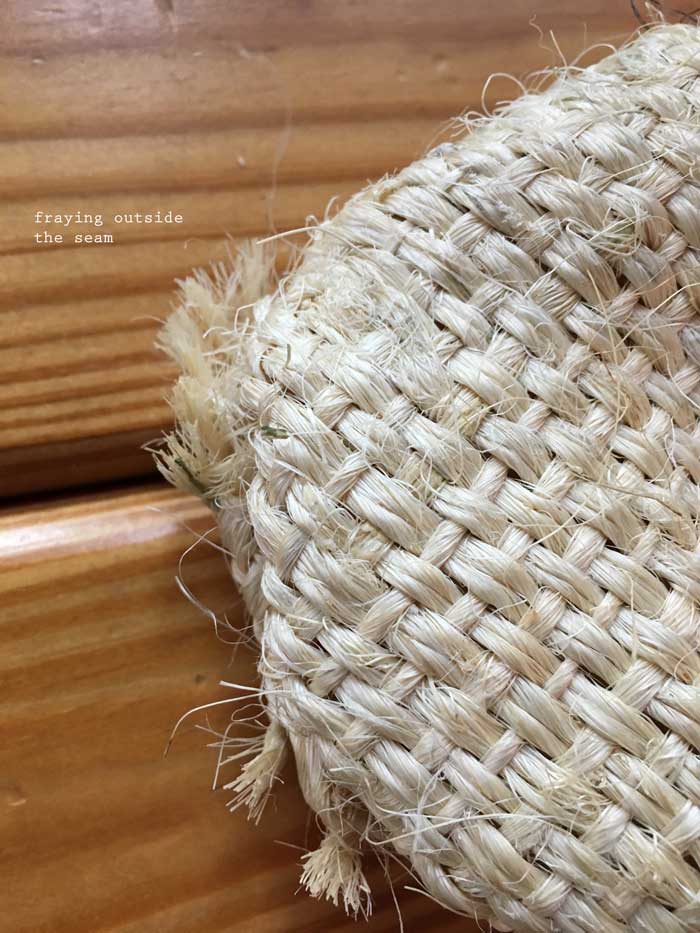
With right sides together, sew the two pieces together with 1/4 seam allowance. Make sure to leave the top open! Since I didn’t want to keep breaking needles, I sewed mine by hand using a back stitch. I needed the seam to be as strong as I could get it. Still, when I was finished and turned the stocking right side out, there were some frayed edges. However, I was anticipating that and had a plan.
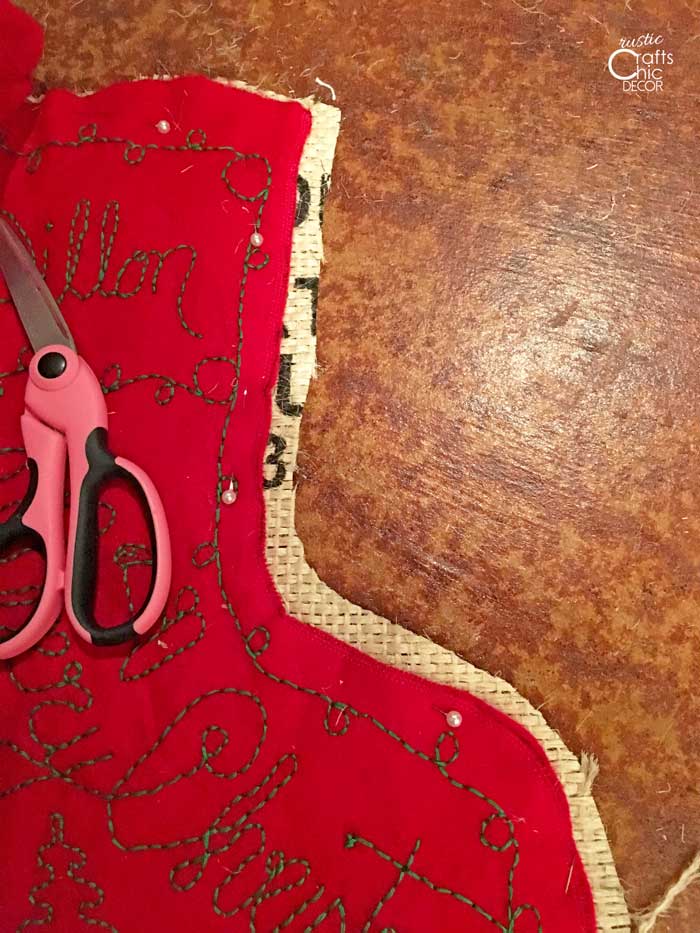
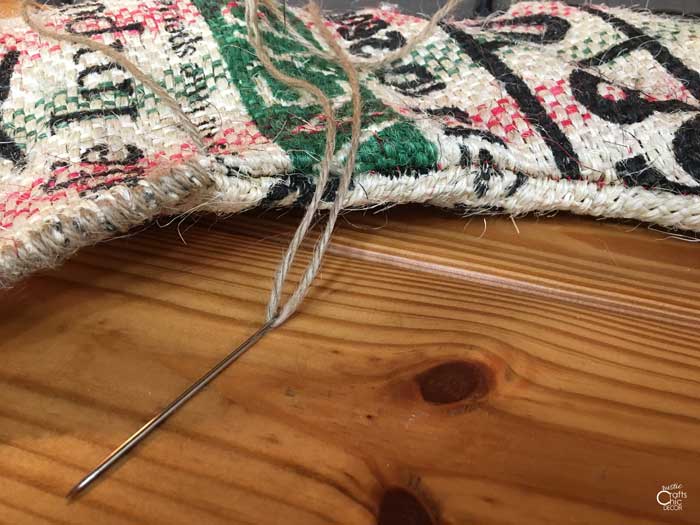
I wanted the edges to be finished with twine anyway so I began looping the twine around the seam. Here’s where I caused myself even more grief. The twine I purposely used was at thick at the coffee sack weave. Getting that embroidery needle through the fabric, with the thick twine, took some effort. But, I wanted good coverage so I carried on. There is a nice part to all that hand sewing though. I worked on the sewing at my cabin in front of the wood stove looking outside at the beautiful Fall colors! A perfect way to work on a DIY Christmas stocking.
finish off the top edge
After all of the sewing, I was left with an unfinished top edge. To give it a nice finish, I used a wide bow. Basically, I just folded the bow in half over the edge and stitched it in place. Starting at the back top edge, I left about six inches of the bow hanging down at the back seam. When I made my way around the whole stocking top, I left the finished end six inches long as well. When I was finished sewing, I tied these two lengths together in a knot.
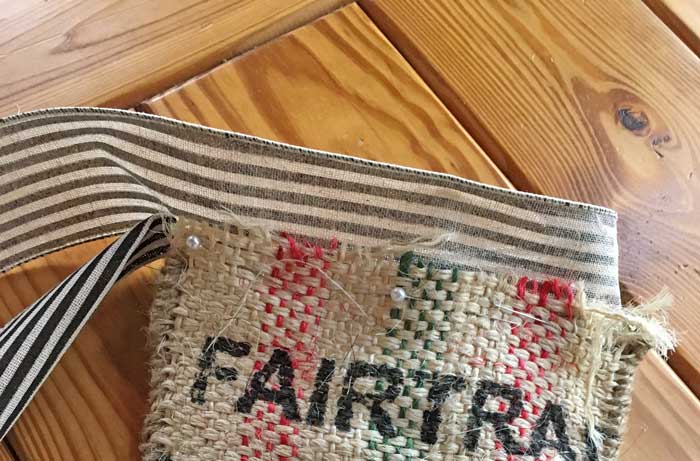
Here you can see that half of the ribbon is tucked inside the edge of the stocking. Next, I flipped the other half of the ribbon over the edge and pinned in place. The beginning and ending lengths of the ribbon are hanging at the back. When I tied the bow ends together, I looped a section of twine through the knot for hanging the stocking.
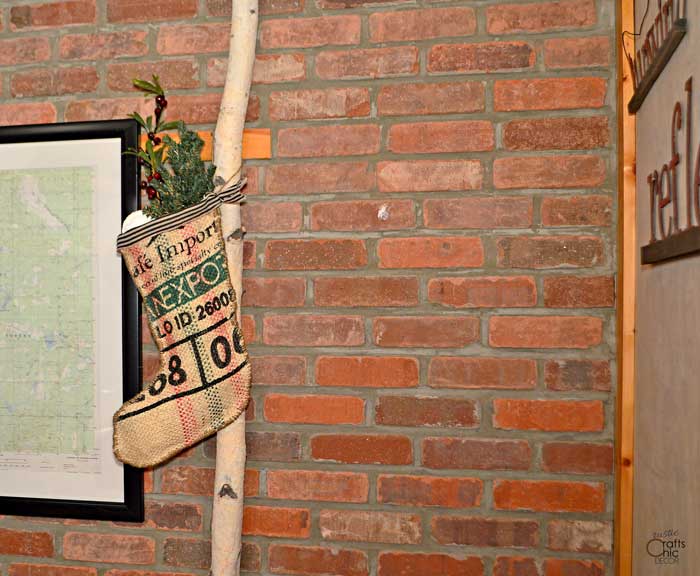
fill the stocking
Since I was using this stocking as a decoration, I wanted to fill it with a little Christmas cheer. I first placed a small amount of pillow stuffing into the stocking to give it the right stuffed look. Then, I inserted a tiny pine tree, a Christmas berry sprig, and one of my homemade snowballs into the top.

And, my DIY Christmas stocking was finally complete!