Have you ever been in the mood to create something but didn’t know exactly what you want to make? This happens to me quite a bit. When it happens it means I need to take a little walk through our garage or pole barn. Since so many of my projects are all about reusing what I have, sometimes all it takes to get inspired is to look at all of our old junk/treasures. This is exactly what I did before making this DIY Fall porch sign.
We normally have a nice amount of scrap wood in our garage. My husband likes to save a lot of his wood scraps which I’m always questioning if we really should keep so much. However, at times like these I’m glad we have just what I need. It’s always a fine line with saving things. I don’t like to have too much saved up but if I throw something out, it’s basically a guarantee that I will need it later!
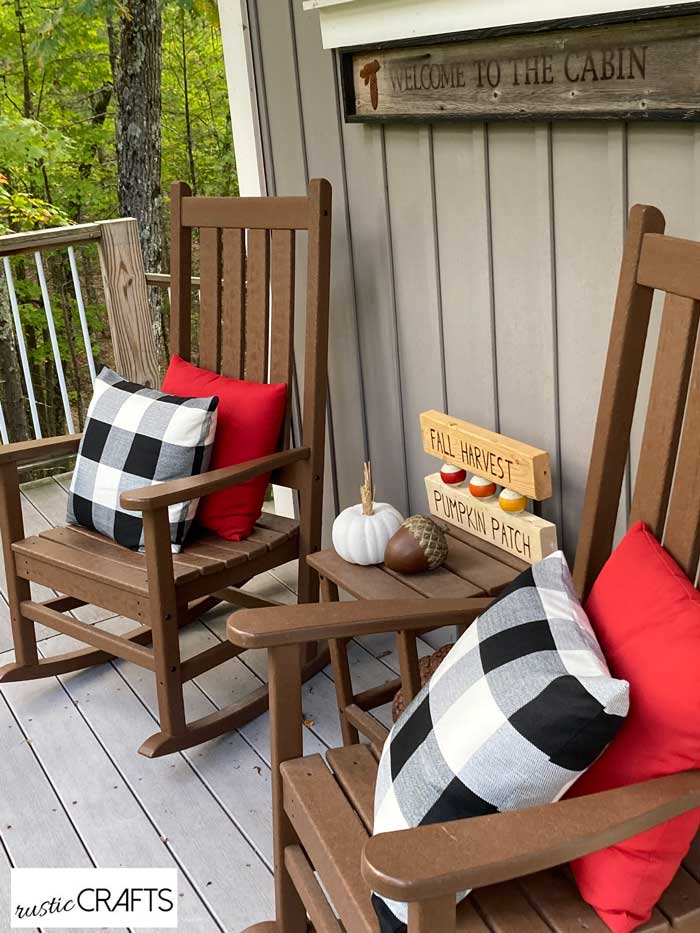
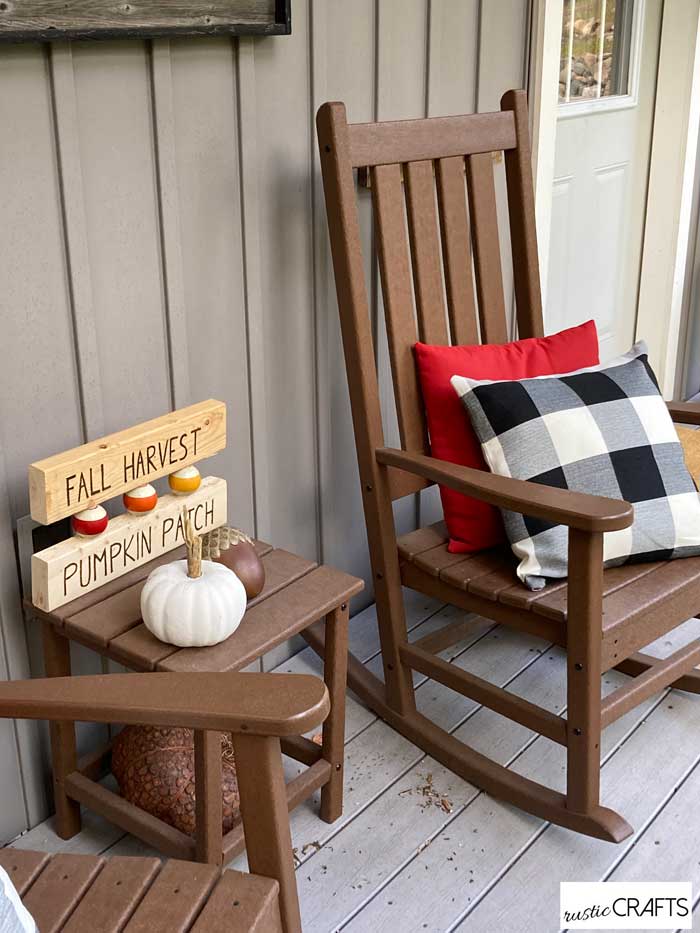
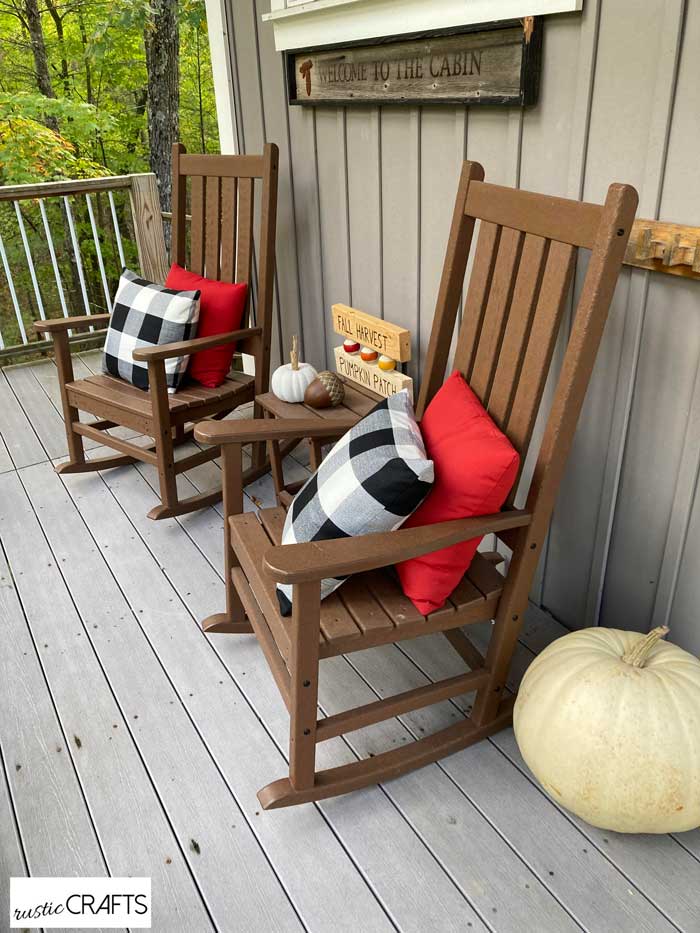
For this project, I found a couple of sections of 2x4s right away. This got me inspired to make a Fall sign for our porch. I was about to redecorate our porch for the Fall season anyway so a new sign would be fun. I also have a container of old billiard balls sitting in my craft room that I have been dying to use. So, I pulled out three in yellow, orange and red to incorporate into my sign is some way. What I ended up with was a rustic sign with a touch of playful color. I’ll show you how easy it was to put together this DIY Fall porch sign.
Related: 100 Clever Sayings For Wood Signs
DIY Fall Porch Sign
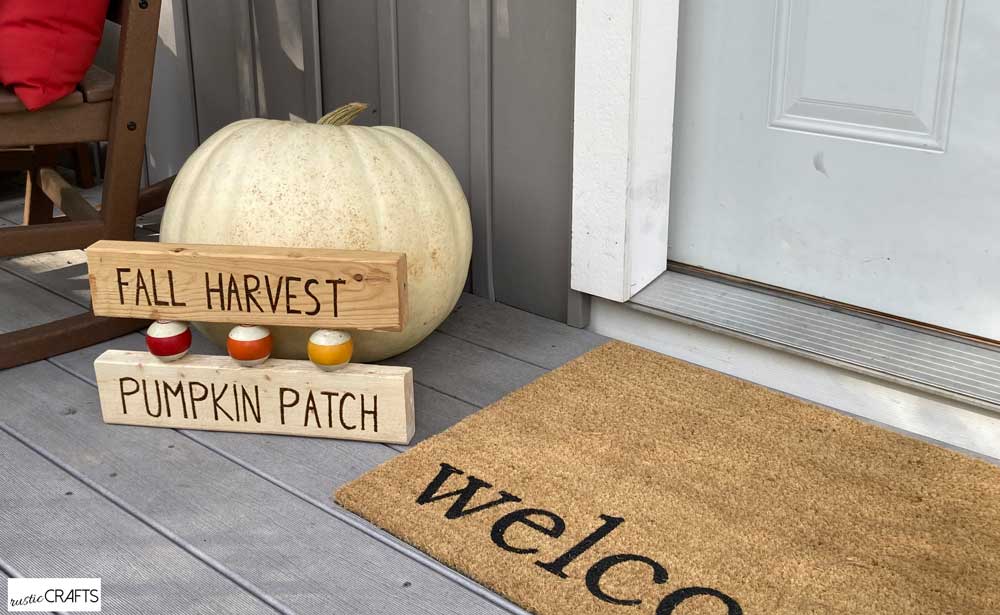
One of the reasons I like rustic crafts is because they are typically simple and don’t have to be perfect. It gives you so much freedom to just create without a lot of rules to follow. For this Fall sign, I used my wood burning tool to go over my freehand writing. I thought about using a stencil or a lettering transfer technique but in the end decided to keep it simple so it would look more rustic. I figured the pool balls could be sandwiched in between the boards to add a little Fall color.
How To Use A Woodburning Tool For Sign Lettering
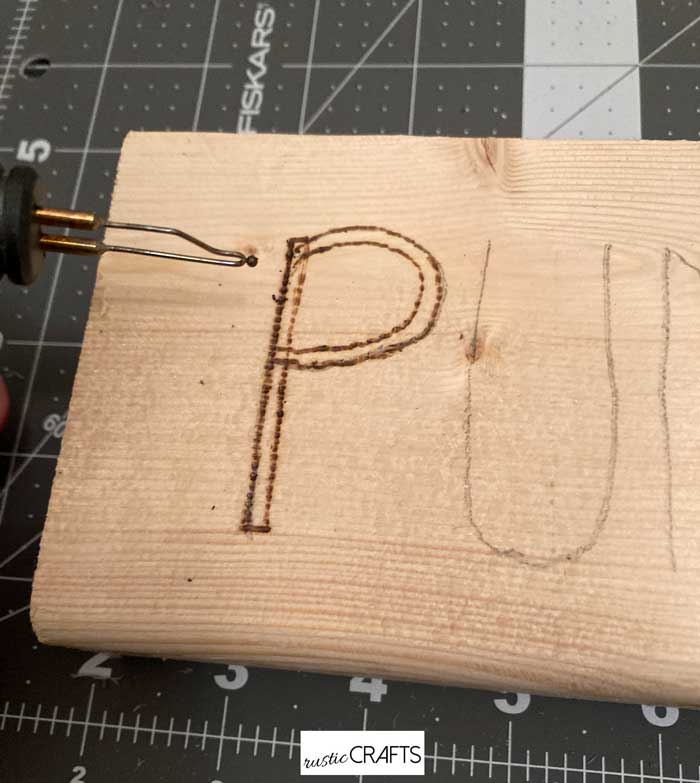
Most woodburning tool kits will provide several different tips for the tool. For signs, you will want your lettering to be thick enough to read your words legibly. I like to start out with my pen tip to trace over my handwritten letters. Then, using the same tip, I block the letters out a bit. Depending on how thick your letters are, you can either fill them in with the same pen tip or use a thicker tip. My letters were still fairly thin so I used the pen tip for most of it.
For harder woods, you may have to write more slowly with the woodburner tool. It needs that longer contact to burn through. You might have to go over your letters a few times trying different speeds and pressures to see what gives you the best result for your type of wood.
Related: Make A Woodburned Recipe Keepsake On A Cutting Board
How To Attach Billiard Balls To Wood
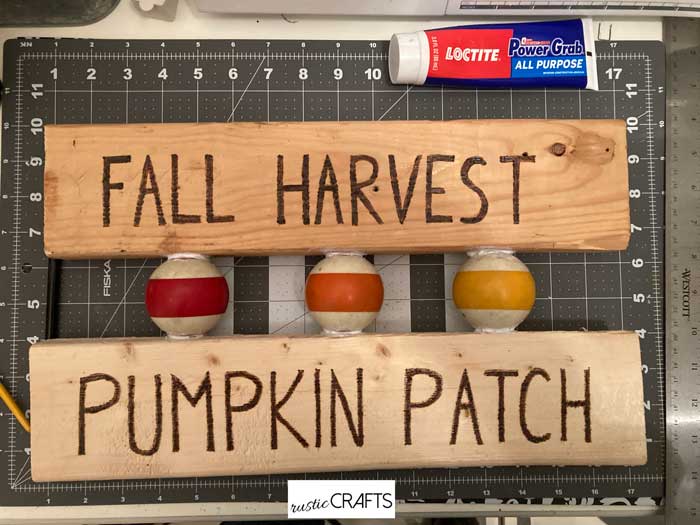
I love experiments that work out! Attaching a billiard ball to wood seemed like a project I would need a drill press for and maybe a threading tool. However, since this project was for myself and I really didn’t have anything to lose, I tried one of my favorite adhesives.
When I put up thin brick in our cabin kitchen, I discovered a construction adhesive that I absolutely love. It’s Loctite Power Grab which takes hold almost immediately. So, even though I had my doubts that a slippery rolling object would actually adhere to anything without screws, I tried some Loctite Power Grab in a tube.
First, I adhered each ball into place on the top of the bottom board. I held each ball for a few seconds and when I let go the ball stayed in place. Perfect!
What Not To Do
Next, because I get anxious to see the final result, I added a dab of glue to each of the tops of the balls. This was before letting the adhesive on the bottom dry. Not a good idea! Then I set the top board on the balls. The balls got a little roll-y at that point and it was hard to align the wood in a way that I thought it would sit securely. For a minute, I felt like I was playing stack toys with my grandkids and just waiting for the whole thing to tumble over. So lesson learned, be patient and wait for the bottom adhesive to dry!
A Better Solution
I ended up taking it all apart and starting over because as I was working on it earlier, I realized that it would be much easier to do this with the boards and balls flat on the table. Since the adhesive takes hold so quickly, I didn’t even need to use clamps as it was drying.
With bated breath, I went to check on the whole sign configuration the next day. First, I was happy to see that the glue dried clear! Then, I couldn’t believe how sturdy it ended up being. It feels super secure which I am very excited because I have other projects, using pool balls, that I’m thinking about!
Related: 100 Easy Fall Decorating Projects
Simple and Rustic Fall Porch Sign
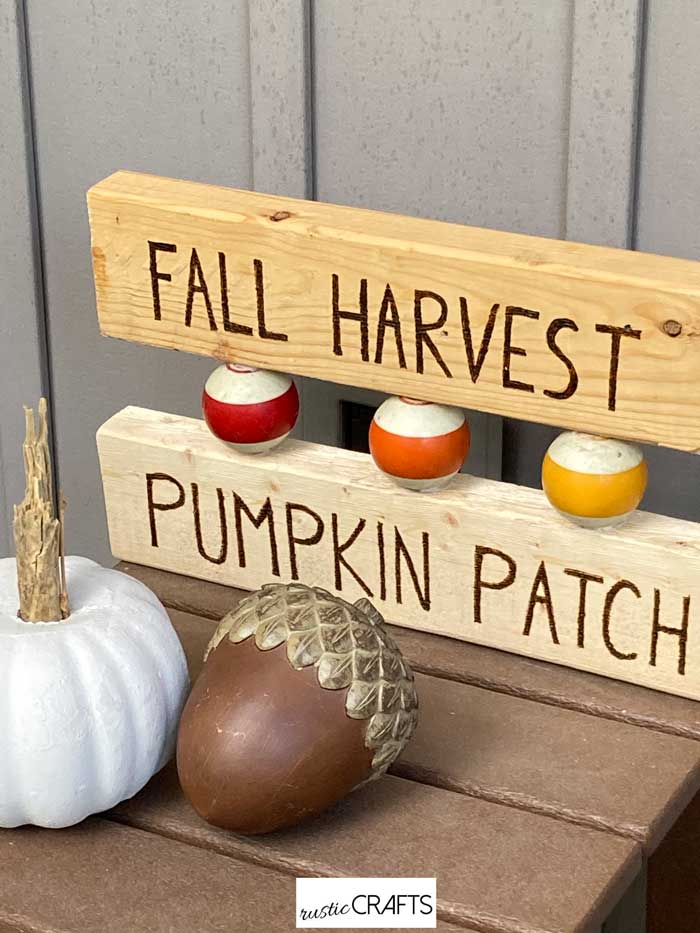
So my porch is feeling a little more festive for the season now. I feel confident that this will hold together for a long time! If the Power Grab adhesive can hold bricks on the wall, I guess I’m not too surprised that it would hold my sketchy tower of seasonal fun in place as well!