Birch bark decor is popular in rustic decorating. But what if you don’t have access to real bark? Although a lot of craft supply stores are now carrying birch bark, it may not be ideal to use real bark for your particular project. Depending on the size and shape of the item you want to look like bark, it may be easier to use paint. Surprisingly, you can create realistic tree bark with just a little paint. I’ll show you how to paint pretty much anything and get the look of real birch bark.
How To Paint Realistic Tree Bark
This post contains recommended product links. If you make a purchase through one of the links, I will earn a small commission.
When you look closely at tree bark, you will notice several layers of colors and texture. Because of this, it’s necessary to use several paint colors as well as something to give the item texture. I use a crackle medium with my paint to get some peeling similar to birch bark.
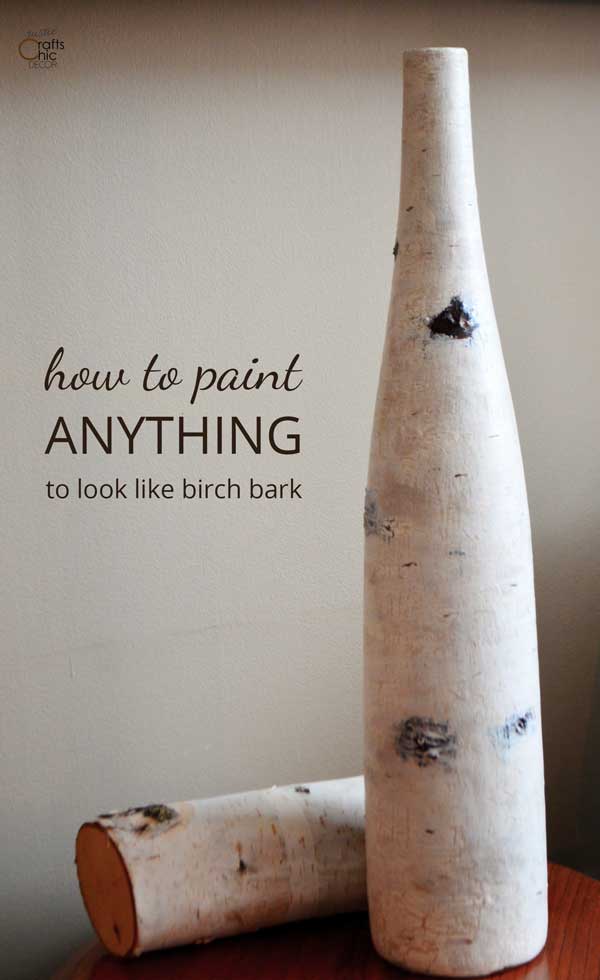
Supplies Needed For Birch Bark Look
- acrylic paint in these colors: antique white, sand dune, golden brown, coal, espresso, white birch
- Zinnser Bulls Eye primer (if you are painting over a glossy surface)
- DecoArt Dimensional Effects texture paste
- Folk Art crackle medium
- paint brushes
- something to paint
Instructions For Painting Realistic Tree Bark
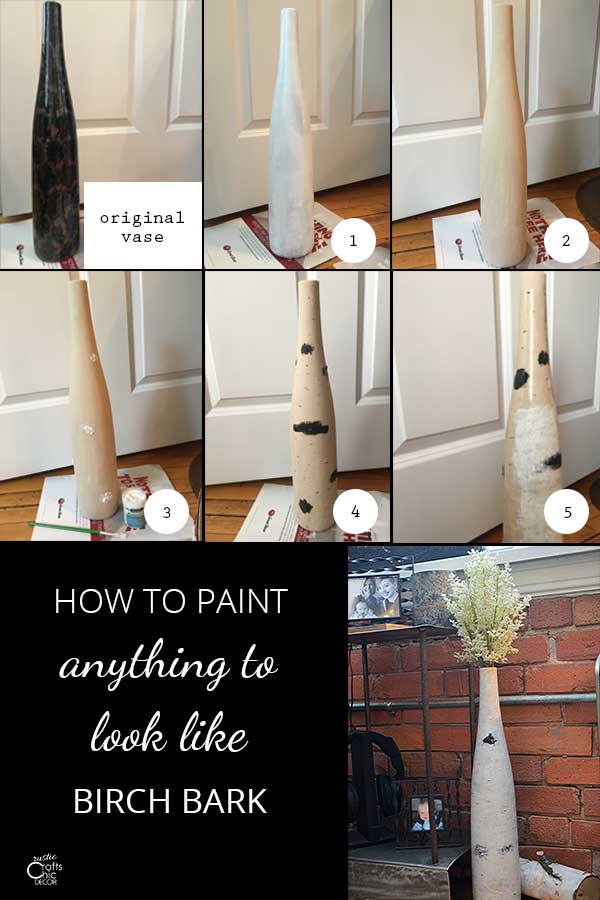
I’m going to show you how I painted over an old vase to give it the look of birch bark. You can apply these instructions to anything that you want to paint to look like realistic tree bark.
How To Paint Realistic Tree Bark
- Prepare Your Item For Painting
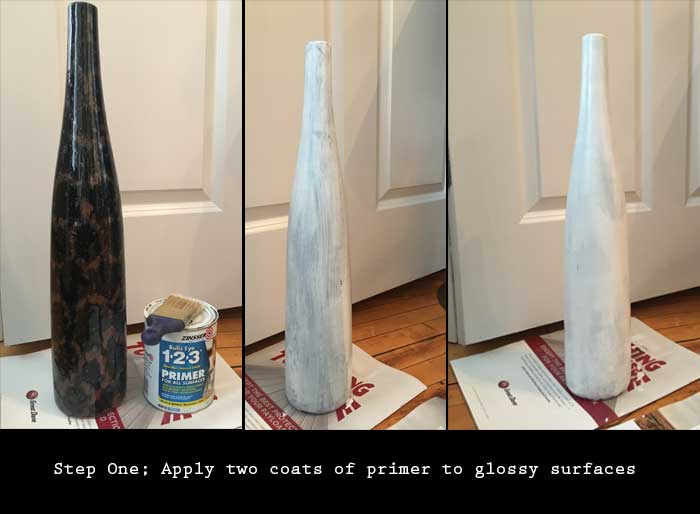
Before painting anything, your item should be free of dirt and any loose paint. If you are painting over a glossy surface, you will need to apply a primer so that the paint will adhere well. Since I was painting over a glossy vase, I first primed it with two coats of Zinsser Bulls Eye primer. I’ve used this primer before painting ceramic tiles before and it made paint adhesion a breeze.

- Paint Your First Layer Of Acrylic Paint To Look Like Bare Wood
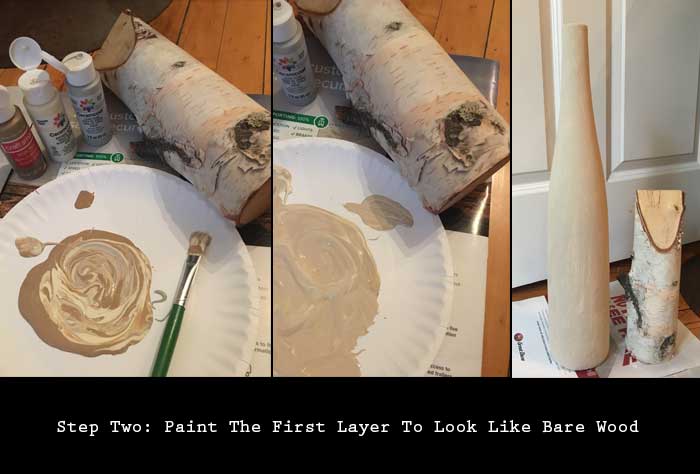
To get an item to look like realistic birch bark, you need to paint several layers. I start with a layer that looks like bare wood. If you peel off the bark of a real birch log, this is the color you would see under the bark. You can find an acrylic paint in the color you want or mix a few to get your exact shade. Since I like to mix paints, I used a combination of antique white, sand dune, and golden brown. Just keep playing around with the colors until you get a mix that you like. I used a real birch log as my inspiration so I mixed until my paint color somewhat matched the bare wood of the log. After painting, let dry completely before going to next step.

- Add Texture Paste In Small Spots Randomly Placed
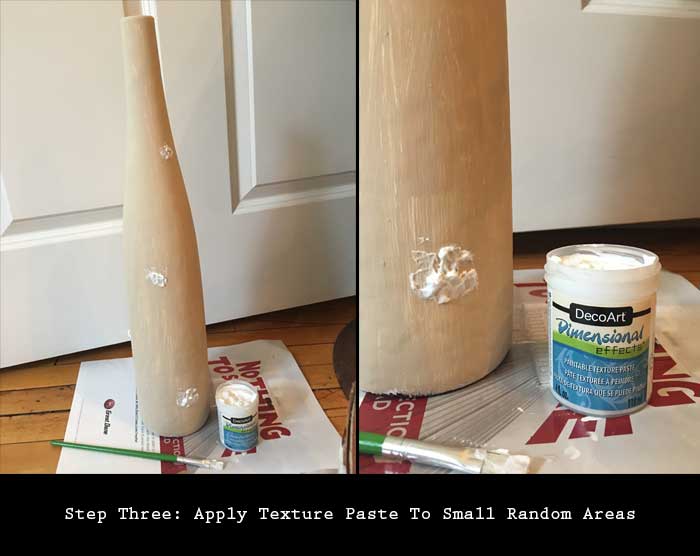
Since a birch log has some rough raised areas that are darker in color, you want to also add this texture to your painted item. With a paint brush, apply some of the texture paste in small areas. Put it on a little globby versus brushing it flat on. Let dry.

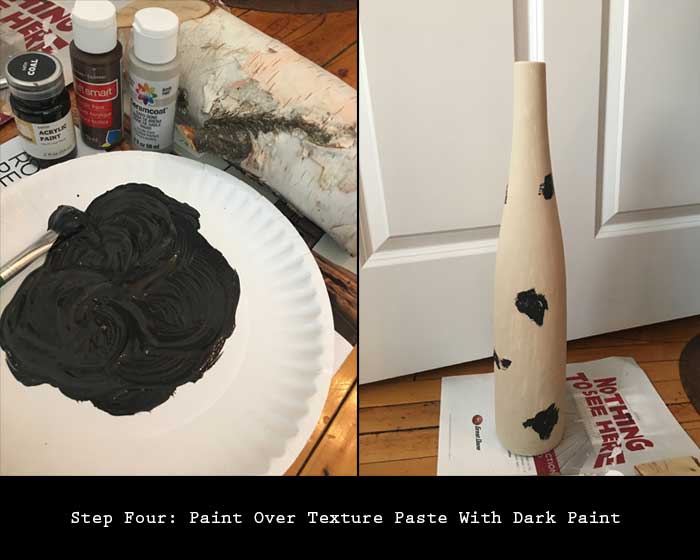
- Paint Over Spots Of Texture Paste With Blackish Brown Paint
Because the raised areas on birch bark are dark in color, the texture paste needs to be painted a dark color. I mixed coal, espresso, and sand dune together to get a dark color similar to the dark areas of my real birch log. You can overlap the texture paste a little as well.

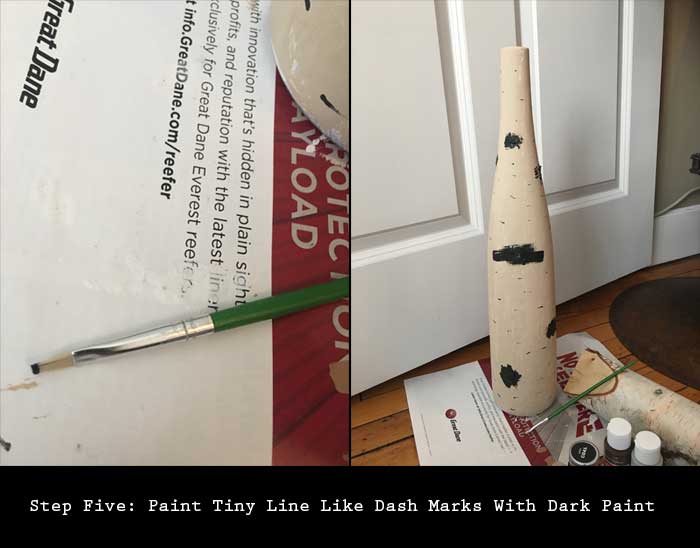
- Add Thin Dash Marks With The Same Dark Paint
If you look at birch bark, you will see small little dark lines throughout the bark. With a stiff small paint brush, add lines throughout the item that are similar to thin dash marks.

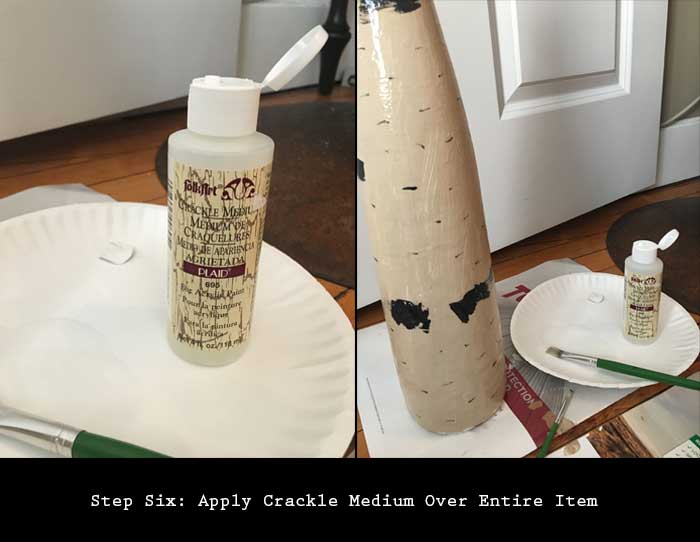
- Apply Crackle Medium Over Your Entire Item
Now that your entire base layer is complete, apply crackle medium over the entire item. Let dry completely. When the top coat of paint is applied to the crackle medium, it will begin to separate or crack to show some of the base layer of paint. This is what really gives a realistic look to the birch bark effect.

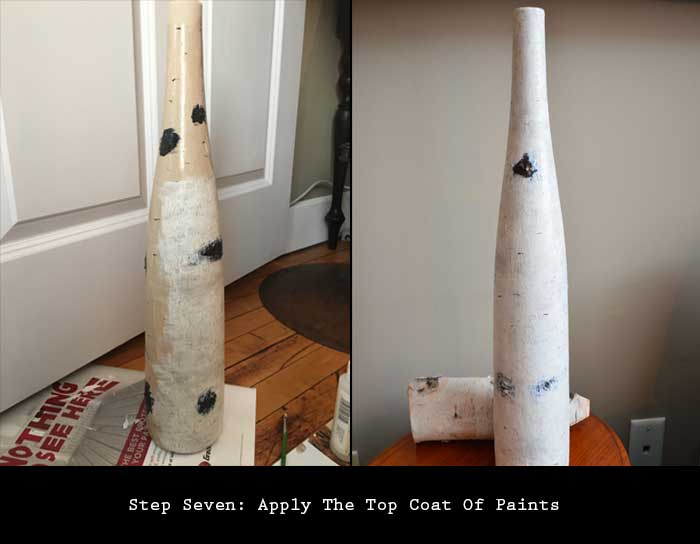
- Apply The Top Coat Of Paint In Colors Of Birch Bark
Now for the fun part! Apply your top coat of paint and watch the magic happen. I used primarily white birch colored paint. However, I blended in a little bit of sand dune, which is actually a light grayish color, in some areas. I did the blending while the paint was wet. First I painted everything around the dark spots. Then, I painted over the dark spots with either espresso or white birch, depending on where I wanted the dark spots to look somewhat hidden under the bark or completely over the bark. This gave it a realistic color since birch has so many variations in the bark. As the paint starts to dry, you will see it pulling away and crackling from the base layer. This adds to the dimension, tone, and texture of the finished coat.

Finished Faux Birch Bark Vase
I am really happy with how this project turned out. The finish matches so well with an actual birch log.
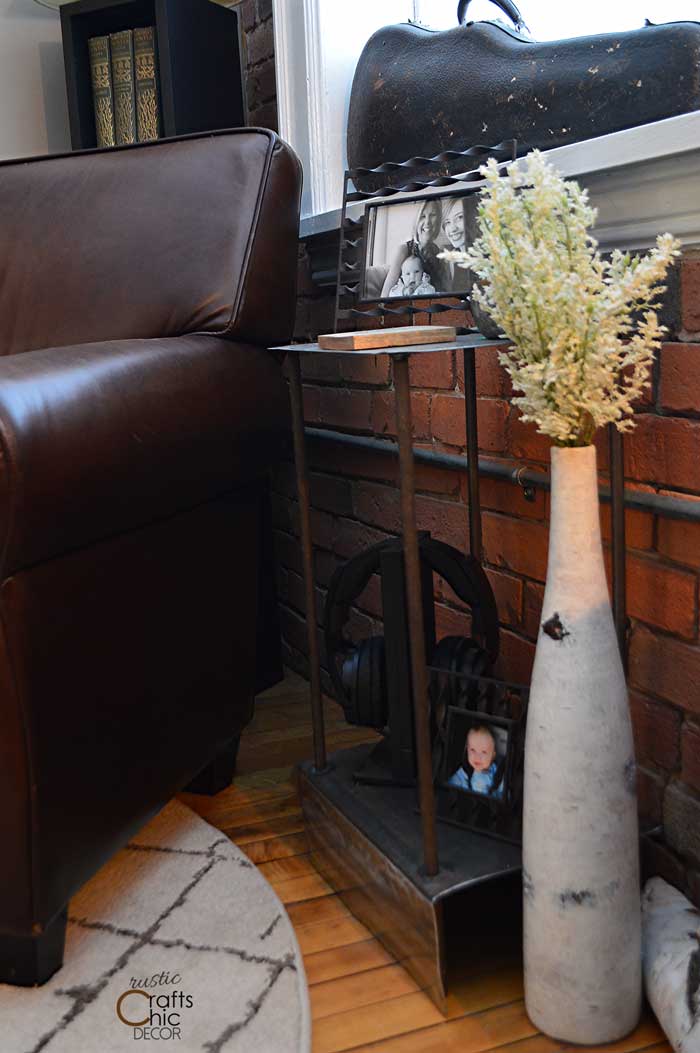
I have several birch bark crafts on this blog. If you don’t have birch bark available to you, you can now use this painting technique instead. Turn any item into rustic decor by painting it to look like realistic tree bark. Depending on the use of the item you are painting, you also might want to coat the finished paint with an acrylic sealer. I didn’t worry about sealing the vase since it won’t be handled much.
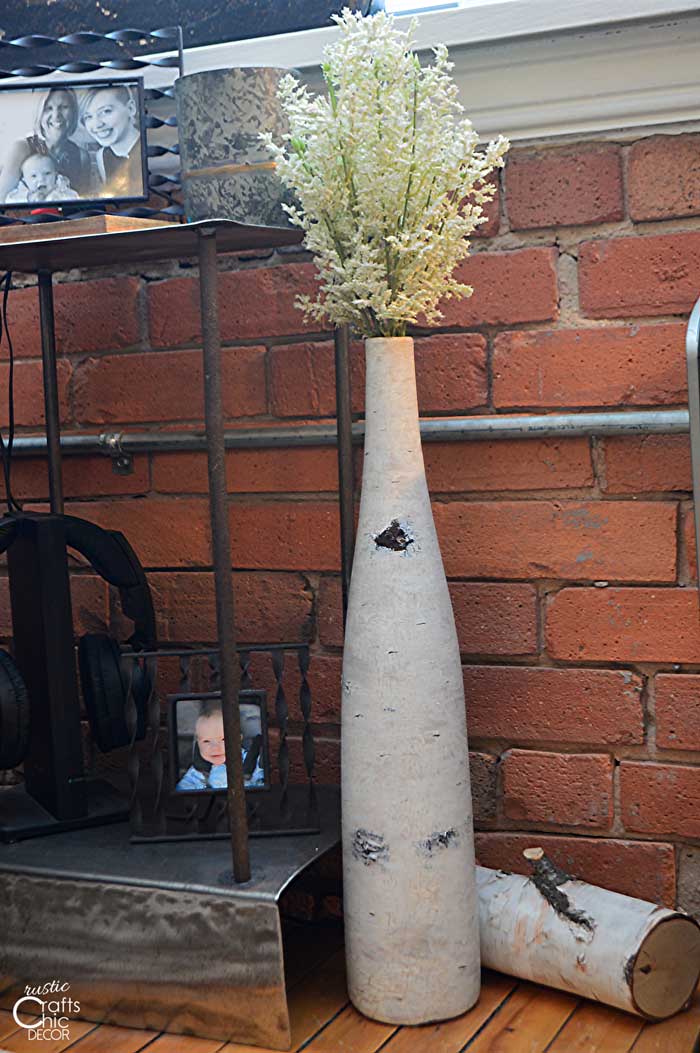
Now that I’ve finished my first birch painting project, I’m thinking about what else I can paint! I wrapped a wine bottle in birch bark before so maybe I’ll try painting a wine bottle next.
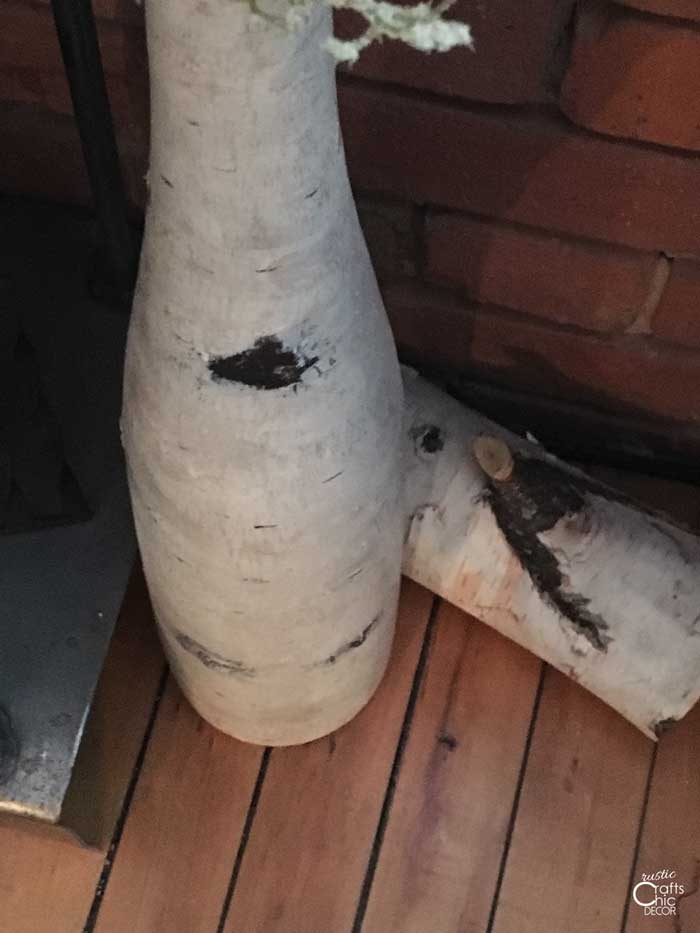
If you’re wondering how to paint realistic tree bark for other kinds of trees, just follow the same procedure. The only difference is in the color of paints that you choose. Plus, you may want to use a lot more of the texture paste depending on the texture of the tree you want to do.

This is amazing. I’ve been looking for a ceiling treatment and was really wanting birch bark. There’s a company that makes panels but they’re way beyond my budget. I thought about collecting it but that’s way too labor intensive and I was afraid it would shed and catch cobwebs. No to wallpaper because of the repeat and our ceilings are textured. I decided to faux paint planks but most of what I saw looked too faux. Yours looks great and exactly what I was hoping for. Thanks! It’s a big project but I’m excited about it.
That’s fantastic! I would love to know how it all turns out! Happy painting!
Hi Renee. I have some regular branches that I’m hoping to make look like birch. I’ll be using them in my outdoor planters. Have you ever done this? Not sure if the above method would work. Any ideas? Thanks, Christine
I have not done this on branches but this technique would definitely work! I would just add a spray coat of matte acrylic sealer since the branches will be outside.
Wow! Love this!
Thanks Tai! It was a fun project.