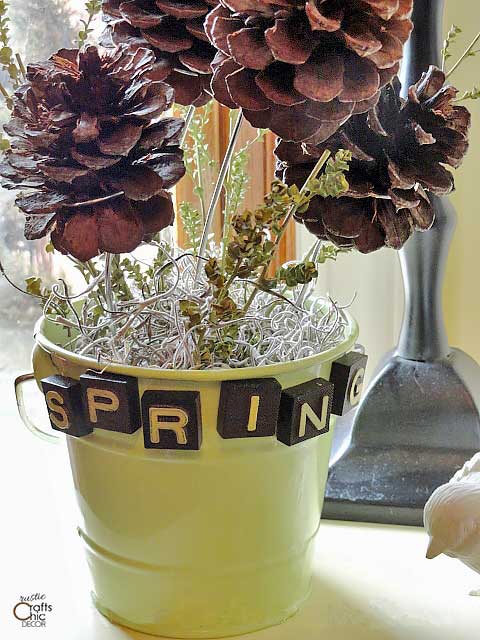
Flower pots come in all shapes and sizes and some were never intentionally made to be flower pots at all. Pretty much anything that can hold dirt can do the job. I wanted to design a flower pot for the Spring season and came up with an easy idea using a couple of repurposed items.
The other day, I picked up a few pastel metal buckets from a flea market. My plan was to create a flower pot design that would be geared toward the Spring season. Because the buckets were already painted in pastel colors, I just needed to add a little embellishment. I already the idea to incorporate some vintage game pieces into the design. My only problem was trying to figure out what to put into the pot.
Although I love the look of flowers blooming, I have a little problem. I can’t seem to keep any plants alive. Of course plants need water and I know that. It’s just that sometimes I forget. And then, when I remember, I give them an extra big dose to make up for my neglect. Apparently, they don’t like that. So flowers were not going to work for me. Since I also wanted to have the pot design complement my rustic decor, I decided to fill the pot with pinecone stems.
My Pot Design For Spring
Materials Used:
- small metal bucket
- vintage letter tiles
- florist wire
- Styrofoam ball
- pine cones
- Spanish moss
- faux greenery
How To Make A Rustic Flower Pot For Spring
Rustic Flower Pot Design
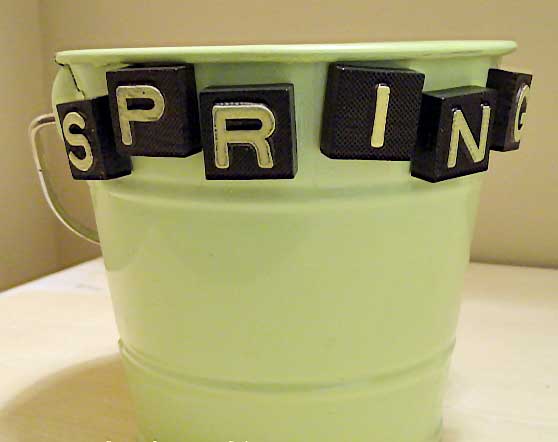
- Glue Game Tiles To Bucket
Since I had the right game tiles to spell out the word Spring, that is the word I went with. Any springtime word would work. I used vintage game tiles but Scrabble tiles are a little easier to find. Use hot glue to adhere the tiles to the bucket.

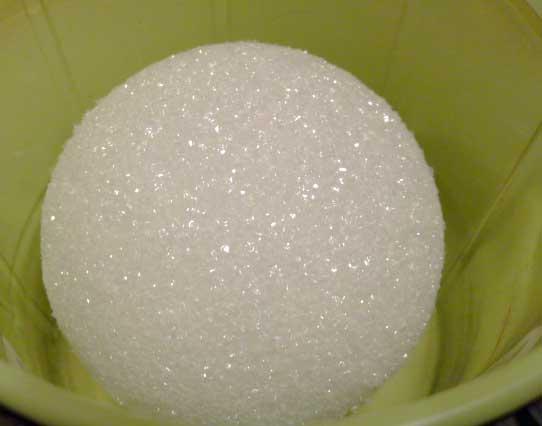
- Insert A Styrofoam Ball Into The Bucket
Choose a Styrofoam ball that fills the bottom of the bucket. This will be used to insert florist wire and other stems into. Glue the ball in place so that it doesn’t move around.
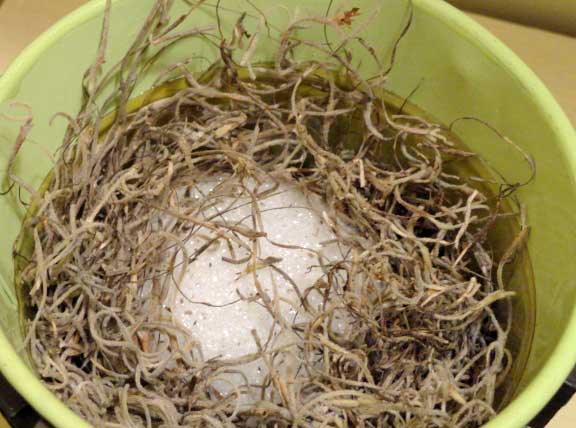
- Fill In The Gaps With Spanish Moss
To completely fill the bottom of the bucket, pack some of your Spanish moss around the ball.
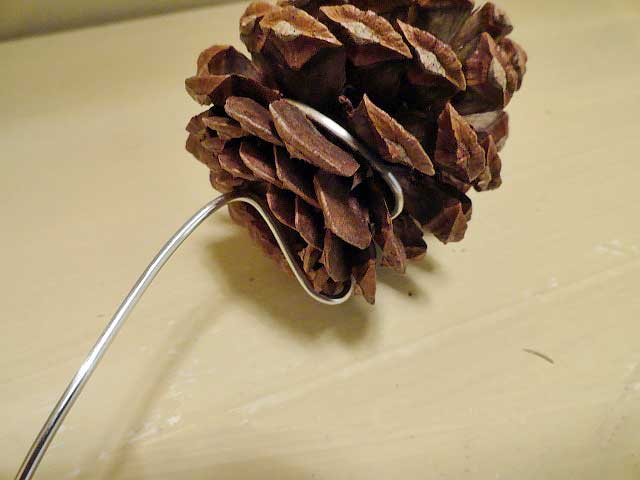
- Wrap Pinecones With Florist Wire
Cut a 12 to 18 inch length of florist wire with wire snips. Wrap one end around the middle of the pinecone. After wrapping, tuck the wire between the pinecone petals and bend toward the center of the bottom. Leave the length of the wire as a stem to poke into the Styrofoam. If you have too much wire left, just cut the end to your desired length with wire snips.
- Insert Pinecones And Other Stems
Starting with the pinecone stems, insert them into the Styrofoam toward the center. Fill in the rest of the pot with greenery stems. Then, add more Spanish moss to the top of the bucket.

Sweeet!!Thank you for joining in the hop and for your bloggy friendship
This is the cutest Spring craft ever. I love this idea! I would love it if you could share this wonderful post at our WIW linky party. Hope to see you there.
Paula
Ivyandelephants.blogspot.com
Very cute! I love the “SPRING” game pieces!
Oh!! I love this!!! The spring blocks are adorable!
I hope you’ll share this at The DIY Dreamer… From Dream To Reality!! PLEASE 🙂
thediydreamer.blogspot.ca/p/mothers-day-gift-guide
Sorry!! Wrong link!
thediydreamer.blogspot.ca/2012/04/from-dream-to-reality-linky-party-10
Thanks Christine, I will do that!
SO pretty and I love how you made the pinecone ‘flowers’ and the way you decorated the bucket!
Thanks Lauren!