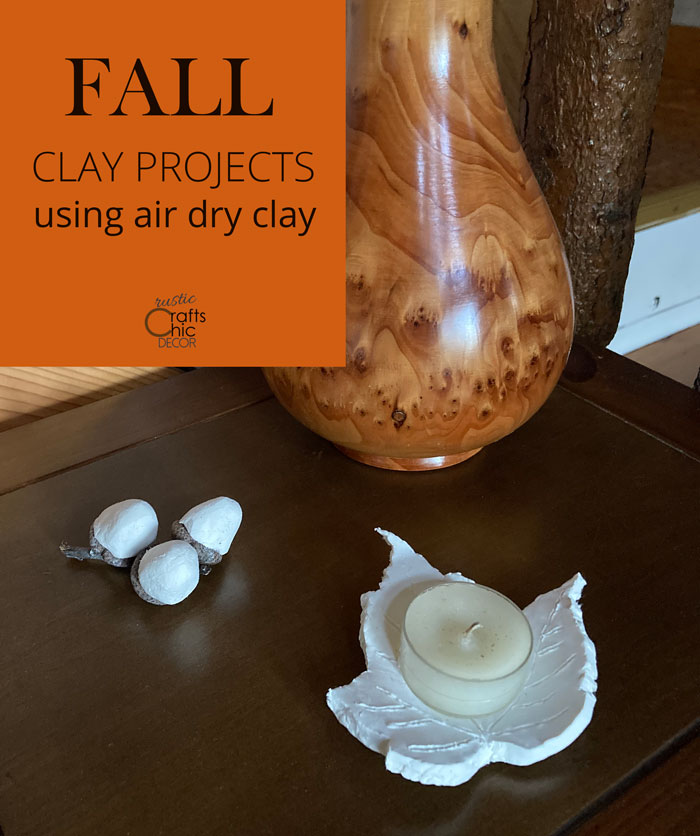
If you haven’t played around with air dry clay before, I highly recommend it. It reminds me of playing with Play Dough as a kid. You can make all kinds of shapes and forms just using your hands and maybe some forming objects. Since you can’t glaze air dry clay, this kind is better suited for simple more rustic projects. It was easy to come up with some simple Fall clay projects that anyone can do to for some seasonal decor. Both acorns and leaves are fun to make and they are so quick to do! You don’t even have to finish them with paint if you don’t want to.
I like just the natural white finish that you get from the dried clay for a rustic chic look. If you prefer color, you can definitely paint them with a variety of different paints. It’s even possible to get a glossy finish, without glaze, by finishing with polyurethane or Mod Podge. Or, tint your clay before forming with ready made dyes or food coloring.
This post contains recommended product links. If you make a purchase through one of the links, I will earn a small commission at no extra cost to you.
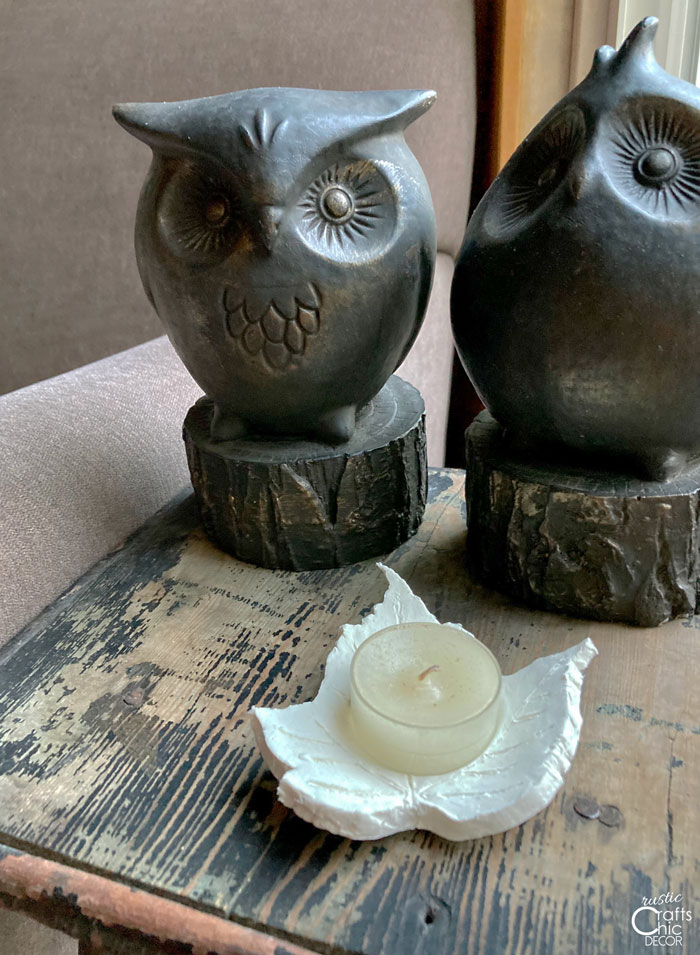
DIY Clay Leaf Candle Holder
Materials Needed
Clay Leaf Instructions
Step One: Roll Out A Round Ball Of Clay
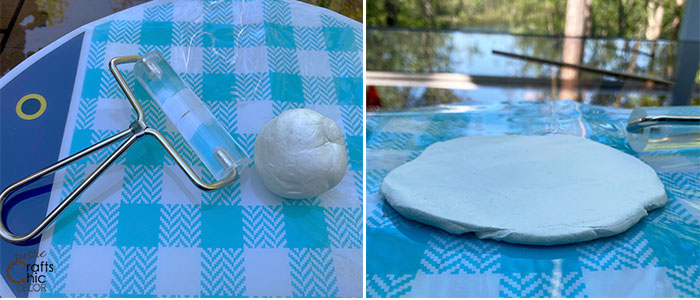
The first step is to roll out a small section of clay with your roller about 1/4 inch thick. If you don’t have a roller just for clay, then pull out your kitchen rolling pin. This part will feel similar to rolling out sugar cookie dough!
Step Two: Press A Leaf Onto Your Clay Round
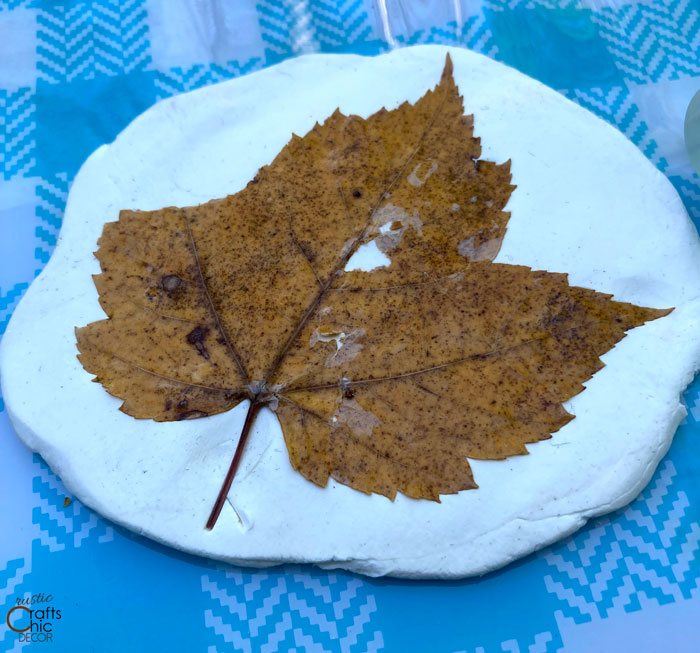
Although you could simply use a leaf cookie cutter to cut out your leaf shape, a real one will give you more of the fine details. Just press either a real leaf or silk one onto the clay. By pressing it down, you will get the details of the veining throughout the leaf. My leaf was one that was left over from preserving leaves for a wreath project. It was coated with Mod Podge which made it a little stronger to work with.
Step Three: Cut Out The Leaf
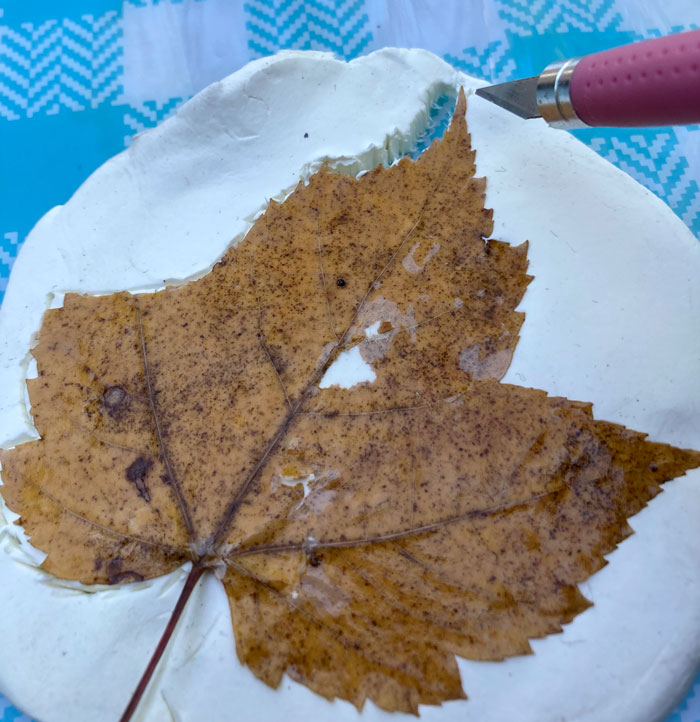
Using an exacto knife, carefully trim around the leaf. I didn’t include the stem because I didn’t want to risk it breaking off from being so thin.

Once the cuts are made, pull the edges off to be left with just the shape of the leaf.
Step Four: Accentuate The Details
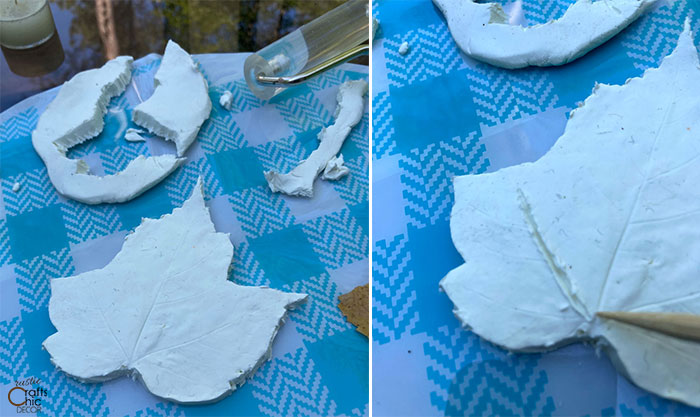
Carefully lift the leaf off of the clay. There should be subtle lines where the veining was. Leave them as is or make the lines deeper with a wooden skewer or other pointed object.
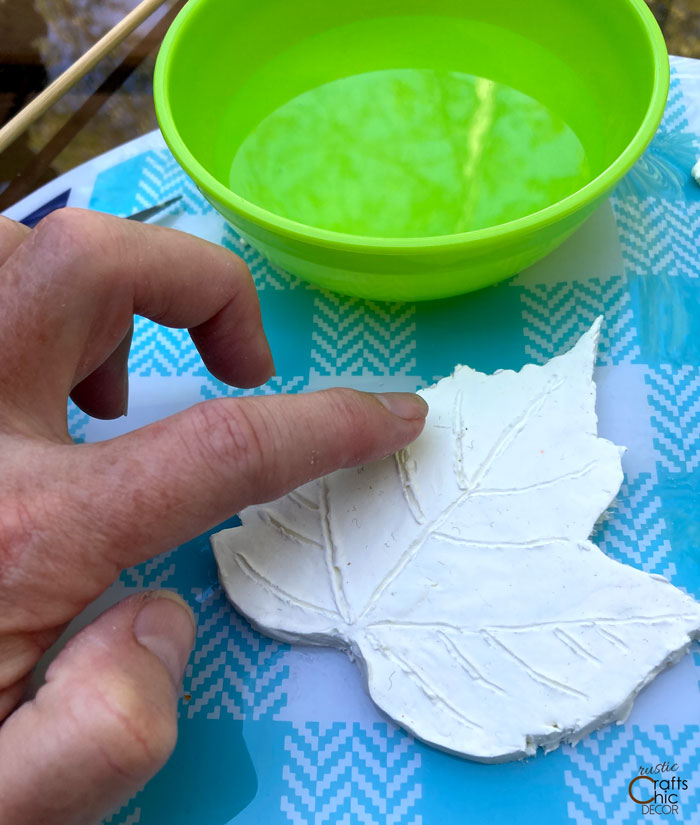
Dip your fingers in water and smooth out the face of the leaf where it needs it.
Step Five: Add A Tealight Candle

Add a tea light candle while the clay is still wet and press it into the center of the leaf. Next, lift up the leaf in your hands and press upward to form a little bit of a bowl to hold the tea light. Let dry one to two days depending on the thickness and humidity in the air.
How To Make Easy Clay Acorns
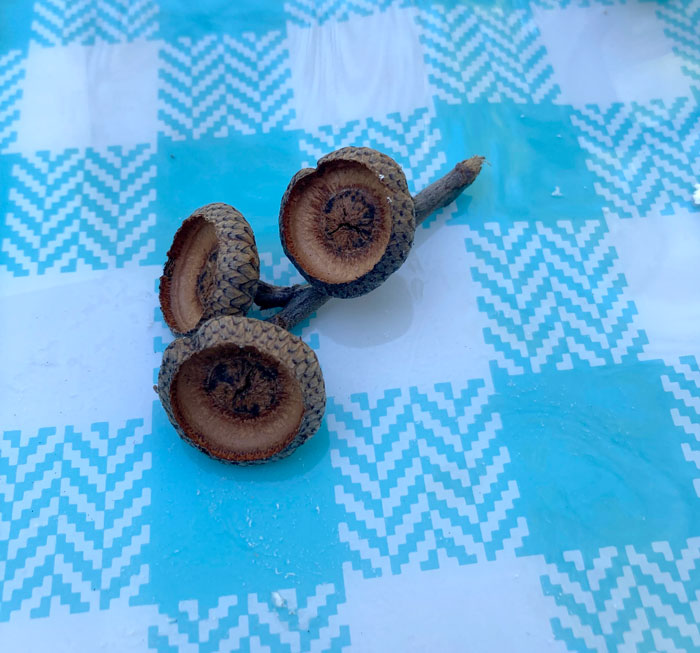
Collect some acorn tops and dry them to use as the base of this project.
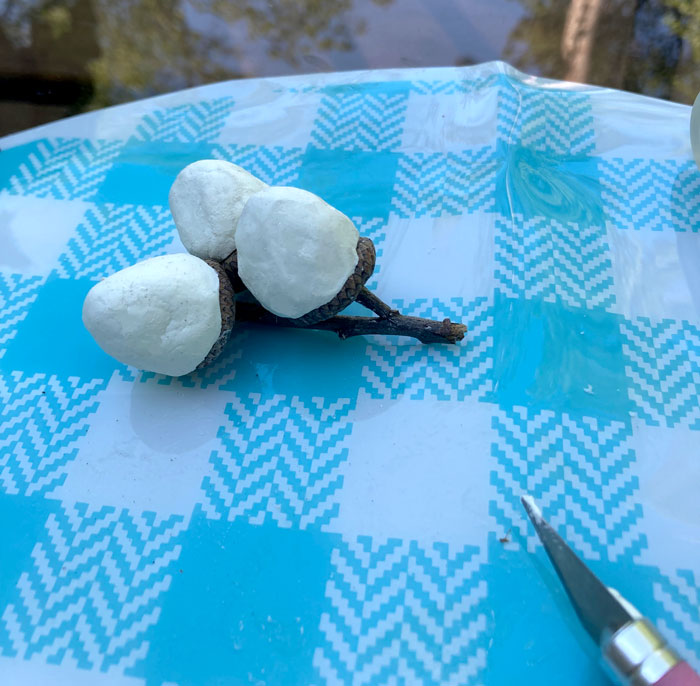
Roll about a marble size piece of clay into a ball and press it into the acorn tops. Smooth and shape the clay to get the shape that you want.
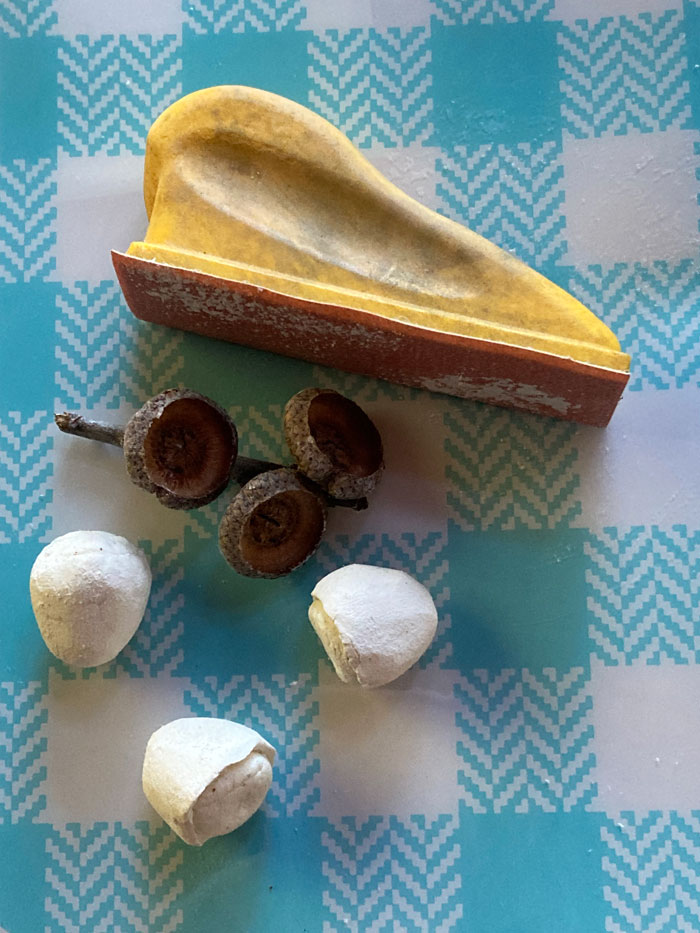
Remove the acorns from the top when they are dry and sand them lightly with fine sandpaper.
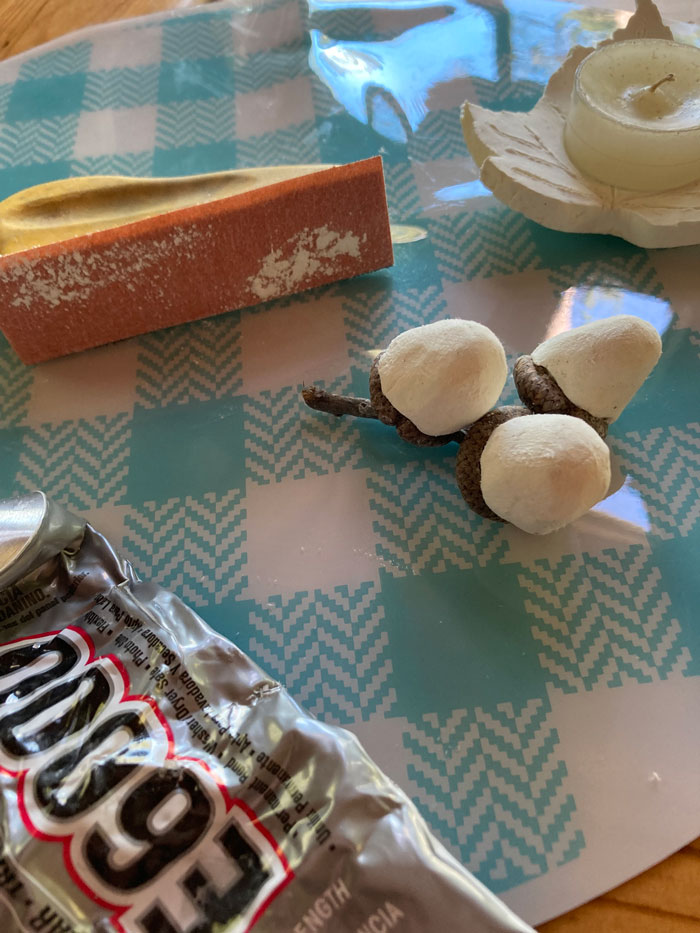
Place a drop of E6000 craft glue into the acorn top and replace the clay acorns.
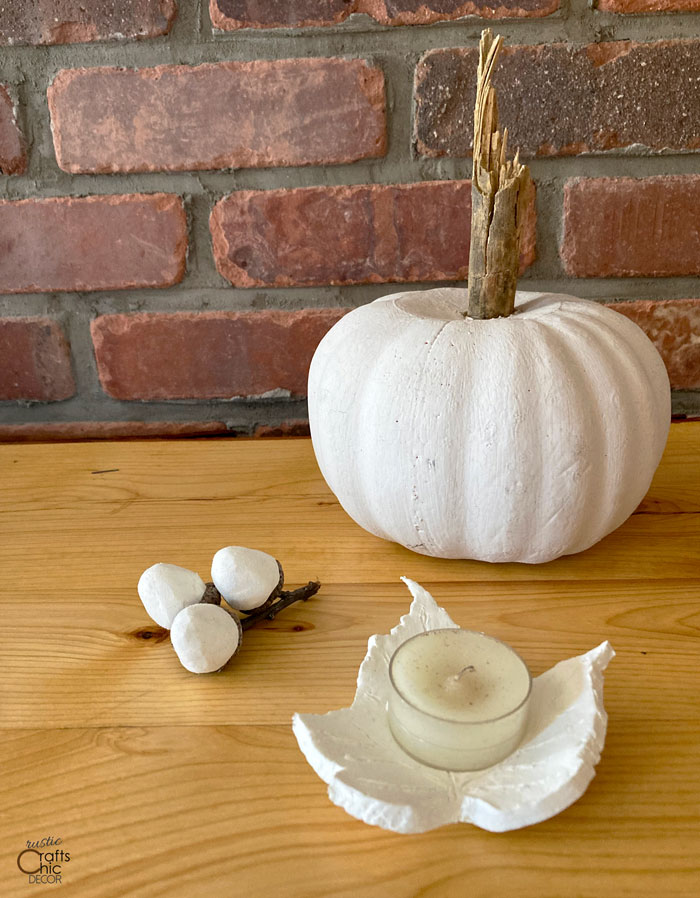
The pumpkin shown in this picture is not clay. It’s one that I had which had been chalk painted. However, I do think it fits in perfectly with my Fall clay projects.