How many of you have received a gift in a decorative Christmas tin? While these tins are cute to display during the holidays, afterward they are just one more thing to store or dispose of. However, these are not the only two options. You can easily transform the tins for useful storage in your home. All you need to do is cover the Christmas motif with paint. I’ll show you how I painted tins, with a couple different types of paint, to create storage tins that fit in with the rest of my decor.
This year we received a couple of large popcorn tins. With the tins being so large, they would work perfectly for several types of storage. In the past, I have wrapped small Christmas tins with twine to use as desktop storage. However, since these tins were bigger to work with, I decided to just paint them. There are all kinds of options, with paint, to create a customized look. You can use any color or even add texture with a specialized spray paint. Even so, I just went with a plain white for the can. I did leave the tops their original red and added some chalkboard paint for labels.
The easiest way to transform decorative tins is to cover them with spray paint. However, since I would never trust myself with a spray can inside and there is about six inches of snow outside, I chose another option.

This post contains recommended product links. If you make a purchase through one of the links, I will earn a small commission at no extra cost to you.
My Painted Tins Idea
What You’ll Need
- tins to recycle
- primer – I used milk paint
- cover paint – I used oil base enamel paint
- medium paint brush
- chalkboard paint or construction paper and white glue
Instructions
Step One: Paint Several Thin Coats Over Tin
Normally, when I am painting over something smooth, colorful and somewhat glossy I like to use a base coat of deglossing primer. However, this time I just used milk paint. It was basically an experiment. Since I was anxious to start, I didn’t want to make a run to the store for my usual paints. Instead, I used what I had on hand.
Milk paint is real tacky and adheres well to most surfaces, even glossy. I had used it in the past to cover wood laminate that I couldn’t sand. It worked like a charm and became one of my favorite paint products. You do need to put the coats on very thin but usually four coats gives a nice amount of coverage.
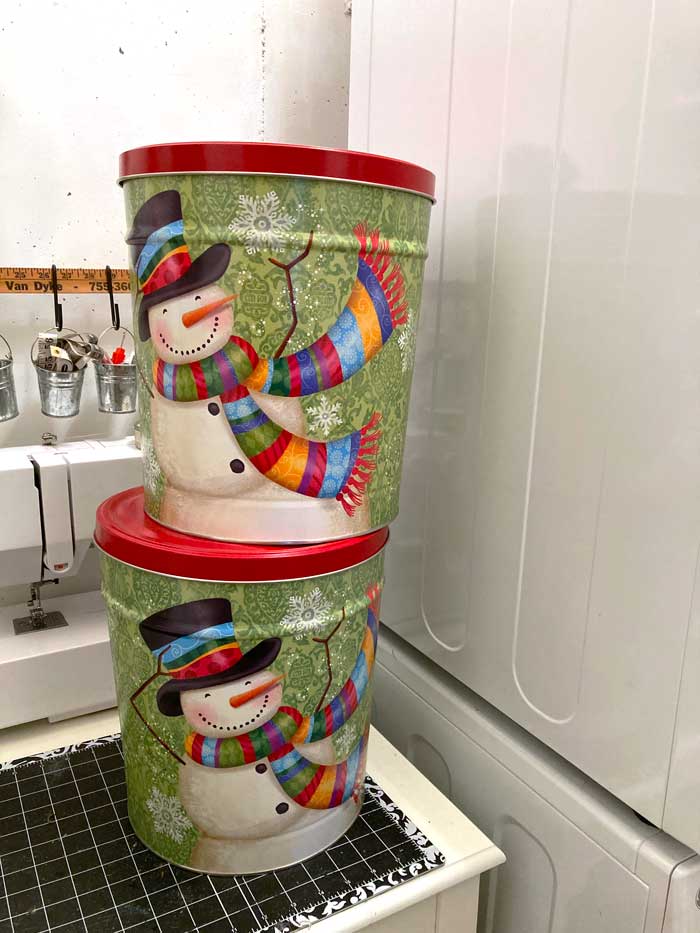
This is what I started with. Goodbye cute and playful winter tins and hello clean and chic craft room storage!
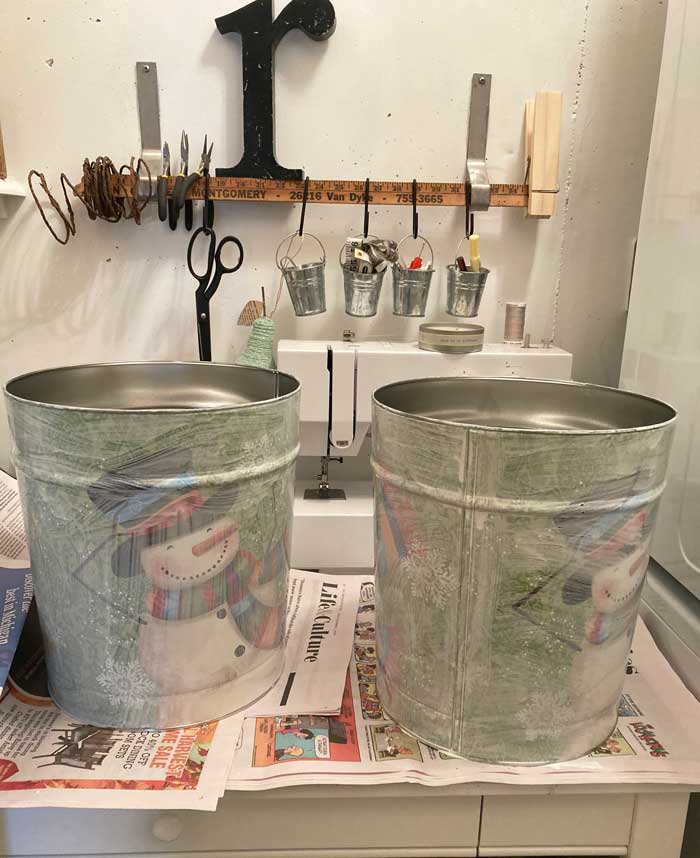
As you can see, the first coat doesn’t provide a lot of coverage. You may be thinking that it’s going to take forever. However, it really does start to show a lot of improvement even just after the second coat. Milk paint gives a whitewash look and can be brushed on every which way for this project. Each coat of paint provides a much more solid look.
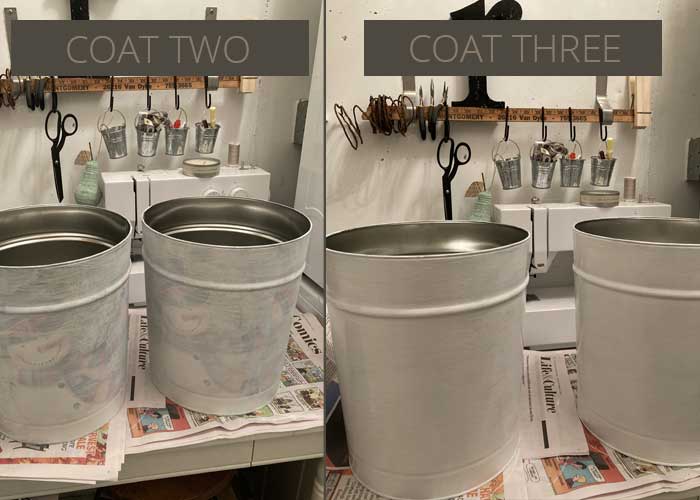
By the third coat I almost have full coverage. I did one final coat and let it dry overnight. If I had gone out to buy Zinsser Bullseye Primer, I could have gotten away with just one or two coats since it is a much thicker paint. The primer worked wonderfully when I painted over the ceramic tile in our kitchen. However, at least I didn’t have the extra expense and I could use up some of the milk paint that I already had.
Step Two: Add A Coat Of Cover Paint
I almost thought I could get away with just using the milk paint to cover the tins because I liked the smooth finished look. But, after the fourth coat I could still see a faint color underneath. So, I kept with my plan and added a coat of white enamel paint.
Step Three: Create A Label Area
Chalkboard labels work great for storage tins. Since you might change your mind about what you store in your tins, it’s a good idea to make your labels erasable. Originally, I was planning on using my chalkboard paint to paint on a label area. However, I recently learned of a way to make little chalkboards using construction paper and white glue. It seemed like a cleaner and easier way to create chalk areas for my tins.
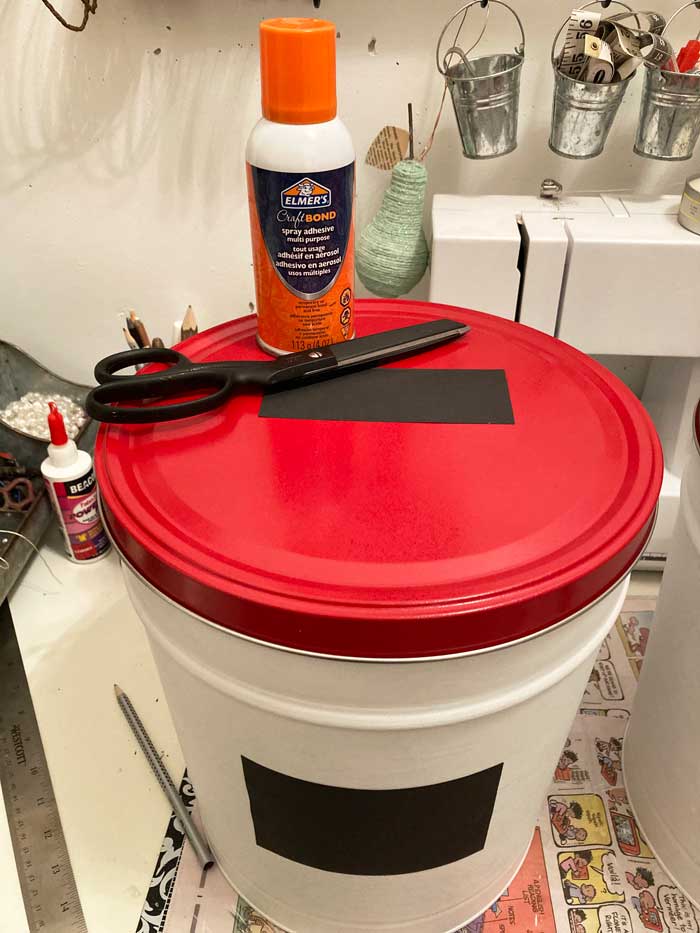
So, I cut out a couple of rectangles from some black construction paper. Then, using adhesive glue, I attached the construction paper to my tins. I’m not sure what I will be putting in the tins quite yet so I left the labels blank at this point.
When I am ready to turn the labels into chalkboards, I just need to cover the entire paper with white glue and let it dry completely. A foam brush works best for getting an even thin coat. After the glue is dry, just season the “board” by rubbing the side of a piece of chalk all over the paper and then brush off. Easy peasy!
I’m anxious to go through my extra craft supplies and put these tins to use. I’m thinking one of them might hold fabric scraps but I’ll have to see how many I really have!
Painted Tins Ready For Use
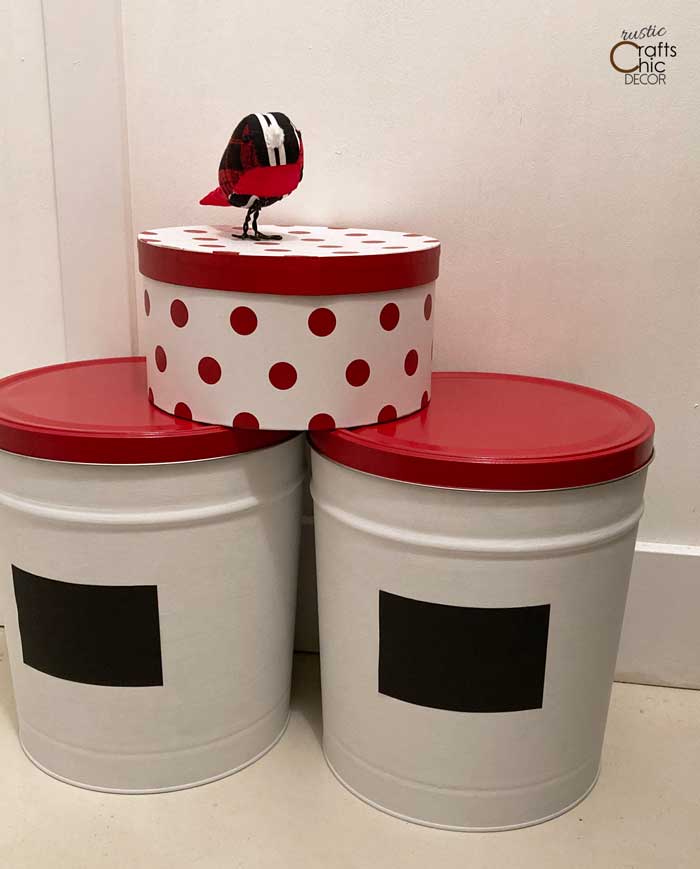
The finish on these painted tins seems to be very durable. I know this because I was lifting one up to put on top of my dryer and dropped it. It was a matter of either saving myself or the tins. Instead of getting a step ladder, I opted to use my stool which has a swivel seat. Need I say more? Anyway, the tin dropped and crashed onto my desk with various items on it. None of the paint chipped off at all. I did get one tiny dent but the paint was fine.
If this idea gets you in the mood to get things organized, you may also want to check out my post on craft room organization using things that are free.