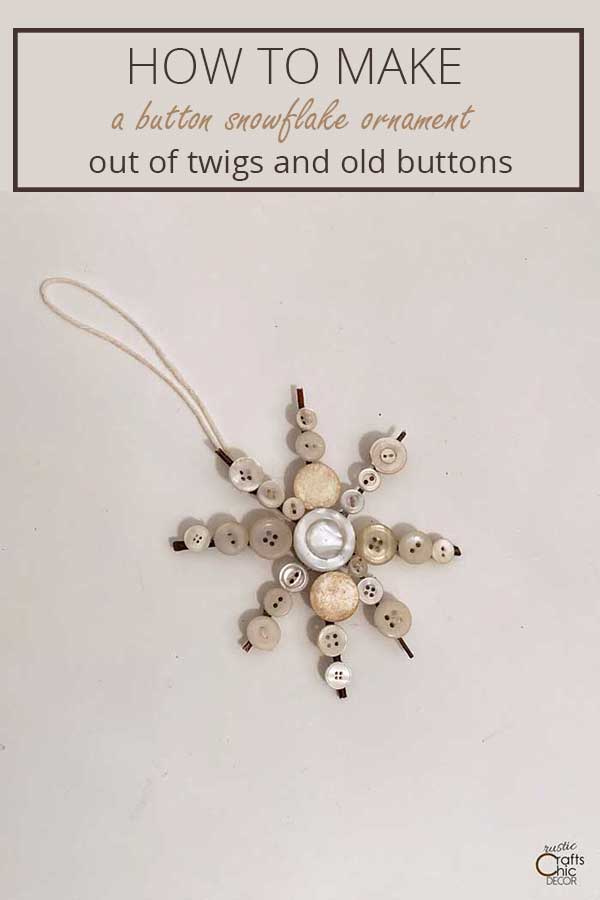
Over the years, I have really enjoyed making my own Christmas ornaments. They seem to add a little more nostalgia to the Christmas tree due to the fact that they were lovingly made. Because I like a rustic chic Christmas tree, this year I decided to incorporate twigs and old buttons into a snowflake ornament. It’s a super easy project so there is no problem in making lots to cover your entire tree! In fact, with this button snowflake craft, you may be tempted to make extra to adorn gift packages with.
When I look outside and see all of the snow covered evergreens, I really don’t think there is anything more beautiful. The way the snow sparkles in the sun is almost like little diamonds. This is what inspires me to recreate the look inside with homemade snowflakes. Although you can use any buttons for this snowflake craft, white or cream buttons look especially chic. A lot of times these buttons already have a sparkly sheen on them that will pick up the light nicely.
I’m thinking I will combine these button snowflakes with some of my homemade indoor snowballs for a glitzy snow covered tree. If you like a little contrast on your Christmas tree, I think that the snowflakes would also pair well with some plaid fabric star ornaments to enhance the rustic look.
This post may contain recommended product links. If you make a purchase through one of the links, I will earn a small commission at no extra cost to you.
How To Make A Snowflake Ornament
What I love about this button snowflake craft project is that if you recycle buttons, the ornaments are basically free. I always keep a jar of old buttons in my craft room. A lot of times, blouses, shirts, or jackets will come with extra buttons. I throw these into my jar along with buttons I take off old clothes that can no longer be worn. If you do have to purchase buttons, you can quite often find inexpensive collections of vintage buttons at antique stores or flea markets.
What You’ll Need For Button Snowflakes
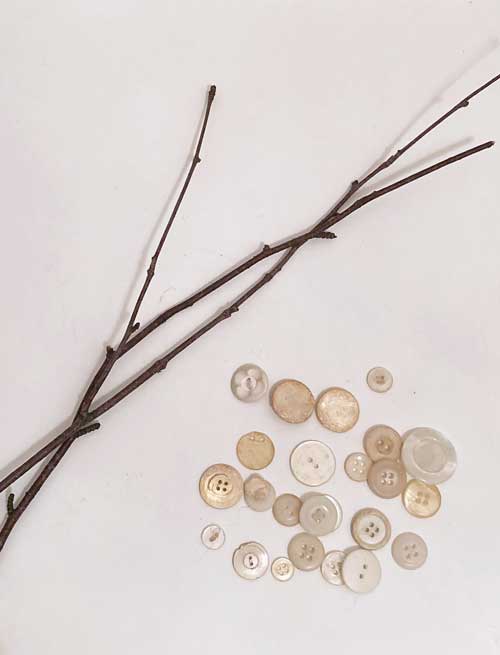
- small twigs
- buttons in various sizes – you can purchase a collection of just white and cream buttons
- hot glue
- twine for hanging
Step By Step Button Snowflake Instructions
1. Break Twigs Into Small Lengths
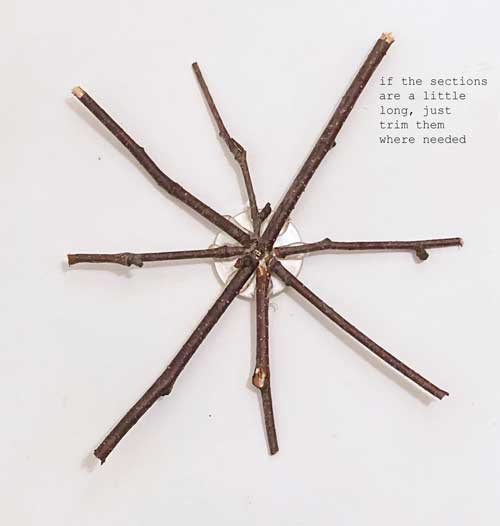
You will need four lengths of twigs that are about three inches long and four that are about two inches long. The sizes can be adjusted depending on how large you want your snowflake. You can also start longer and then easily trim the ends when you have the size you want.
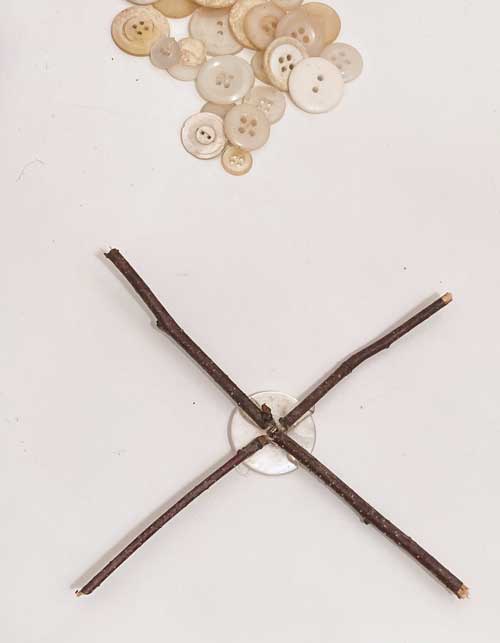
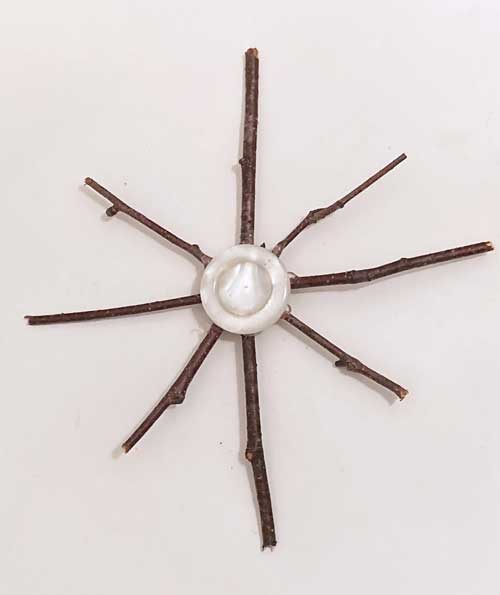
2. Hot Glue Twigs To Center Button
Pick your largest button to act as the center of the snowflake. Then, begin gluing your twig sections to the back side of the button. I started with the four longer twigs and glued those to form an X. Then, I added the smaller lengths to form a smaller X inside the first X.
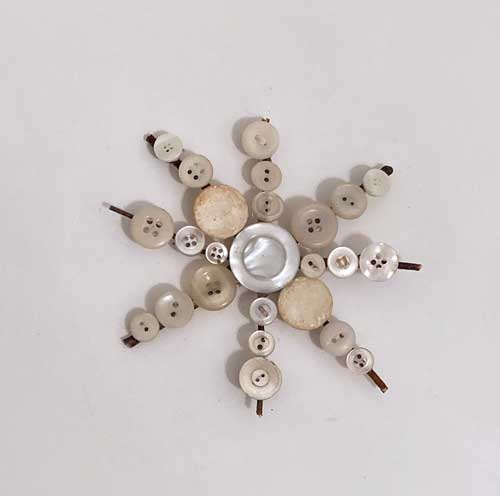
3. Flip Snowflake Over And Glue Buttons To The Front
Now just glue the rest of your buttons to the front of the snowflake. Vary the size of your buttons to add more interest.
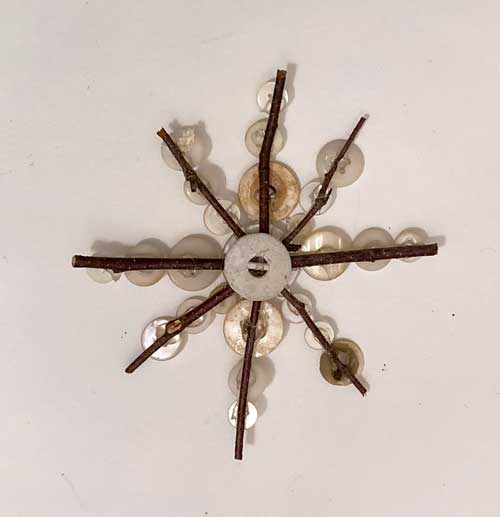
4. Add A Final Button To The Snowflake Back
Once your snowflake is basically finished, you need a way to hang it on the tree. I found the best way to do this it to add another large button to the back center of the snowflake. This is what you will loop your twine around for hanging.
5. Add Twine For Hanging
Cut a section of twine about a foot long. Loop it in half and tie a knot. Now, attached the tied end of the loop around the button at the back of the snowflake and secure with hot glue.
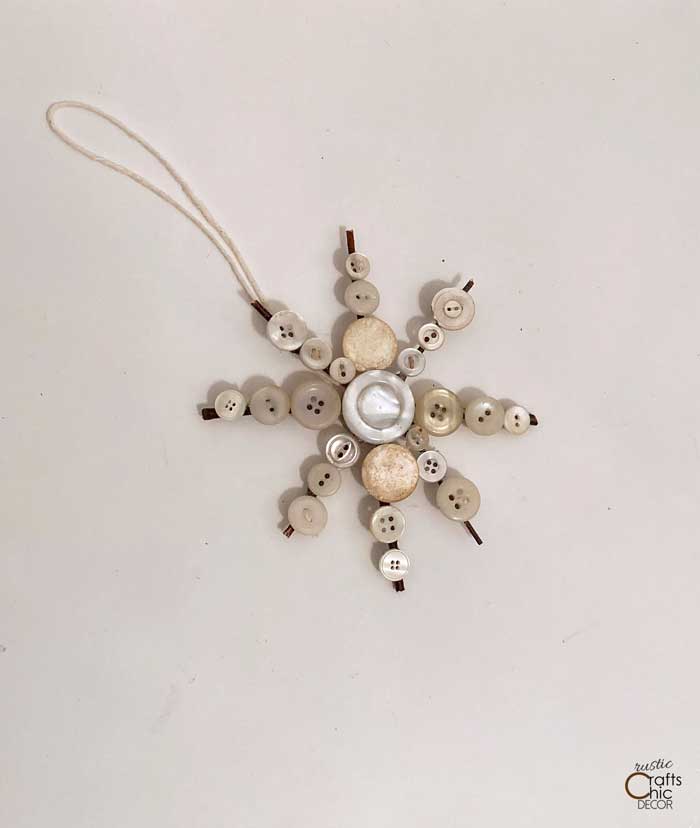
That is all there is to it! Now all you have left to do is hang your button snowflakes on the Christmas tree.