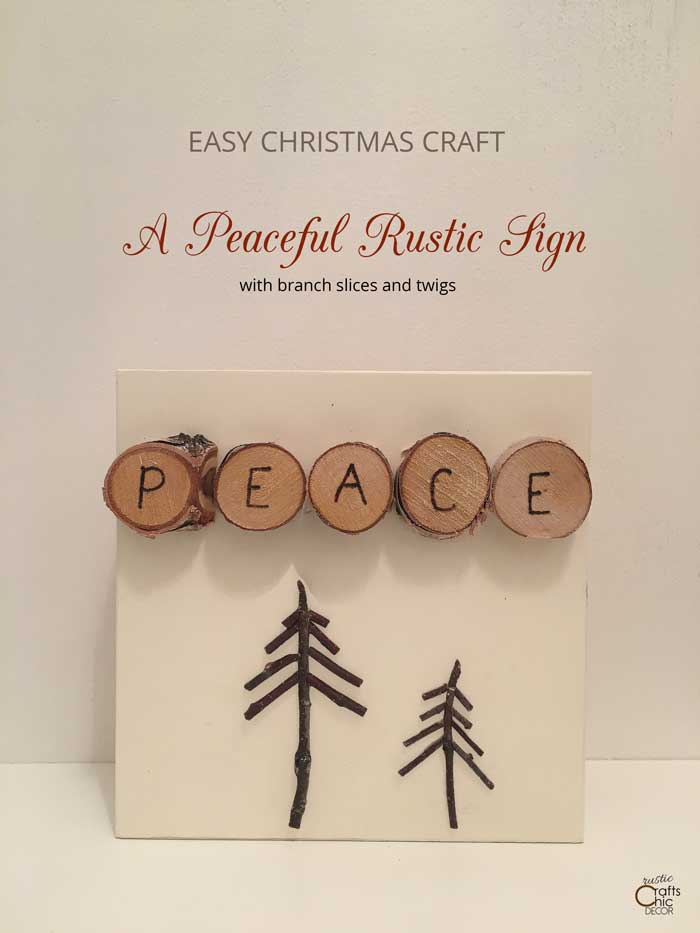
Small twigs are great to use in so many rustic craft projects. Since you can shape the twigs into shapes or words, they are very versatile as a natural craft supply. A twig Christmas tree is especially easy to make and I’ll show you how to incorporate some into your own rustic Christmas decor. In the past, I have made a free standing small branch Christmas tree. However, this time I am making smaller twig trees to use in a rustic Christmas sign craft.
Although it is easy to also shape letters with twigs, I had another idea for creating my word. It still incorporates branches but in another way. Since I had some small branch slices in my stash of craft supplies, I decided to make use of them.
My favorite way to create words is with game letter tiles or typewriter keys. Because I wanted my sign to be all natural and rustic, I decided to use the branch slices for my letters. I could have painted letters onto each branch slice but instead opted to use my wood burning tool.
For more precise lettering, I could also have used letter stencils or transfer paper. Since I wasn’t after perfection with this rustic craft, I simply drew the letters on the slices by hand. Then, I just wood burned over the penciled in letters. However, this wasn’t the original plan for the craft.
A Craft Fail Made Right
This post contains recommended product links. If you make a purchase through one of the links, I will earn a small commission at no cost to you.
Supplies Needed
- 6x6x1 inch square unfinished wood block
- chalk paint in sheepskin
- fine sand paper
- thin birch twigs
- one to one and a half inch round branch slices
- E6000 craft glue
- wood burning tool
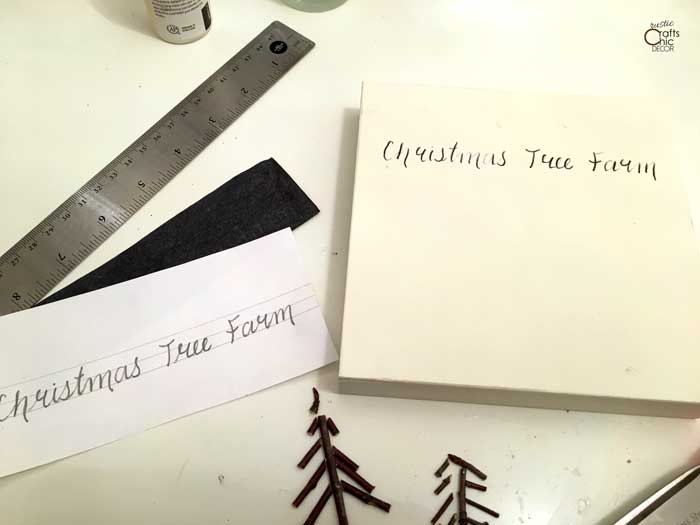
I had planned from the start to make a couple of twig Christmas trees for my sign. However, I started out wanting to wood burn “Christmas Tree Farm” to the top of the wood.
It was a good plan, but I wanted to paint my wood square white first.
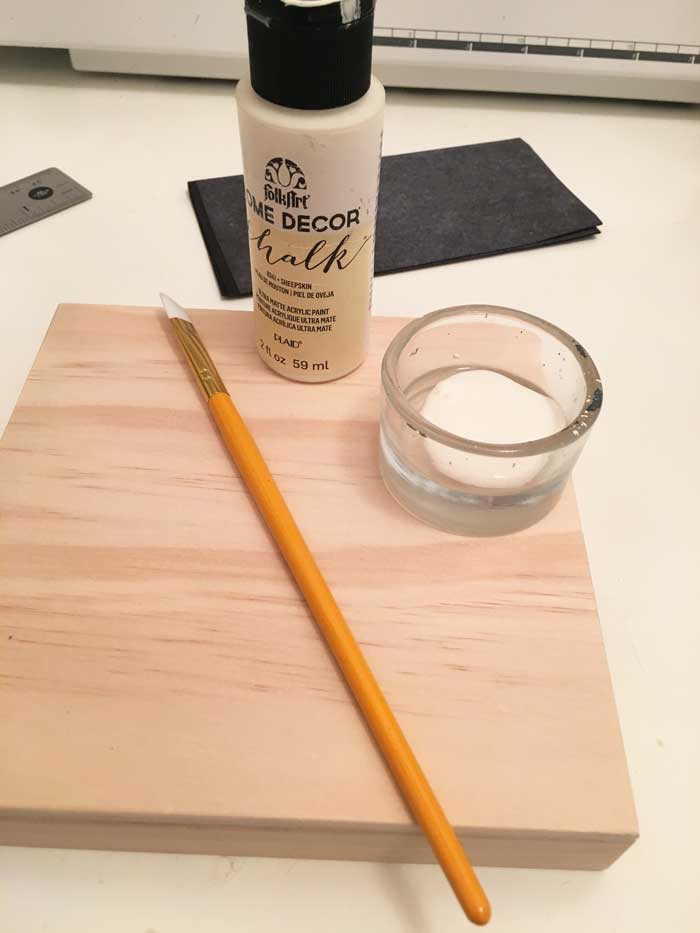
I love using chalk paint for a nice smooth finish. For good coverage, I applied three coats of paint. After the last coat was dry, I sanded over the whole thing with fine sandpaper. The finish turned out super smooth and wonderful.
I’m not exactly sure why I thought woodburning over a painted surface would be a good idea. I basically was wondering if it would work and wanted to experiment.
First Option Was Hand Lettering
First, I practiced hand lettering my phrase. It took me a few tries to get the lettering right. Once I was happy with the lettering, I used transfer paper to apply the lettering to my wood. First I laid a small section of transfer paper over the top of the wood. Then I centered my phrase of the transfer paper and went over my lettering again with a pencil. This put the letters onto the board.
I should have stopped there. However, I was dying to know if it would work to burn over a paint. I briefly thought about the possibility of toxic fumes when heating paint but I quickly discarded the thought.
Technically, it did somewhat work. However, because I had to go over the lettering several times to get a good burn, it ended up looking messy. It was too thick in some spots and barely showed in other spots. So, I determined it definitely does not work well to wood burn over paint.
Unfortunately, since I had tried it I had deep grooves where I burned into the wood. My nice smooth surface was no more. At first, I was going to simply glue decorative ribbon over the text area. I had some red and black buffalo check ribbon that would have looked nice. But….I really wanted a word or saying.
That is when the idea of using branch slices came to me. They would cover up the ruined surface rather nicely. The only problem was that there was no way that my original phrase would fit.
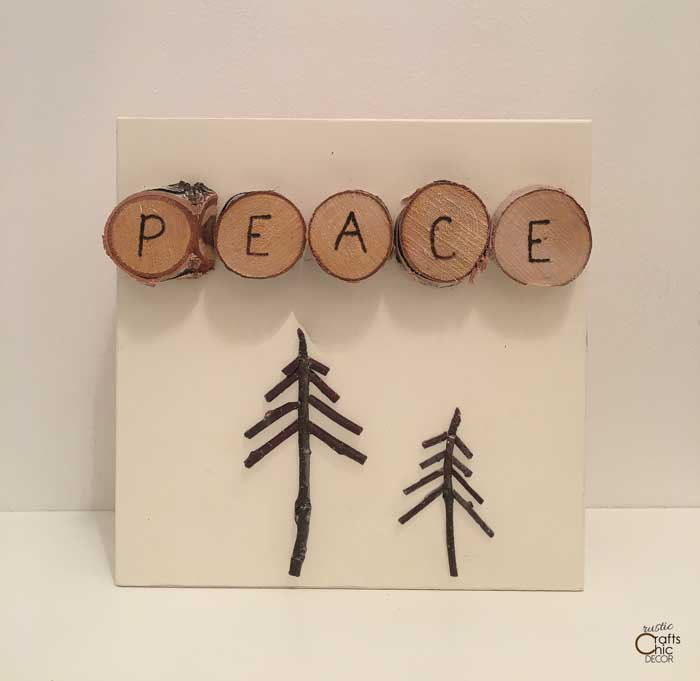
After thinking about the look of the twig Christmas tree, the word “peace” came to me. It would be a peaceful rustic scene perfect for the holidays.
How To Make A Twig Christmas Tree
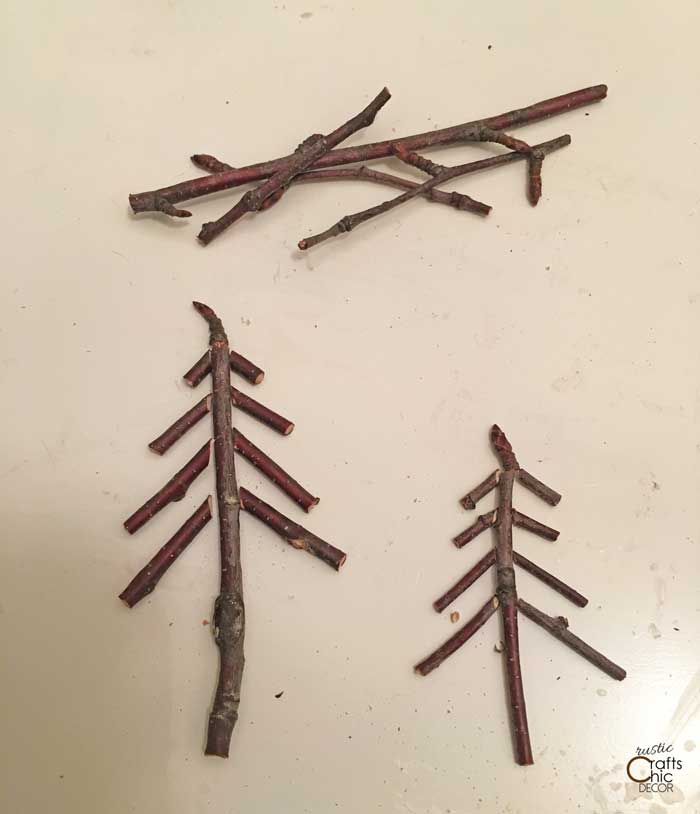
To make the twig Christmas trees, I just needed to cut small pieces to glue onto my wood. I used one longer twig for the center of the tree. Then, starting at the top, I cut small pieces for each side of the tree that gradually got bigger.
To get the side pieces to fit seamlessly with the center twig, I cut the side top at a an angle. Then, the side twig butted up to the center twig with very little gap.
I used E6000 craft glue to secure the twigs to the board. Since I didn’t have a precision tip on my glue, I used a small paint brush to apply the glue to the twigs.
Finished Twig Christmas Tree Sign
After securing my twig Christmas trees to my wood, I went to work on the word. There are a lot of Christmas words to choose from but I thought peace was the most appropriate.
Burning the letters onto the wood went super smooth and easy. After all, a wood burning tool is meant to be used on bare wood!
Once all the letters were done, I just glued them in place to the top of the board. I should mention that before I even picked out my word, I lined up some branch slices to see how many would fit. Five branches fit perfectly so I was good to go with my chosen word.