It’s hard for me to believe but we’ve had our cabin now for just over ten years. When we originally built it, it was meant as a weekend or vacation place. However, since that time, it has become more of a home where we spend most of our time. Because of that, it became necessary to make some changes in our main bathroom. I needed more space, function, and a bit of modern appeal. This remodel meant replacing the vanity and sink, painting the tile backsplash, painting the linen cabinet, and replacing the mirror. I’ll show you the whole process of blending the old with the new to create a more modern rustic bathroom space.
Before I start with the new, I need to show you the before picture. None of the design started out with an initial vision. It was basically a work in progress as we found a need. Because of that, the look is not very cohesive. We have a mix of orange, dark wood, golden pine, lighter pine, white, and concrete. Too many colors and finishes for me. It’s hard to feel relaxed in a room with so much going on. I definitely wanted something more sleek but still rustic. So, now that the cabin is our home, a bathroom remodel is a must.
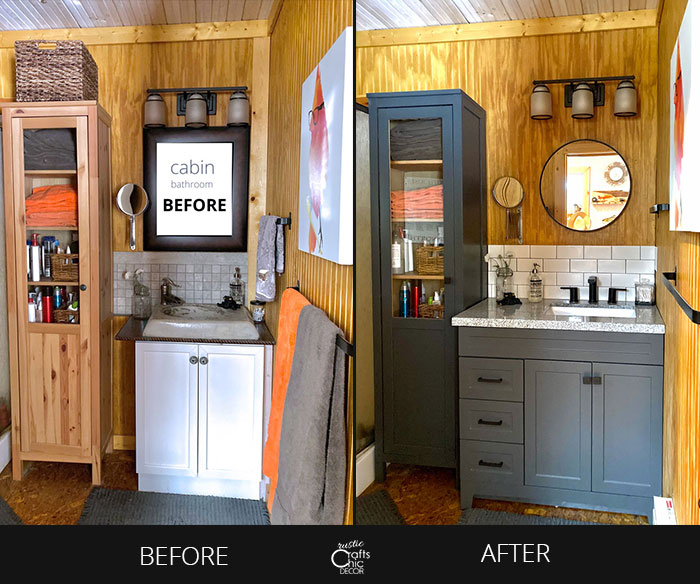
Cabin Bathroom Before Remodel
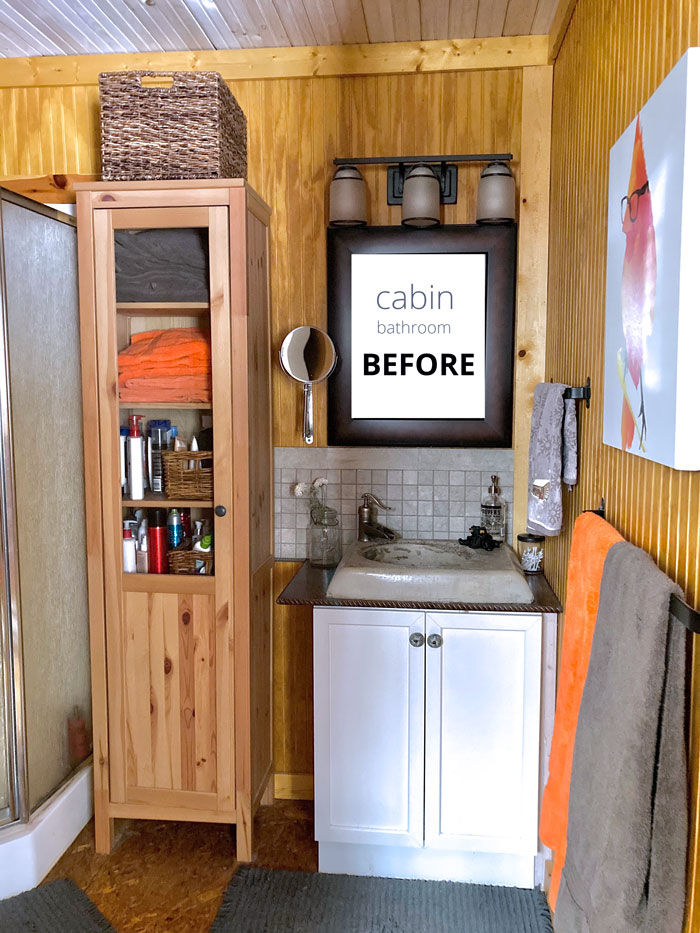
Can you get anymore hodge podge than this? The linen cabinet was added several years after the initial vanity and mirror. Unfortunately, it isn’t the same tone as the wall. The gap between the two cabinets is so awkward and useless. And, the tile backsplash needs a solid anchor.
Now, I’ll flip to the other side of the bathroom and you can see yet another cabinet color.
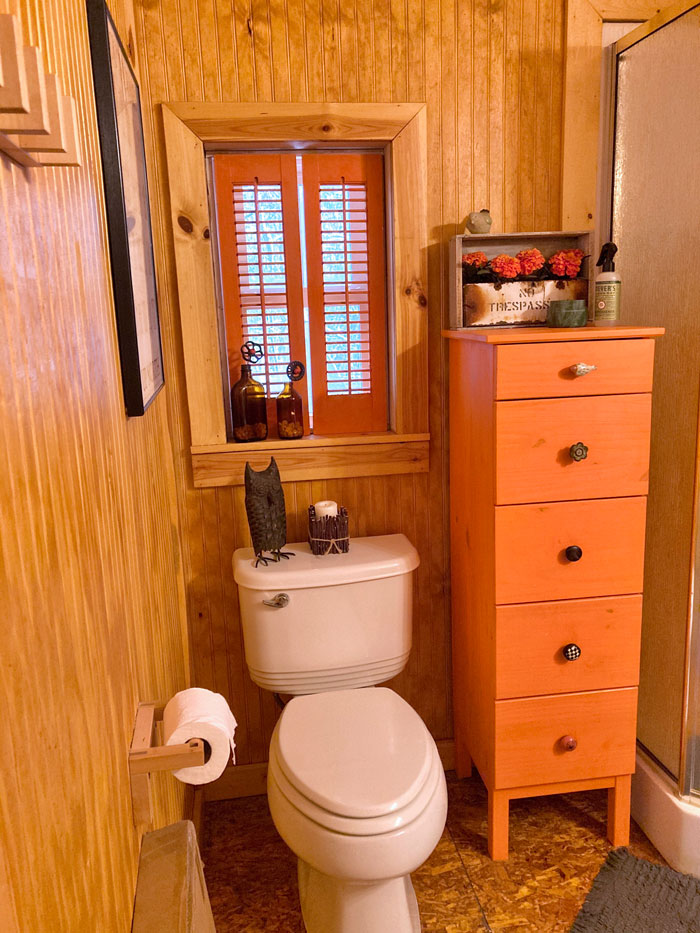
I actually intended to have the pop of orange color on this side of the room. However, when combined with everything else, it gets a little crazy. The orange inspiration all started when I found the vintage window shutters. At first the plan was to paint them white. However, I surprised my conservative self when I decided to keep them orange. I kind of liked the fun pop of color. When we needed to add extra storage, I decided to complement the shutters and stain the drawer cabinet orange as well.
My Cabin/Home Bathroom Remodel Goals
- Purchase a new bathroom vanity and counter to fill in the awkward gap, get more counter space, and provide more room for storage.
- Limit my decorating colors to grays/black and orange.
- Paint the linen cabinet to match a new gray vanity.
- Switch out the mirror to a more modern round style.
- Replace the tile backsplash.
- Update decorative accessories.
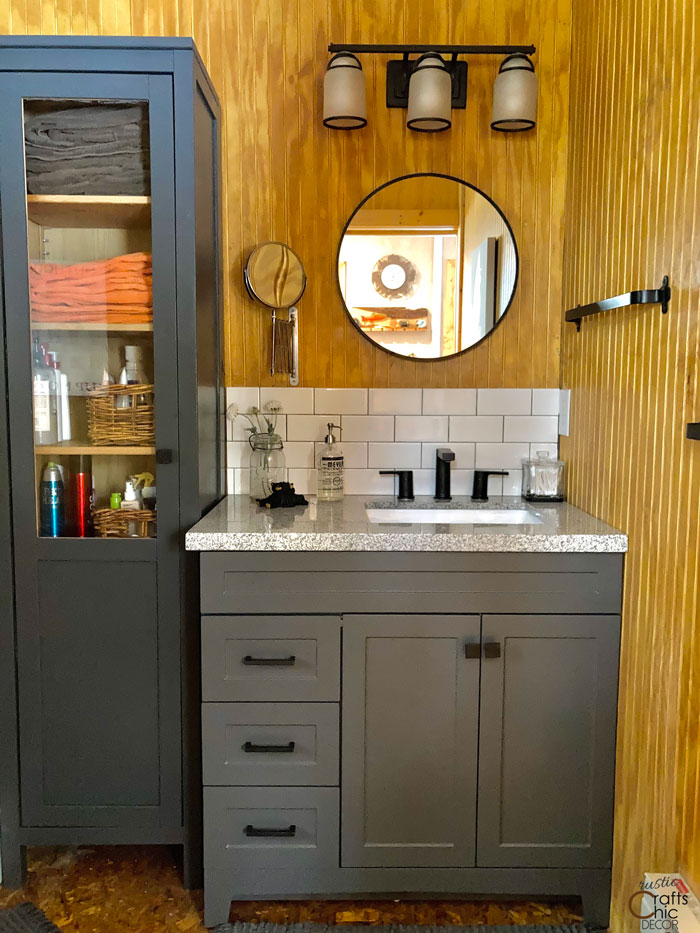
Our New Modern Rustic Bathroom Remodel
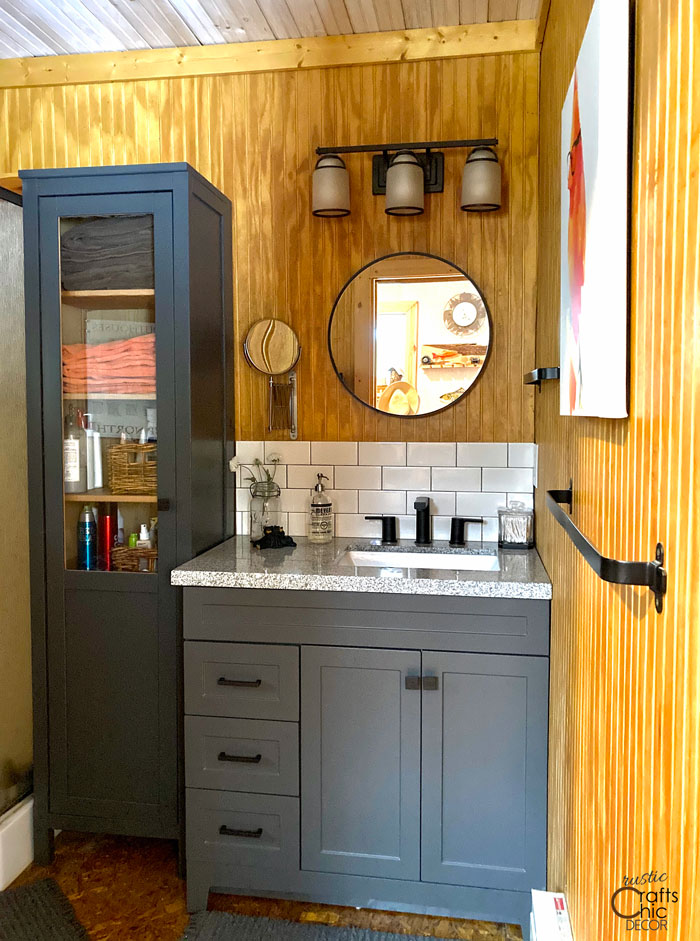
Spacing Matters!
By pushing the linen cabinet all the way over to the shower enclosure, we were able to fit a 36 inch wide vanity cabinet. No more awkward gaps and way more storage options! I couldn’t be happier.
By purchasing a counter with a right side sink, instead of center, I didn’t have to worry about changing the light or mirror location. Plus with the sink to one side, I have a nice sized flat counter area.
The round, almost frameless, mirror offers me the same amount of mirror area as the old rectangular mirror. Now it fits the space better without looking like it’s squished in.
More Streamlined With Less Color
The old pine linen cabinet coordinates much better with the gray paint. It actually looks closer in color to the vanity cabinet in real life versus the picture. I had to put two coats of Zinsser Bullseye primer on the cabinet followed by three coats of satin gray paint. It was a long process, especially with waiting a day and a half for the primer to cure. However, it was well worth the effort.
Since my counter was a patterned gray granite, I didn’t want a busy tile backsplash. I thought about painting the tile but in the end used leftover subway tile from one of our rental home kitchen remodels. I like a clean look which is why I chose the simple white subway tile. I used a dark gray grout to give it a little more emphasis. The old tile was easy to knock off. Then, it was just a quick job of installing the new subway tile and grout.
The knobs that came with my vanity cabinet were brushed nickel. It was easy to just switch them out to black. I also chose a new black faucet. Now all of the hardware, mirror, and light fixture finishes are black to keep my eye from bouncing all over. I find the less color, the more calming for me.
My Handyman Helper
There is no way I could do a bathroom remodel without the help of my husband! He is such a trooper when I get an idea in my head. Holes had to be cut at the back and floor of the cabinet to fit the internal plumbing. Then, the faucet needed to be hooked up and sealed. It didn’t look like fun but he was ecstatic that there were no leaks at the end of it.
Before And After Side By Side
The old bathroom worked okay for limited weekend use. However, now that we are spending most of our time at our cabin, the bathroom needed more storage and some of the finishes that we like in a home. It still is rustic but now it is also more functional and relaxed.
For more bathroom inspiration, check out the following posts: