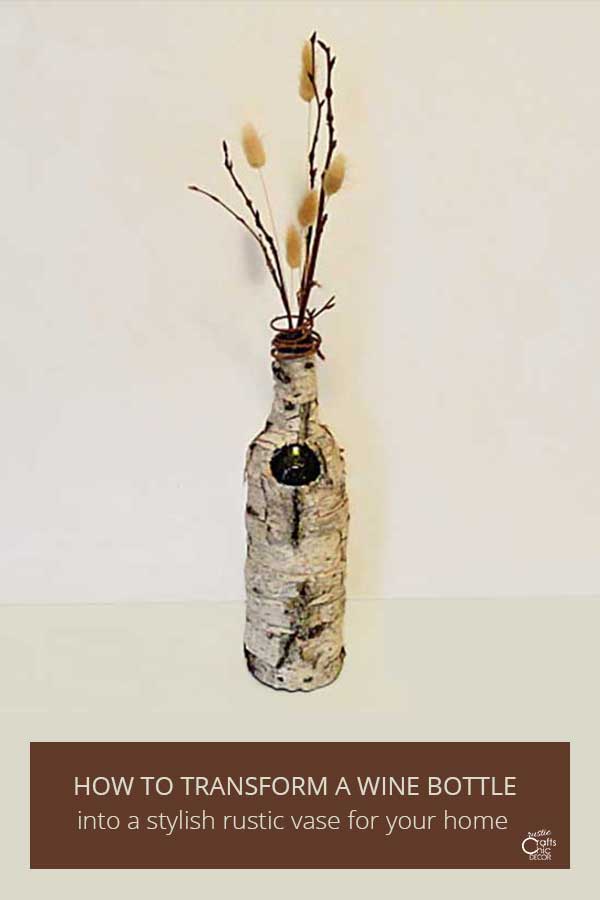
Do you ever wonder what to do with an empty wine bottle after you finish it? Sure, you could simply throw it in the recycle bin. However, what if I told you that you could make a really cool rustic vase with birch bark? That is what I did with this wine bottle craft. I turned that plain glass bottle into something I could display proudly in my home. Since I’m always looking for some new budget friendly rustic decor pieces, this project was right up my alley.
Don’t you love when you can make something new totally for free? Technically, I did buy the glue at some point and I did have to buy and drink the wine – darn! However, the empty wine bottle and the birch bark are things I already had. I have access to an area of woods with lots of birch trees. There are all kinds of fallen trees or branches to take bark from. But, you can also buy birch bark, for a decent price, to use in a lot of different birch crafts. One example is a rustic birch bark pumpkin that was super fun to make.
If you don’t have any empty wine bottles, you have a couple of options. One, you can go out and buy a bottle of wine and drink it up! Have a party if you need to. Two, you can always use a different kind of bottle. Soda bottles, liquor bottles, and anything in your pantry that comes in a bottle are all good choices. If you wind up with too many, there are so many creative things that you can do with glass bottles.
For now, though, let’s just concentrate on one wine bottle and get started with this rustic wine bottle craft.
This post contains recommended product links. If you make a purchase through one of the links, I will earn a small commission at no cost to you.
How To Make A Rustic Vase Out Of A Wine Bottle
Like I mentioned before, you only need three things for this craft. A wine bottle, birch bark, and tacky glue. You can also optionally decorate the top with bark covered wire and finish it with a matte polyurethane spray
When I originally made this vase I didn’t take the time to take pictures throughout the process. Although it’s not very complicated, it always helps to have some visuals to look at.
So, I decided to make another one to help explain the process better. This time I used a little smaller bottle from my pantry. It’s still wine, just wine vinegar!
Materials
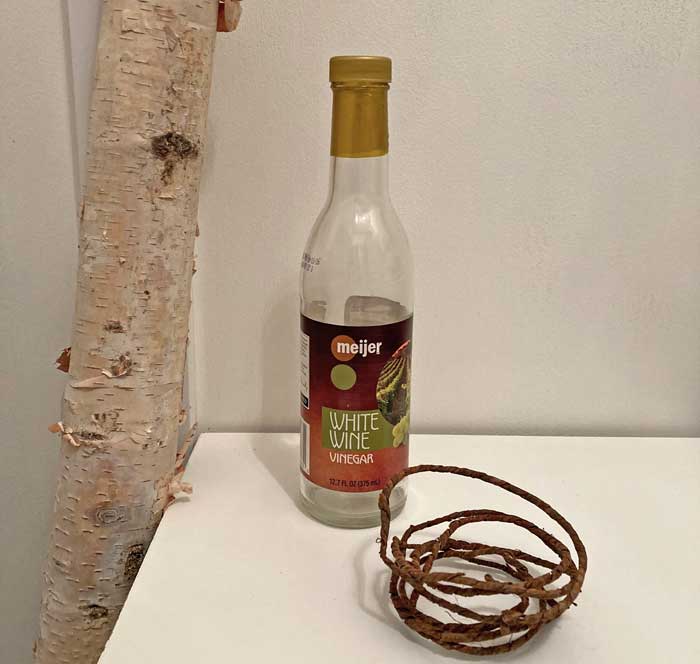
- empty wine bottle or other glass bottle
- birch bark – collect your own or purchase in square sheets
- tacky glue
- glue gun – (optional) if your bark is on the thicker side it will still adhere to the bottle with hot glue
- matte spray polyurethane
- bark covered wire (optional)
Wine Bottle Craft Instructions
Step One
Peel any labels off the wine bottle. Then, wash and dry thoroughly. Even though you will be covering over where the label was, I like to have a clean surface to work with first. To save time, you could always skip this part. You just have to make sure that your bark overlaps enough to not allow the label to show through.
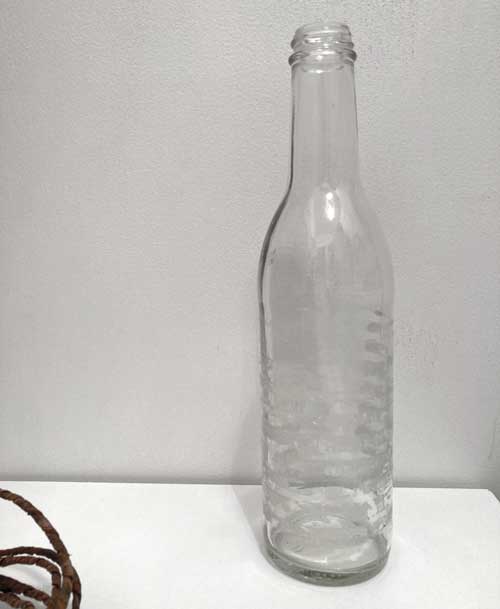
As you can see, I did leave some of the white residue from the label. At first, I was actually going to get out my Goo Gone. Sometimes the way I’m wired drives me crazy! I did come to my senses and figured why on earth would I use Goo Gone just to add more goo with the glue??
Step Two
Peel sections of birch bark from your log as thin as possible. If you purchase sheets of birch bark, just peel thin layers from the square sheets. You want the layers to be as thin as possible so that they are easy to wrap. But, even though you want the layers thin, you still want some pieces that are fairly large to cover more area.
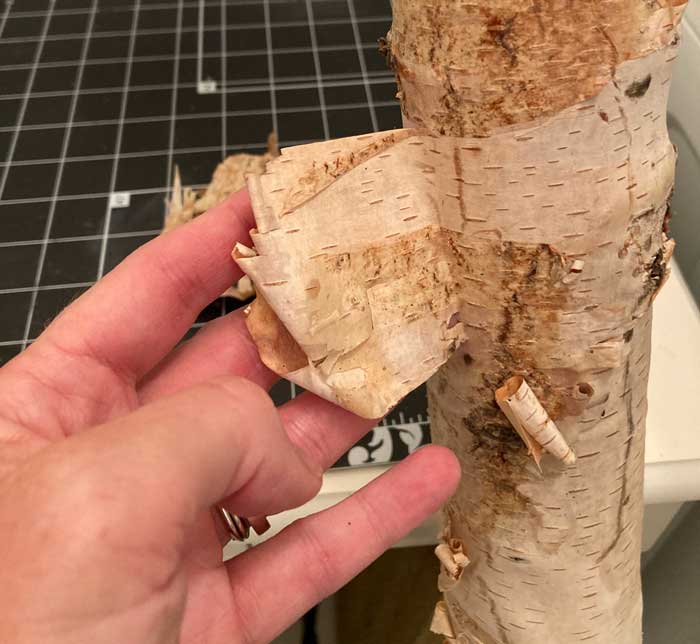
This part of the craft is my least favorite, especially when peeling the bark from a log instead of a sheet. It reminds me of peeling wallpaper. When you get a big section it’s worth celebrating! But, if you’re one of those people who like peeling skin after a sunburn, you might just love it!
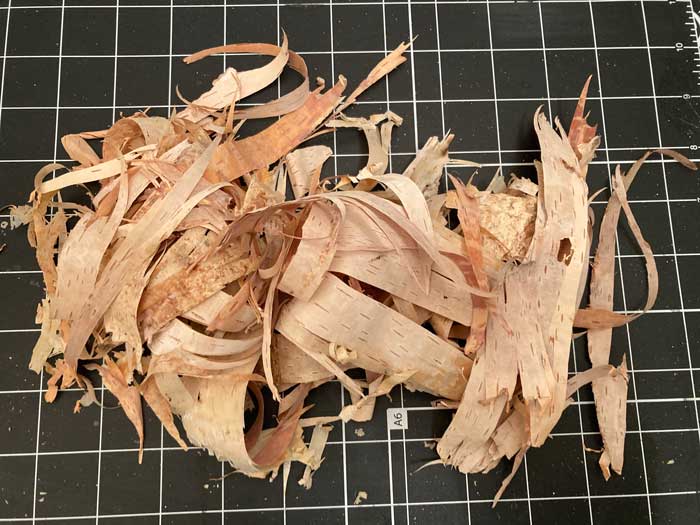
It does actually get easier when you get down to some of the bottom layers of bark that are a little thicker. These pieces are the best ones to put on your bottle first.
*Tip: The older or dryer the birch log, the easier it will peel.
Step Three
Starting from the bottom of the bottle, glue a strip of bark around the circumference. Continue adding pieces artistically to try and get the finished piece to look as natural as possible. Let some of the thin ends curl just a little in some places. It also works well to do smaller sections at a time, letting them dry before starting again. Otherwise, you’ll be moving pieces around accidentally just by touching the bottle. I may or may not have done that…
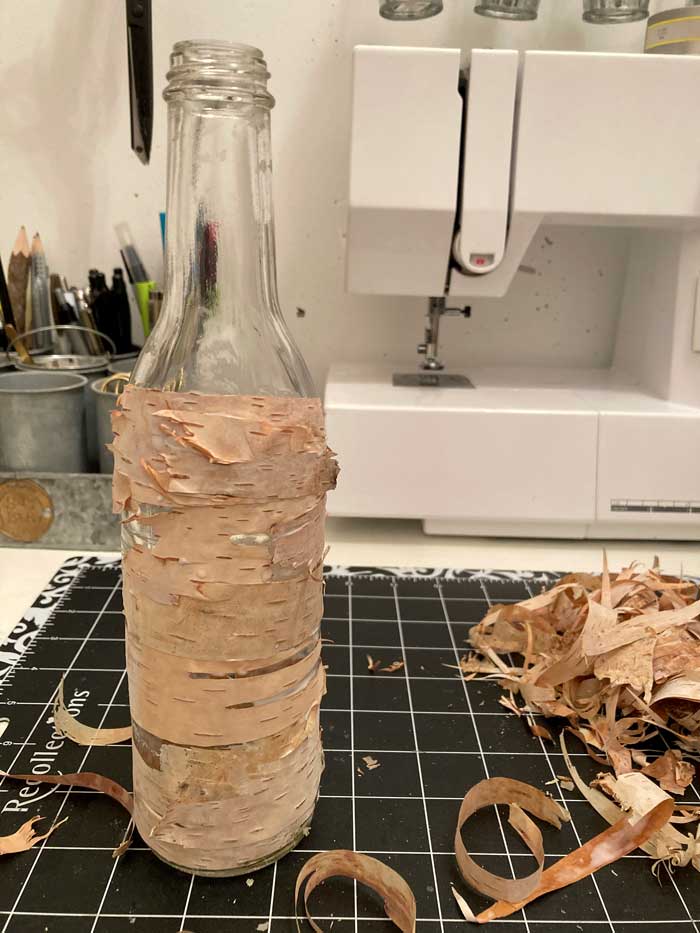
It looks best to start with the layers at the deepest point of the log or sheet. Then, add in the thinnest layers from the most outer part of the bark. This helps it to look the most natural.
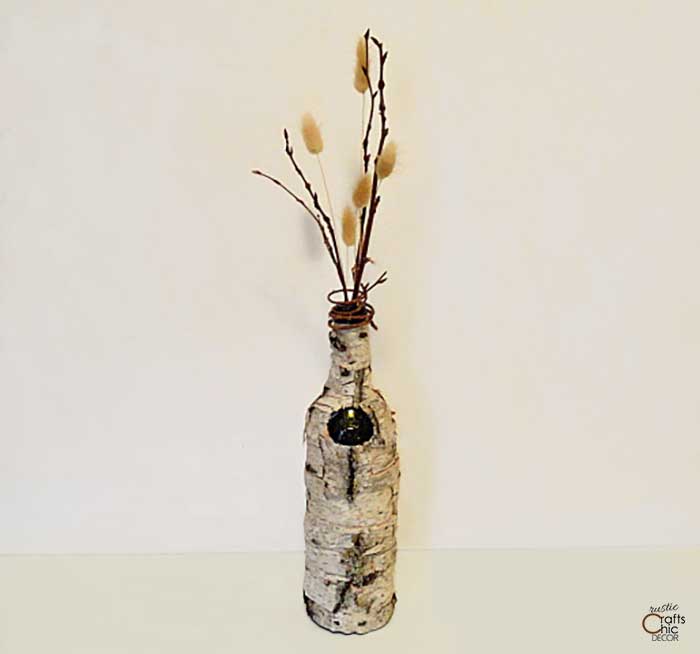
WIth my original wine bottle, I left the embossed glass logo open and free of bark. It was such a nice detail that I wanted to have shown. The wine was Stag’s Leap and the logo was a deer. A perfect addition to my rustic vase! In this situation, just take extra care when adding the bark around the area you want shown. You want the bark to look like it has a natural ending where the logo starts. Using curled pieces at this point is a good idea.
Step Four
Spray the bark surface with a matte polyurethane to seal and protect it. You could also use a satin finish to give it a little more sheen. Stay away from glossy! A gloss finish doesn’t look natural and will highlight any imperfections.
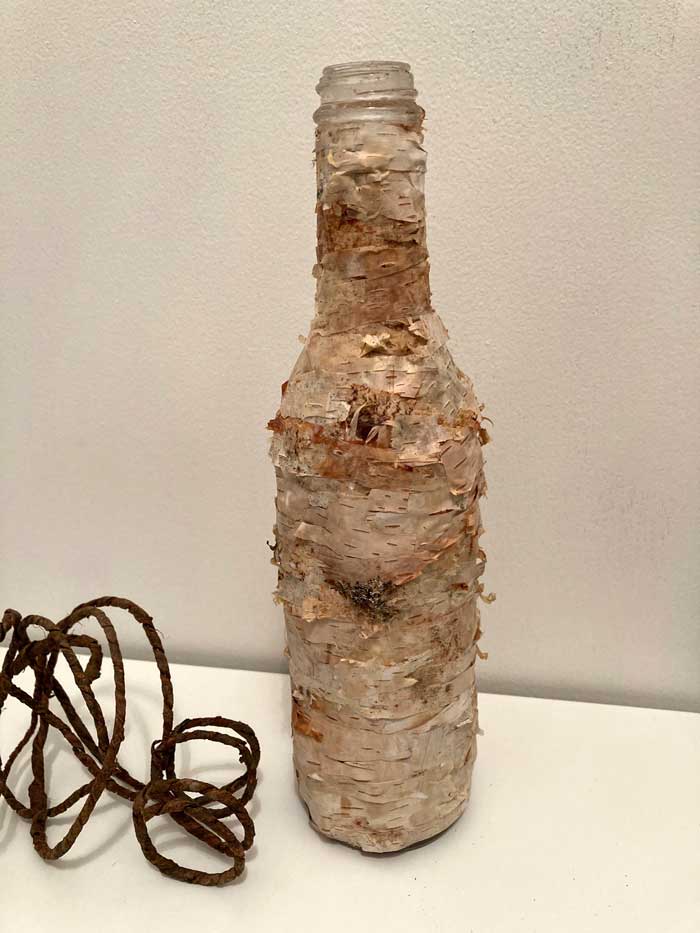
Some birch logs are whiter than others so the look of your vase will vary depending on the log you choose.
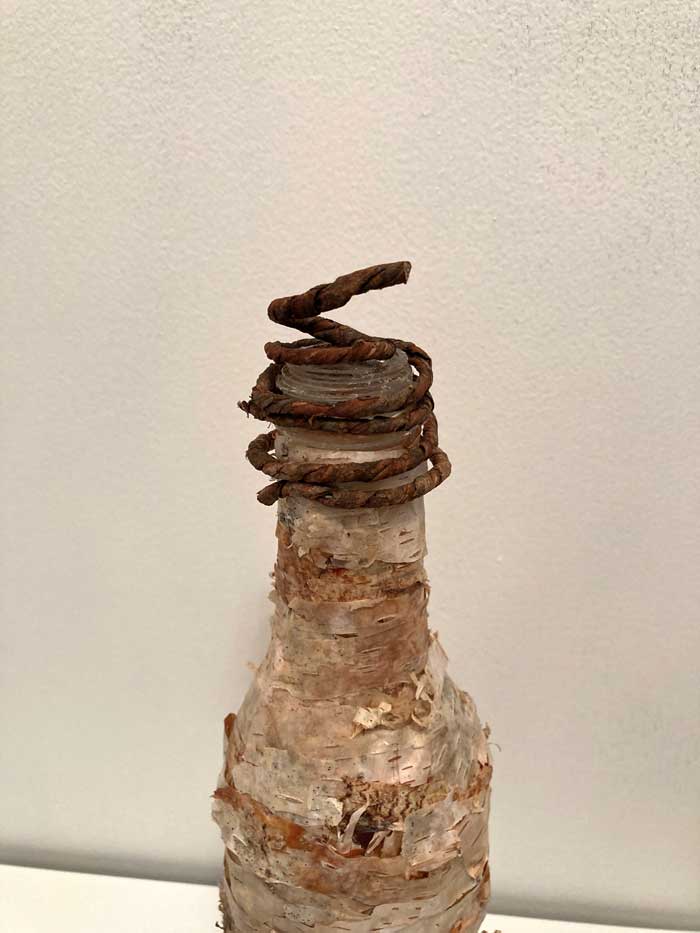
Step Five
Twist a small length of bark covered wire at the top of the bottle for a little extra somethin somethin. I feel like this is a good way to add a finishing touch but it’s not necessary.
Final Step
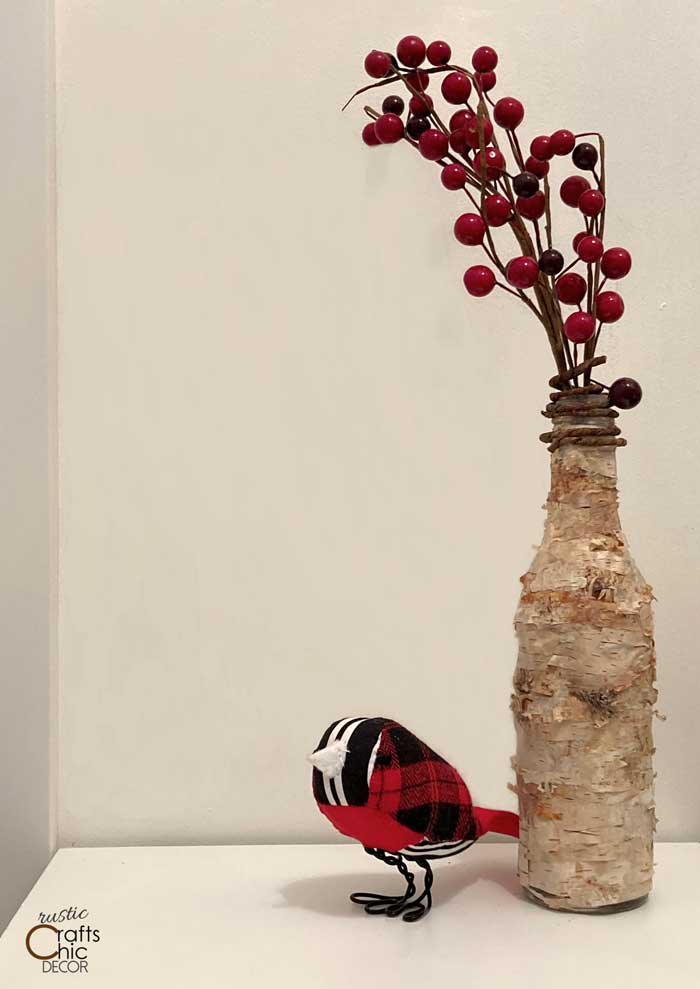
Now all you have to do is fill your new vase with your favorite floral picks. Just a few are all that is necessary. When you finish this wine bottle craft, hopefully you will find that all of that tedious peeling of bark was worth it!
If you like working with wine bottles, make sure to check out these thirteen amazing wine bottle crafts.
I really enjoy working with birch bark in craft projects. However if you like the look but are wanting a different option, make sure to see how I painted an old vase to look like birch bark! I think the result is very realistic looking. If painting is your thing, you might want to give that a try instead.
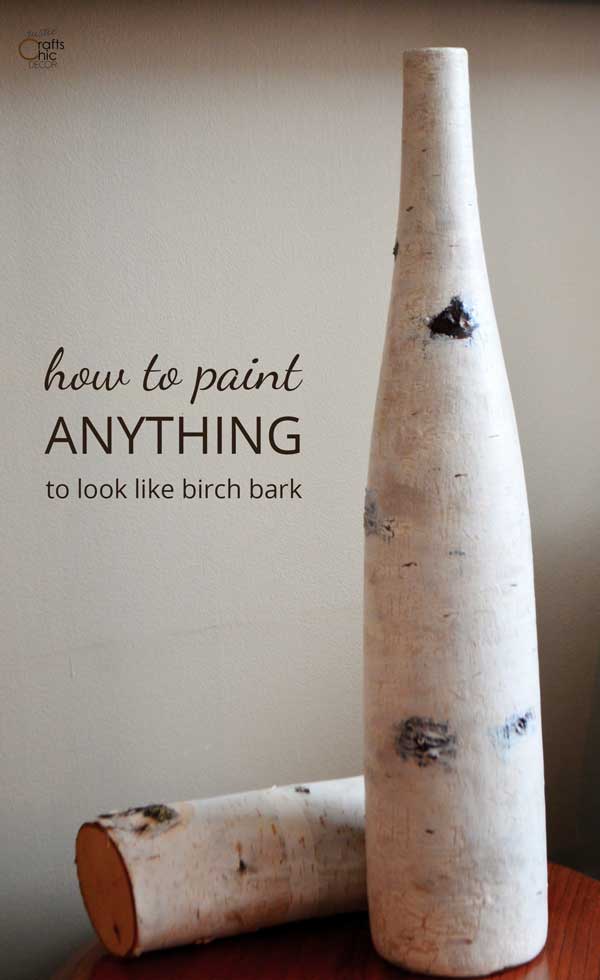
As you can see, with paint you get a smoother look than using actual bark. It just depends on what you like best. More rustic or more chic.
Beautiful idea but I have a concern. Can you please add that you can not peel the bark from a live birch, you open the tree to infection and infestation. Thank you
Thanks for your comment. I restated my sentence to hopefully make that clearer :).
Wow! This is really cool, I love it. So unique. I got to find me some birch bark. I want one. Thank you for sharing this wonderful project.
I’m glad you like it! I like to cover as much as possible in birch bark 🙂