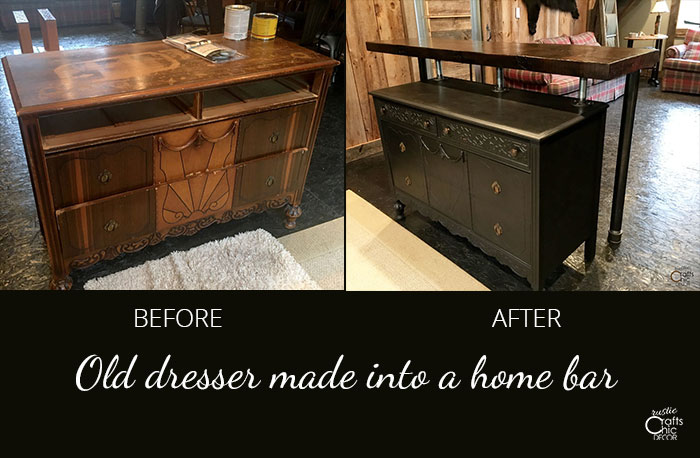
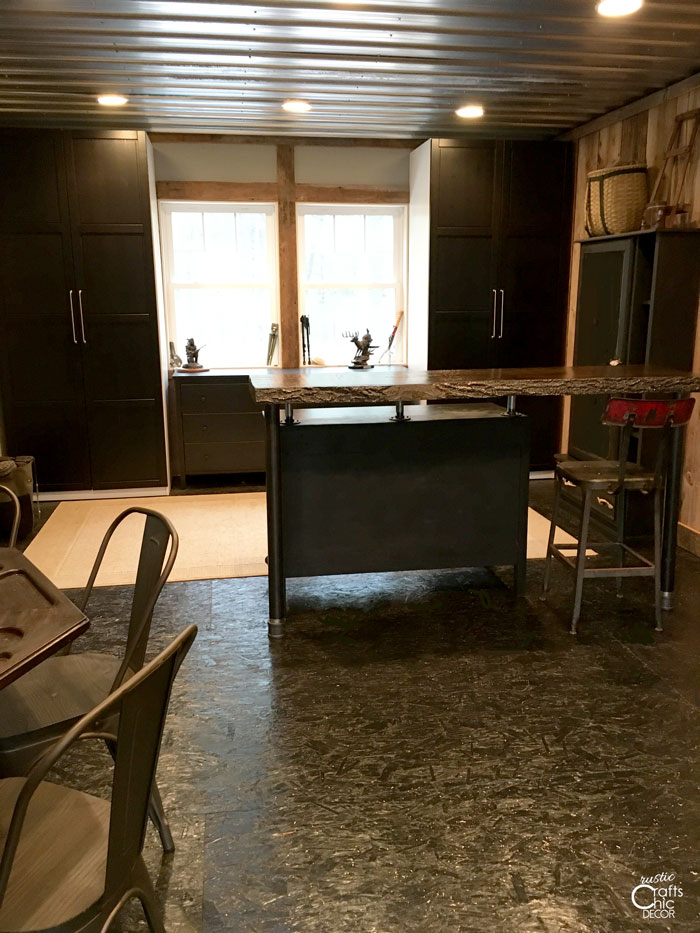
Have you ever thought of making a DIY home bar using an old dresser as it’s base? That is exactly what we did to create a bar area in the upstairs of our cabin garage. I had an old dresser that I didn’t know what to do with and thought it would be a great makeover project. By adding a slab of live edge wood and some plumbers pipe, we created an easy rustic home bar.
I love using what I have to make something brand new. In fact, there are so many ways to repurpose almost anything. I have done several smaller projects in the past to make use of what I had. Some were super easy like turning an old heat register into a clipboard. My favorite was using an old drawer to make a storage side table in my craft room.
Although I like small projects, I always wanted to tackle something a little bigger. Since we had been wanting to build a home bar for awhile, I thought a repurpose project would be a little easier than starting from scratch. Plus, we no longer have to find a place for the old dresser or spend additional money on building a bar base. This DIY home bar is a win win.
How I Made Over A Dresser Into A Home Bar
This post contains recommended product links. If you make a purchase through one of the links, I will earn a small commission.
Refinished Dresser
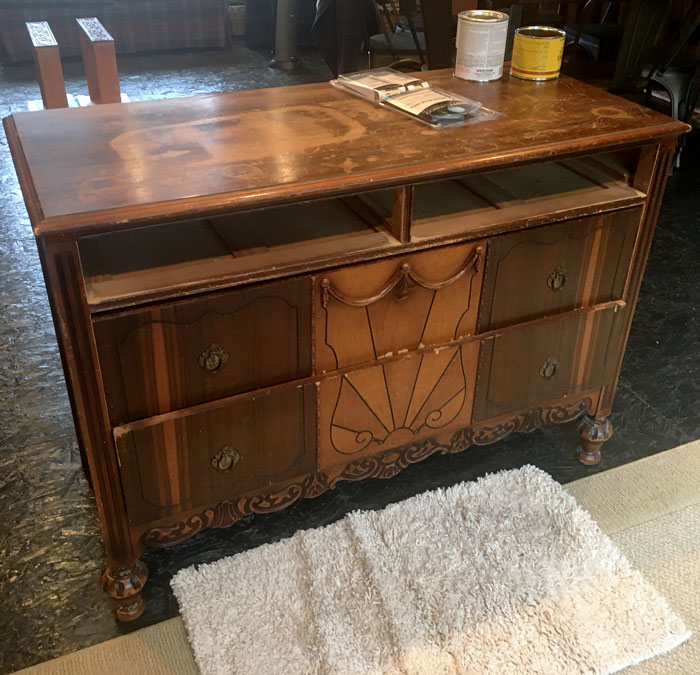
Since the dresser that I had was in pretty rough shape, I needed to give that a little TLC first. All I did was give it a couple of coats of Rust-Oleum milk paint, in Eclipse, and then finished it off with a dark wax. Milk paint or chalk paint are both great for giving old furniture an update. The paints are a matte finish and go on so smooth. By finishing the paint with wax, you get a subtle sheen and protective finish.
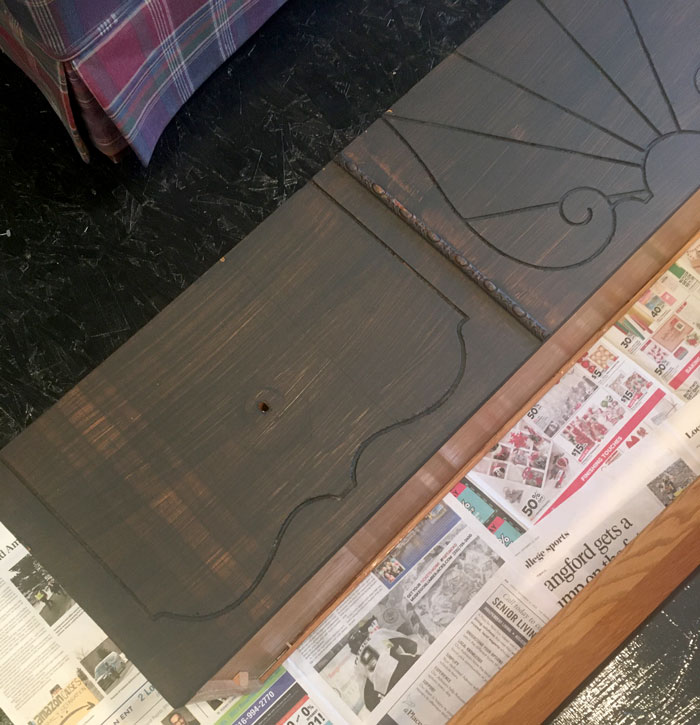
When you paint with milk paint it’s important to remember that the first coat will look really bad. This is how the drawers looked after one coat of paint. It’s such a thin paint that you will see brush marks and parts that do not cover. However, the nice thing is that you don’t have to prime or sand first and each additional coat looks nice and smooth.
I only did two coats and am very happy with the coverage. After waiting 24 hours, I finished it off with some Minwax dark finish wax. All you do is rub a thin layer of wax onto the paint, wait about 15 minutes, and then rub it off with a clean lint free cloth.
Bar Top
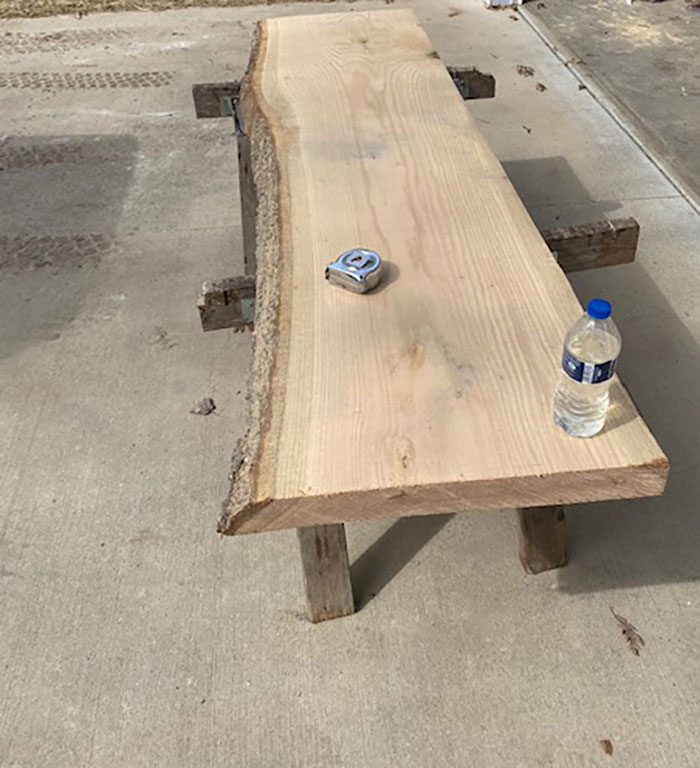
We wanted our bar top to be rustic and immediately thought of live edge wood. My husband called a local saw mill to see if they had any slabs available. Lo and behold they did and it was the depth and thickness that we wanted. It was a bit longer that what we needed but they were able to cut it down for us. Luckily we were able to get it to fit into our Jeep!
The wood is red oak and it is very heavy. This made it a little challenging to work with but not bad. The first thing that I did was sand the slab smooth. I also rounded all of the edges with the sander. Then, I was on to staining and varnishing.
I wanted to keep the bar top dark so I stained it with an espresso stain. Once dry, I finished it with a gloss polyurethane. After the first coat, I sanded it lightly with fine sandpaper. Then, I gave it two more coats and was happy with the finish.
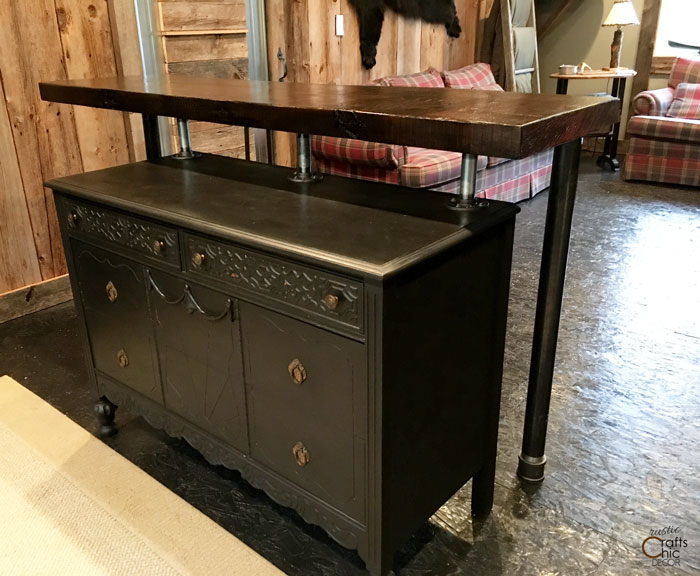
Putting It All Together With Pipe
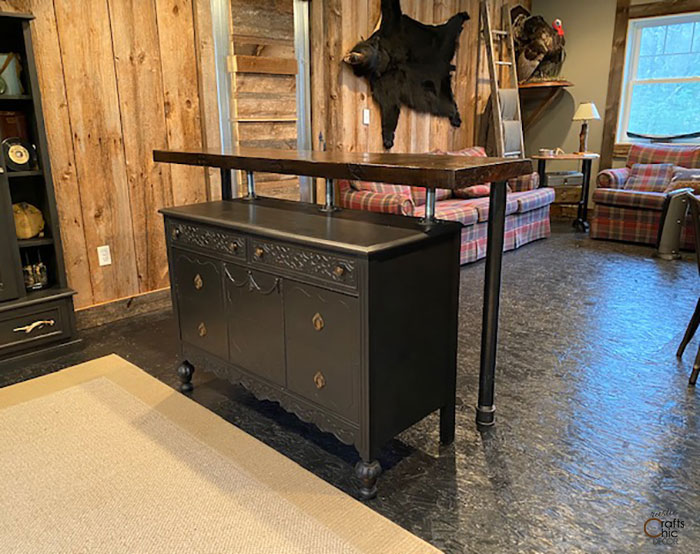
We used two long two inch diameter pipes for the outer edges of the bar top. Then to secure the other end to the dresser, we used three 5 inch pipes that are just one inch in diameter. Each of the small pipes has a flange at each end for screwing to the bar top bottom and the top of the dresser.
The longer pipes are attached to the bar top with flanges as well. We needed a little more length to those so attached two inch connectors to the bottom. These just sit freely on the floor.
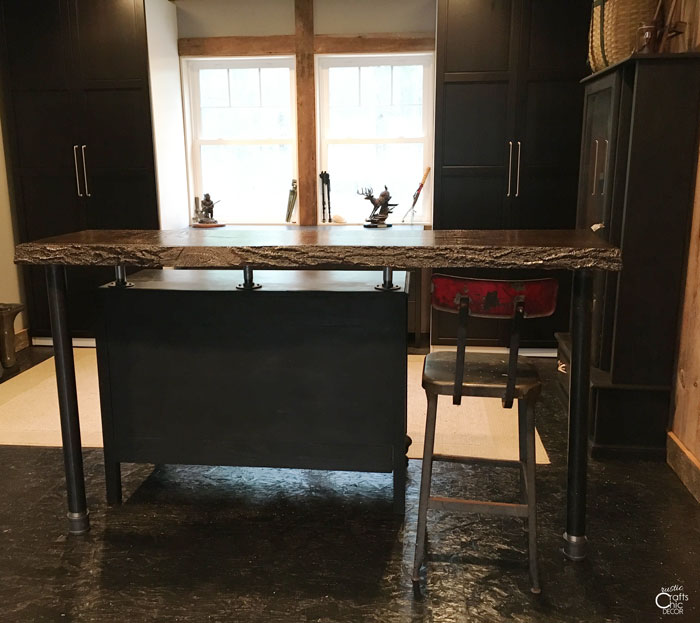
We have an old vintage industrial bar stool which I love having at the bar. I just ordered a couple of new stools to complete the bar seating. The new stools won’t match the vintage one but they’ll still be industrial and vintage inspired.
And, here is the before picture of our dresser along side one of our new DIY home bar. Another DIY rustic decor project complete!